
Note: This article is for the newly redesigned module. This updated module is in the process of being rolled out and may only be available to some users.
Overview
The Employees module controls who has access to your property's BuildingLink platform and allows property management to assign different levels of access to specific users. For simplicity, we refer to everyone who has BuildingLink access as an “employee,” regardless of their actual role at the property. The Employees module is also where you’ll go to manage employee work schedules or configure an employee photo directory.
Note: Click on the images to enlarge them.
Table of Contents
- Employees Settings
- Employee Authority Levels
- Adding and Viewing Employees
- Sending Staff Login Instructions
- Editing Employee Profiles
- Deactivating Employees
- Setting Up Your Employee Photo Directory
- Tracking and Managing Employee Work Schedules
- Adding Special Permissions
- Viewing and Editing Special Permissions
Employees Settings
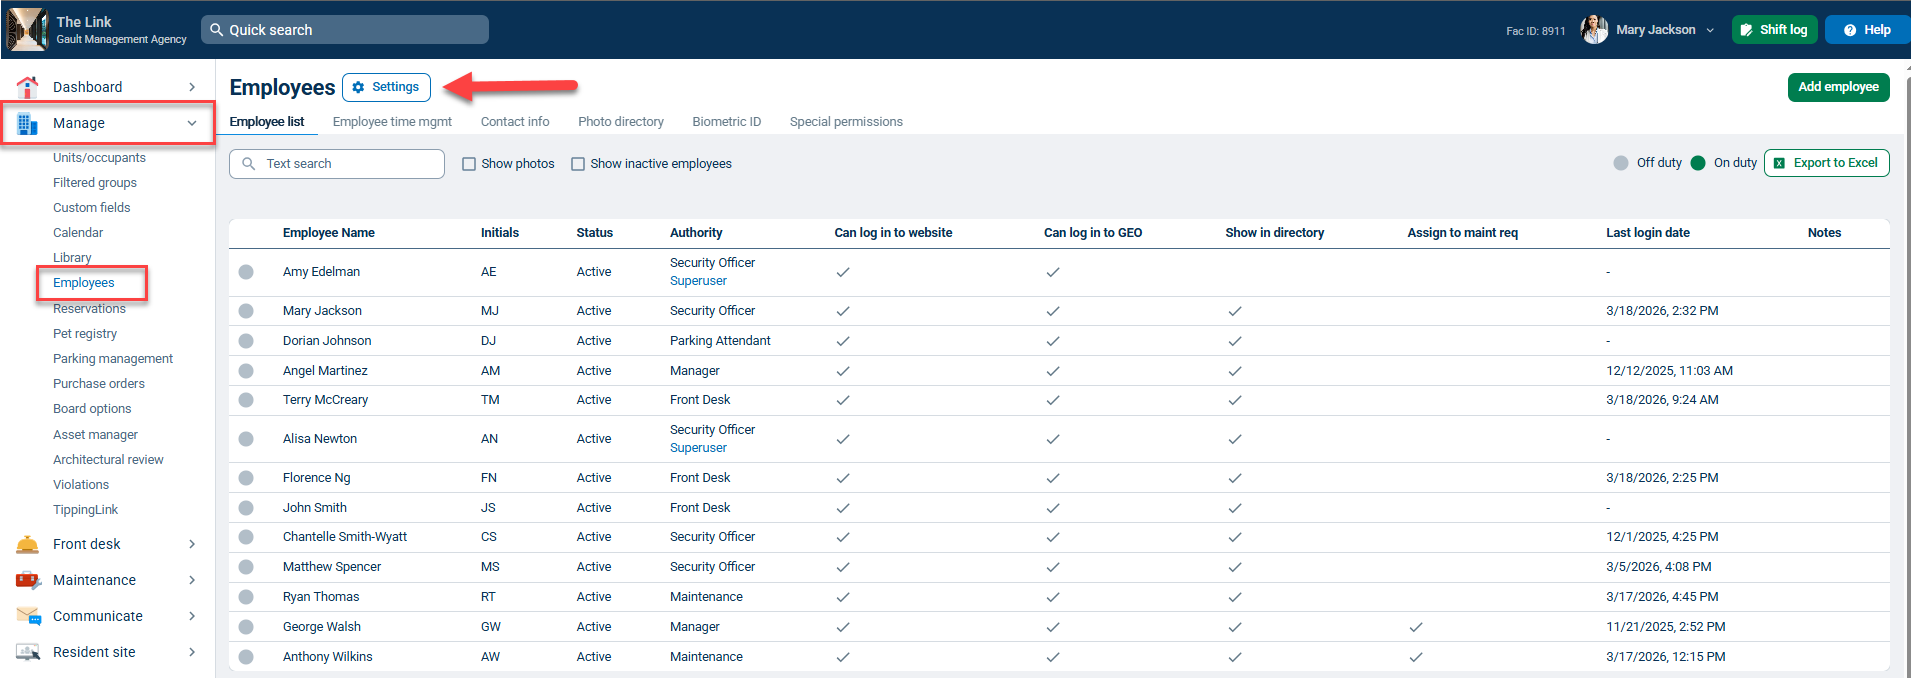
You may access Employee Settings by clicking on the Settings button at the top of the Employees page. From here, you can enable or disable specific settings by checking the appropriate box and clicking Save changes:
- Show the photo directory on the resident portal
- Be able to assign each employee to a department in the employee departments table
- Be able to assign each employee to an employee location in an employee locations table
- Employees can update their email addresses on their profile page
- Employees can update their contact info on their profile page

Employee Authority Levels
When adding a new employee, you will be prompted to choose an authority level. You will also notice that there are authority levels specified for each employee on your employee list. These authority levels control how much of BuildingLink the employee can access--they do not reflect actual job titles at the property. Below is a brief description of the four BuildingLink Authority Levels:
Note: Some of these abilities depend on your property’s settings and can be further limited or expanded if you wish, using Special Permissions.
Front Desk: The most limited staff authority level.
- Can record/track packages.
- Can enter PTE /guest authorization instructions and expire them.
- Can enter maintenance requests on a resident’s behalf and for common areas, but CANNOT edit /change status/ add notes to those requests.
- Can search for resident data (phone numbers, emails, etc.) but CANNOT edit any of that data.
- Can add an amenity reservation request on a resident’s behalf, but CANNOT approve or decline the request.
Maintenance:
- Can do everything a Front Desk level staff member can do.
- Can edit /change status/ add notes to maintenance requests.
Management:
- Can do everything a Maintenance level staff member can do.
- Can edit resident information and create/deactivate occupant profiles (move ins/move outs).
- Can approve/reject amenity reservation requests.
- Can add documents to the building Library.
- Can add events to the building Calendar.
- Can approve/reject resident bulletin board posts.
- Can send building-wide emails.
- Can create announcements.
- Can create surveys.
- Can add new Front Desk level, Maintenance level, or Management level employees.
- Can run assorted data reports.
Security Officer: the highest level of authority.
- Can do everything a Management level staff member can do.
- Can use the Emergency Broadcast System.
- Can use Special Permissions.
- Can rename, activate, and deactivate categories and form fields in the Asset Manager.
Adding and Viewing Employees
To give someone BuildingLink access, simply add them to the Employee List. Go to the Manage tab and select Employees. Here, you’ll be able to see everyone who currently has access to your BuildingLink system.
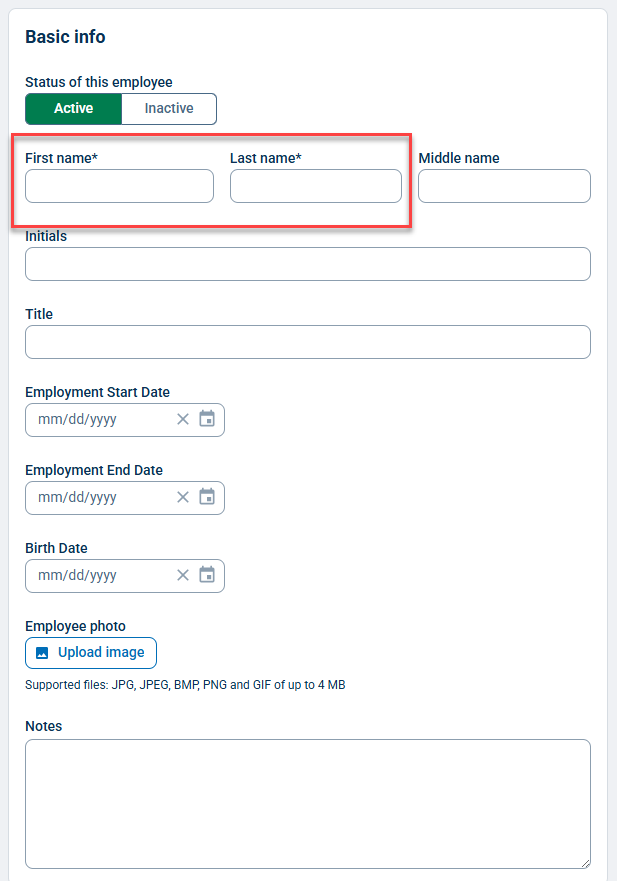
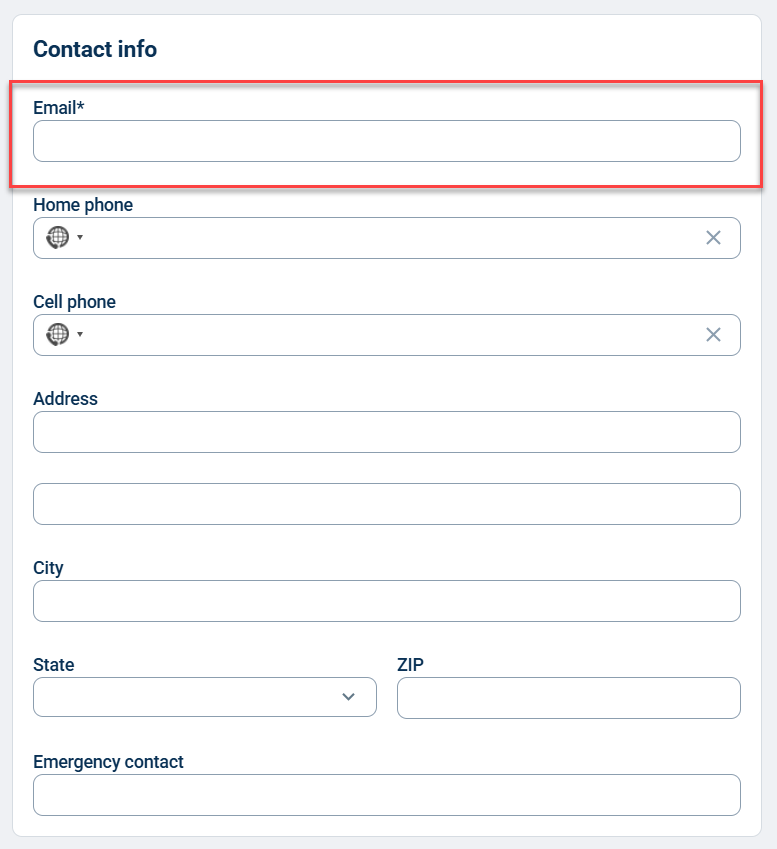
To add someone new, click Add Employee and fill out the required fields. At a minimum, you will need to add First/Last name, Username, Authority Level, and Email Address. Additional information can be added at your discretion. Be sure to select the appropriate authority level (see "Employee Authority Levels" section for more details) as this will determine how much of BuildingLink the new user will be able to access.
Once you’ve completed the form, click the green Save button at the bottom of the page.
Note: You may only add employees who will be on an equal or lower authority level than your own.


Sending Staff Login Instructions
To distribute employee login instructions, go to the Manage tab and select Employees. Click the name of the employee to view their profile. Next, click the Email Login Info button to preview the email draft and send their login instructions. Email Login Info only works if the employee has a valid email address in their profile.
Note: You may only distribute login information for employees who are on a lower authority level than your own unless you are a Security Officer authority level user.


Editing Employee Profiles
If you wish to edit an employee profile for any reason (to change an authority level, add additional data in fields like “Birth Date", change an email address, etc.), simply go to the Manage tab, then Employees, and then click the employee’s name whose profile you wish to edit. You’ll then be taken to their profile page, where you can change any of the existing information or add new information. Be sure to click Save at the bottom when you are finished editing.

Deactivating Employees
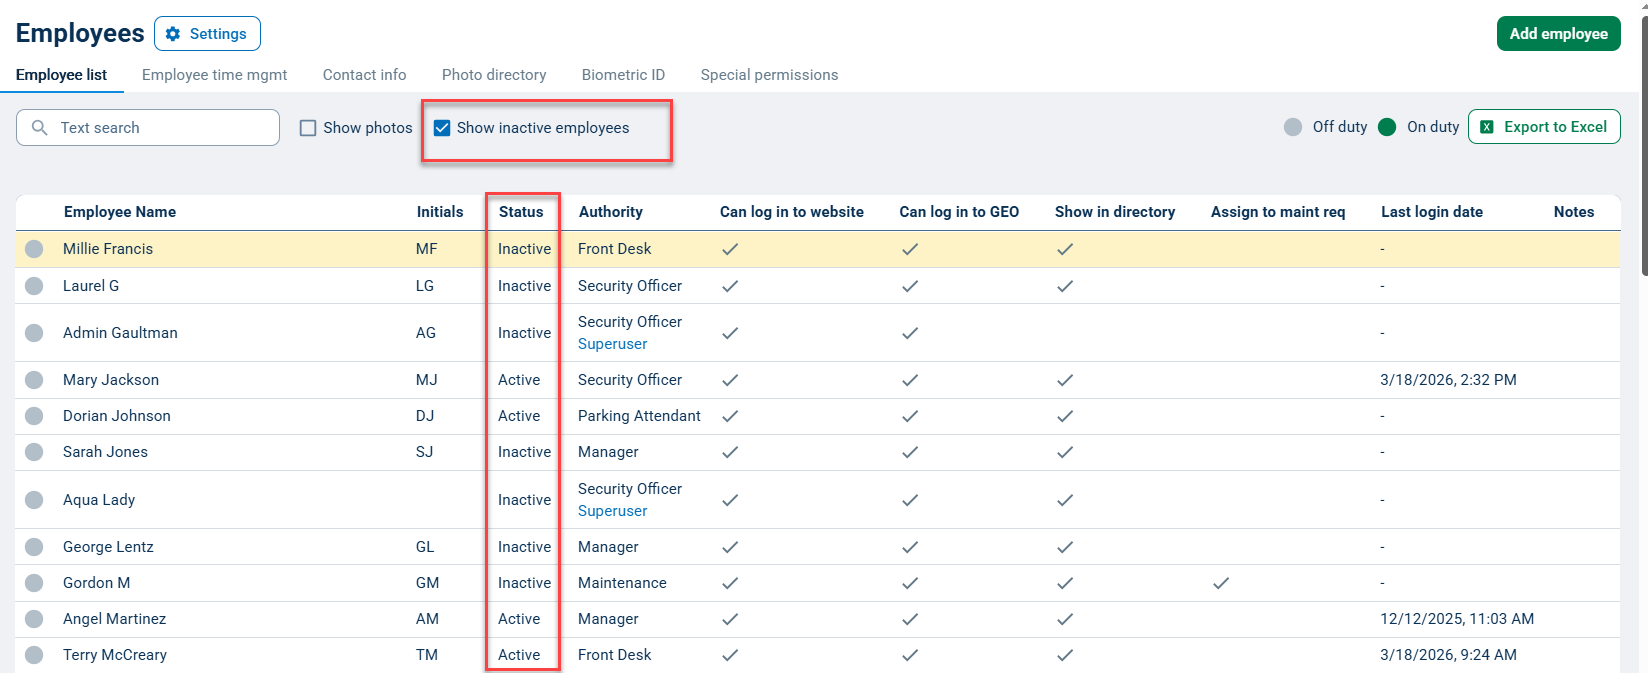
Go to the Manage tab and select Employees. Click the employee’s name whose BuildingLink access you wish to deactivate. Next, select Inactive next to "Status of This Employee” and click Save at the bottom of the page.
The employee will be immediately blocked from logging into BuildingLink in the future, and they will not receive a notification email when they are deactivated.
Note: You may only deactivate employees who are on a lower authority level than your own unless you are a Security Officer authority level user.
You can always access the information for an Inactive Employee, as well as reactivate them should you need to. Simply use the Show inactive employees check box at the top of the Employees page.

Setting Up Your Employee Photo Directory
Go to the Manage tab and select Employees. Next, click the Photo Directory tab. You’ll be able to add photos and choose which fields you’d like displayed (Birthday, Bio, etc.) by clicking the pencil icon. These fields pull data from the Employee profiles, so be sure that you’ve added all the information you’d like to show in the actual Employee profiles (see “Editing Employee Profiles” section above).
By default, all of the employees on your Employee List will be displayed in your Photo Directory; if you wish to exclude specific people from the Photo Directory, you can do so by editing their employee profiles and unchecking the box next to Include this employee in the Photo Directory.
You can reorder your Photo Directory by clicking, holding, and dragging employee content cards to where you would like them to appear.

Tracking and Managing Employee Work Schedules
Go to the Manage tab and select Employees. Next, click on the name of the Employee whose work schedule you want to edit. You will find the Work Schedule section at the bottom of the profile. Click the toggle button next to each day, and select the start/end times for the shift. Click the green Save button when you are done editing the work schedule for that employee profile.
If you would like to keep track of employee hours worked, please see our TimeTracker section.

Adding Special Permissions
The Special Permissions module allows you to override default permissions for specific employees or user types. This module can give lower-level staff members "special permissions," such as the ability to issue payment refunds or send email blasts. When adding special permissions, you can choose to give permissions only to specific staff members (ex., John Smith and John Doe can approve amenity reservation requests) or choose to give permissions to all users of one access level (ex. all front desk users can approve amenity reservation requests).
To add special permissions, click on Manage, and then Employees. Next, click the Special Permissions tab at the top of the page.
There are up to several categories of Employee Special Permissions available, depending on which modules you have active on your site. Communications, Resident Information, Payments, Alterations, and Configuration and Design.
You may access other Special Permission settings by clicking the "Legacy special permissions" link at the top of the page to view Reservations (Amenities) and Privacy categories. Incident Report Special Permissions are located in the settings for that module.


Click the + Add new permission button next to the permissions you wish to update.

You will be prompted to select either an employee or a user type (authority level). Depending on which permission you are adding, you may also see a list of options in the Permission Setting section where you can select the exact nature of the permission. Click Save to save the permission.
If you wish to give more than one employee permission, continue to click + Add new permission for each specific employee or user authority level you wish to add, and continue as instructed above.

Viewing and Editing Special Permissions
To view the special permissions enabled for your property, click on Manage, and then Employees. Next, click the Special Permissions tab at the top of the page. Click the header bar of each section to expand the menu for each setting. Existing special permissions enabled for that category will be displayed inline.

To edit an existing special permission, click Edit next to the permission you wish to change; the permission settings will then display and become editable. Click Save to save the changes.
To remove the permission entirely, click the Delete button. A confirmation window will display; click Delete permission to confirm.


