Note: This article is for the newly redesigned module. This updated module is in the process of being rolled out and may only be available to some users.
Overview
The Survey Module allows Security Officer or Management-level users to create multi-question surveys. Surveys can be created for different resident audiences, including all residents (owners AND renters), just owners, or Board Members only to answer.
Surveys are a great tool that can be used for many purposes, such as deciding on a date for the next board meeting, collecting feedback on a new security company the building has hired, or collecting RSVPs for events and parties. Management also has the option to notify their audience that a new survey has been created.
To answer a survey posted on BuildingLink, residents will have to log in to the site --making the survey tool an easy way to encourage residents to log in to BuildingLink and see what’s there!
Note: Click on the images to enlarge them.
Table of Contents
- Creating a New Survey
- Adding Content to Your Survey
- Finalizing Your Survey Options
- Editing And Expiring a Published Survey
- Viewing Resident Responses
Creating a New Survey
(Please Note: To create a Survey, you must have Management or Security Officer level BuildingLink authority.)
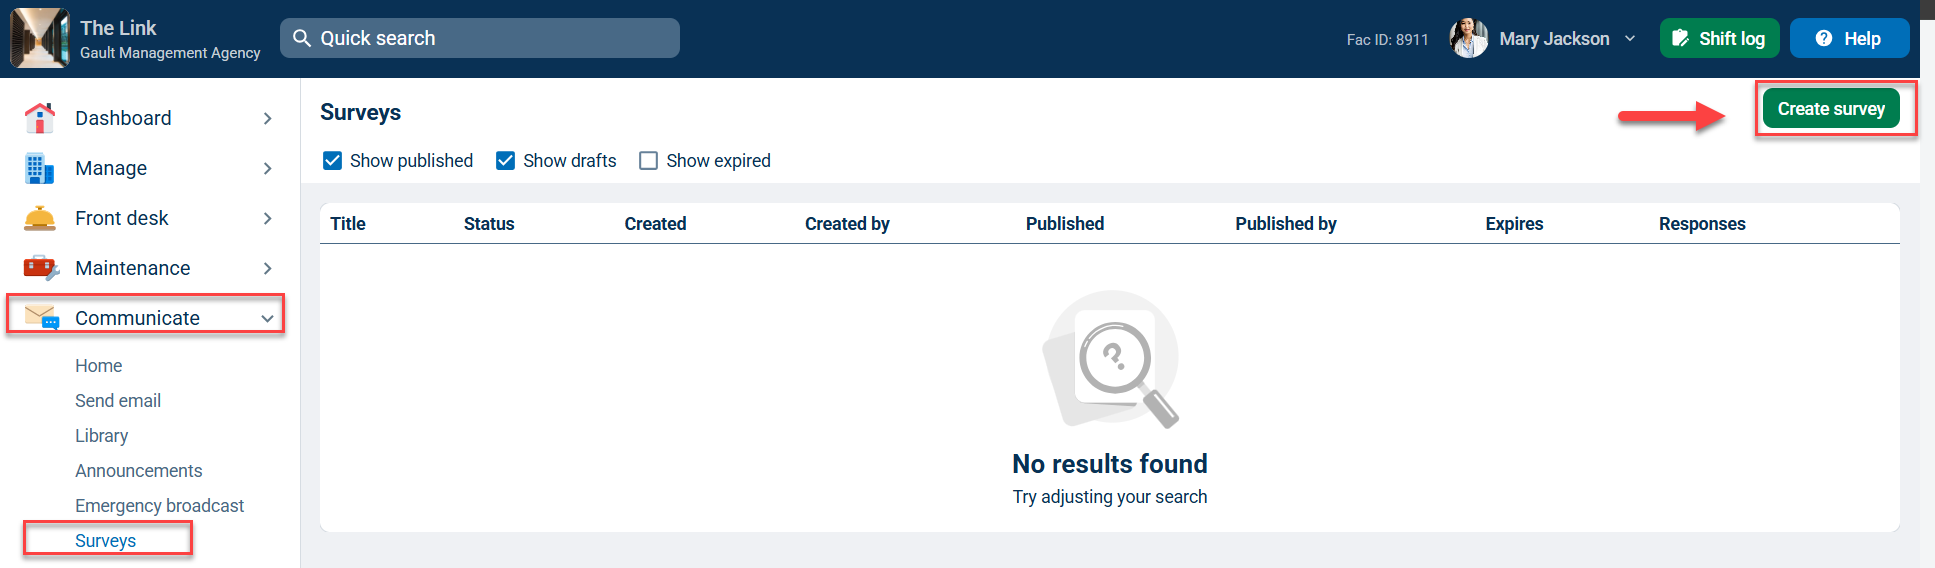
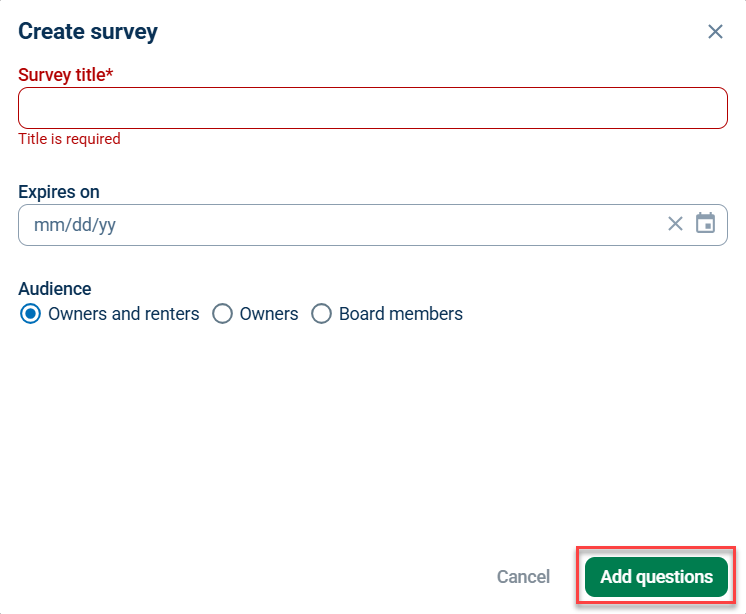
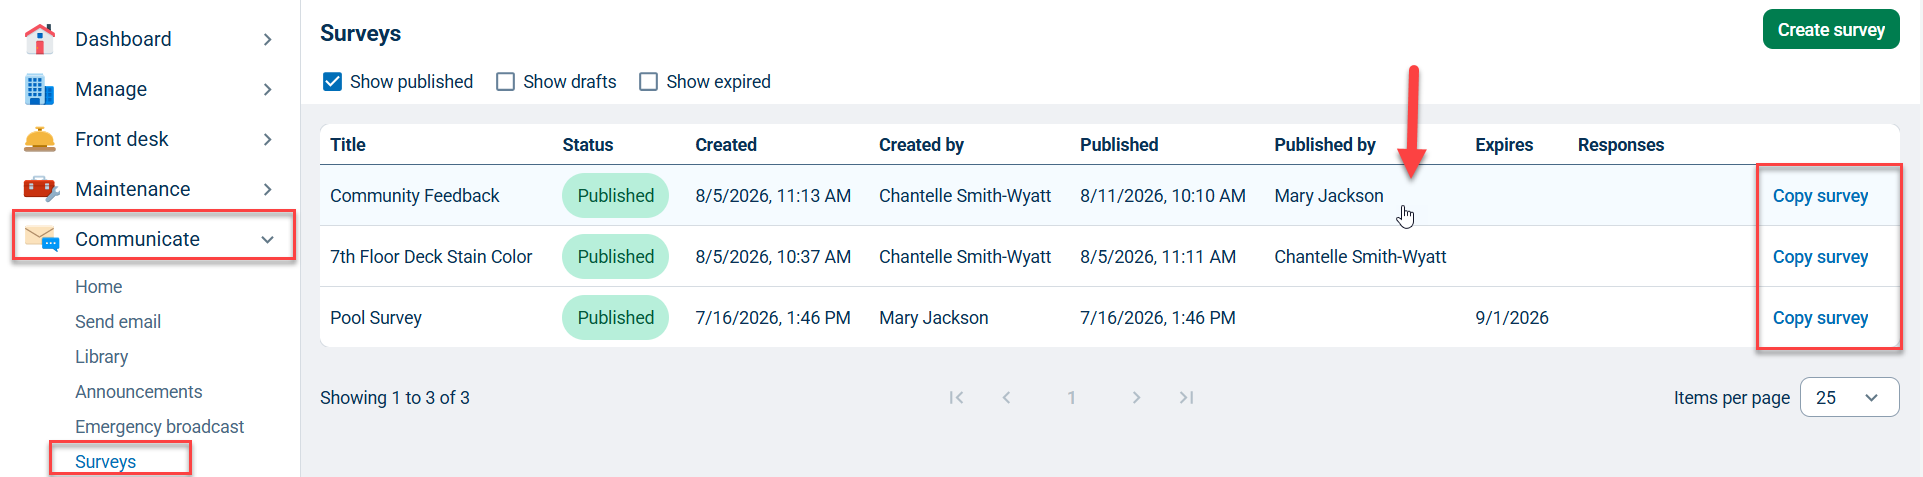
To create a new Survey, click the Communicate tab and select Survey. In the top right corner of the screen, click the green Create survey button. Next, enter a survey title, the survey expiration date (if applicable), then select the survey audience. Click the green Add questions button to start adding questions to your survey.
Adding Content to Your Survey
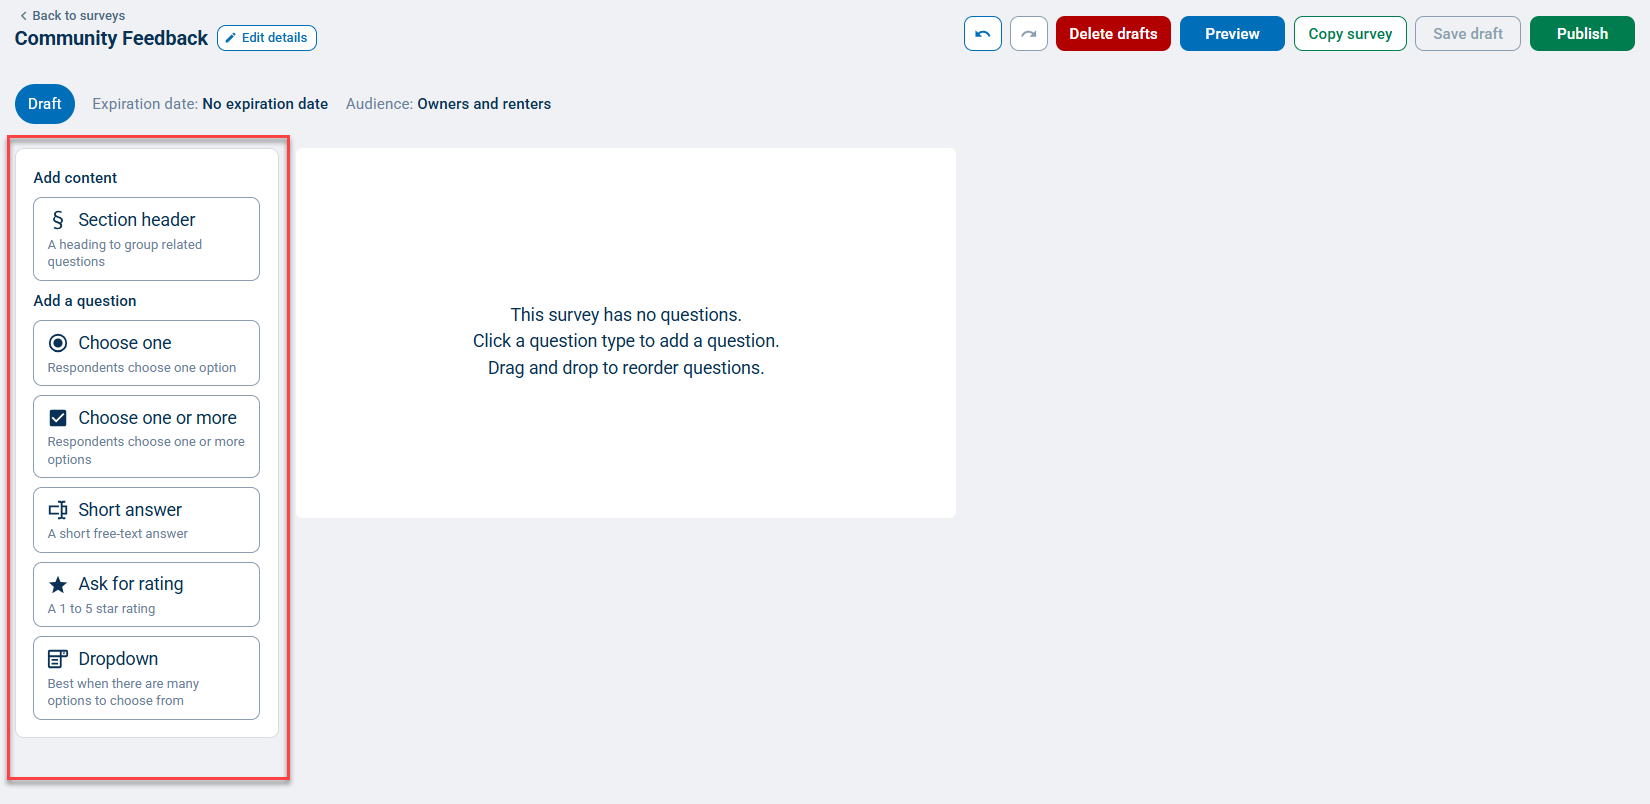
There are 5 types of questions and section headers available for use within your survey. Please see below for more details on how each question type works. You can easily add content to your survey by clicking the content type from the menu on the left, and it will automatically be added into the empty space on the right.
Content Types
- If you'd like to have a survey description, instructions, or other non-question text section, choose Section header.
- If you'd like residents to respond by selecting a single response from a list of predefined answers, select the Choose one question type.
- If you'd like residents to respond to a question by selecting multiple predefined answers, choose the Choose one or more question type.
- If you'd like residents to be able to type in a response to a survey question, choose the Short answer question type.
- If you'd like residents to respond with a star rating on a specific topic (1-5 only), choose the Ask for rating question type.
- If you'd like residents to respond by selecting a single response from a drop-down list of predefined answers, choose the Dropdown question type (best when there are many options).
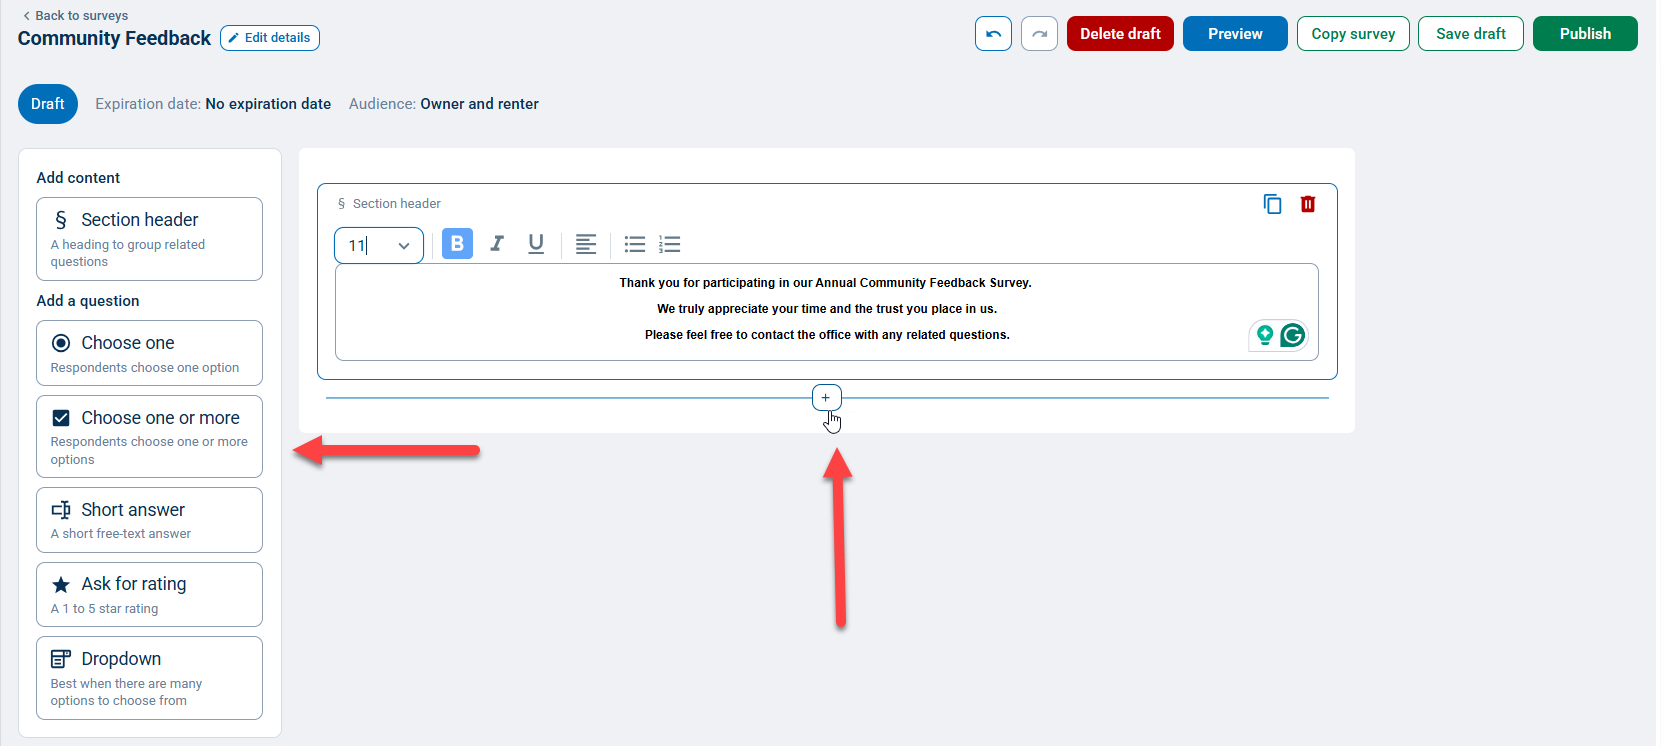
Once you've selected and entered your content, either hover and click the + at the bottom to add more content or select them from the menu on the left.
After you've selected a question type, you can enter a survey question in the Question text field. Enter Answer options in the Option field. To remove an Answer option, hover over the option you want to remove and click the X to the right of the field.
If you'd like to add additional choices to a question, click the Add an answer button, and an additional editable answer option will appear. You can also undo or redo your changes using the Undo and Redo buttons at the top of the page.
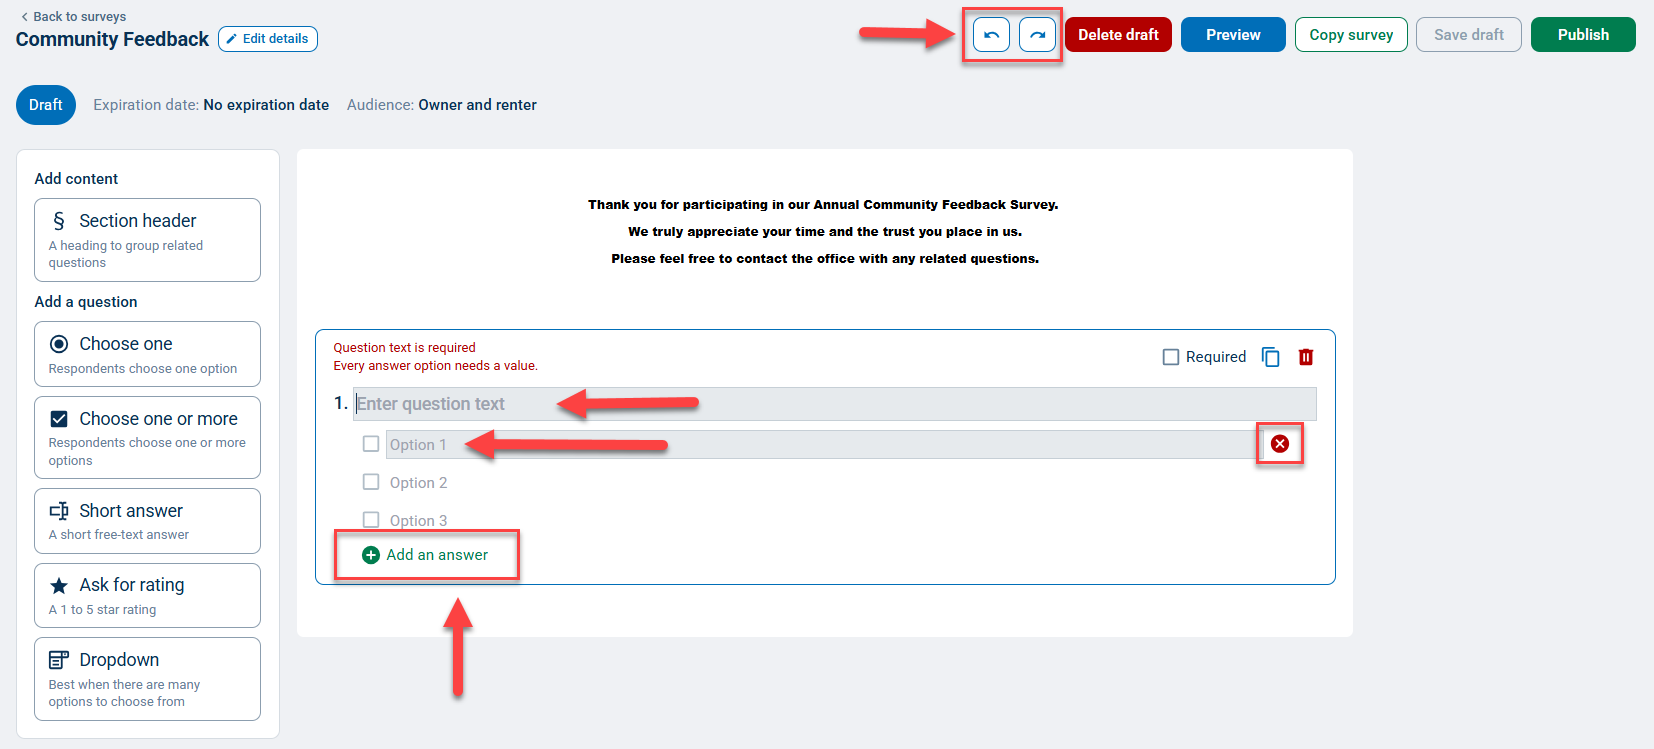
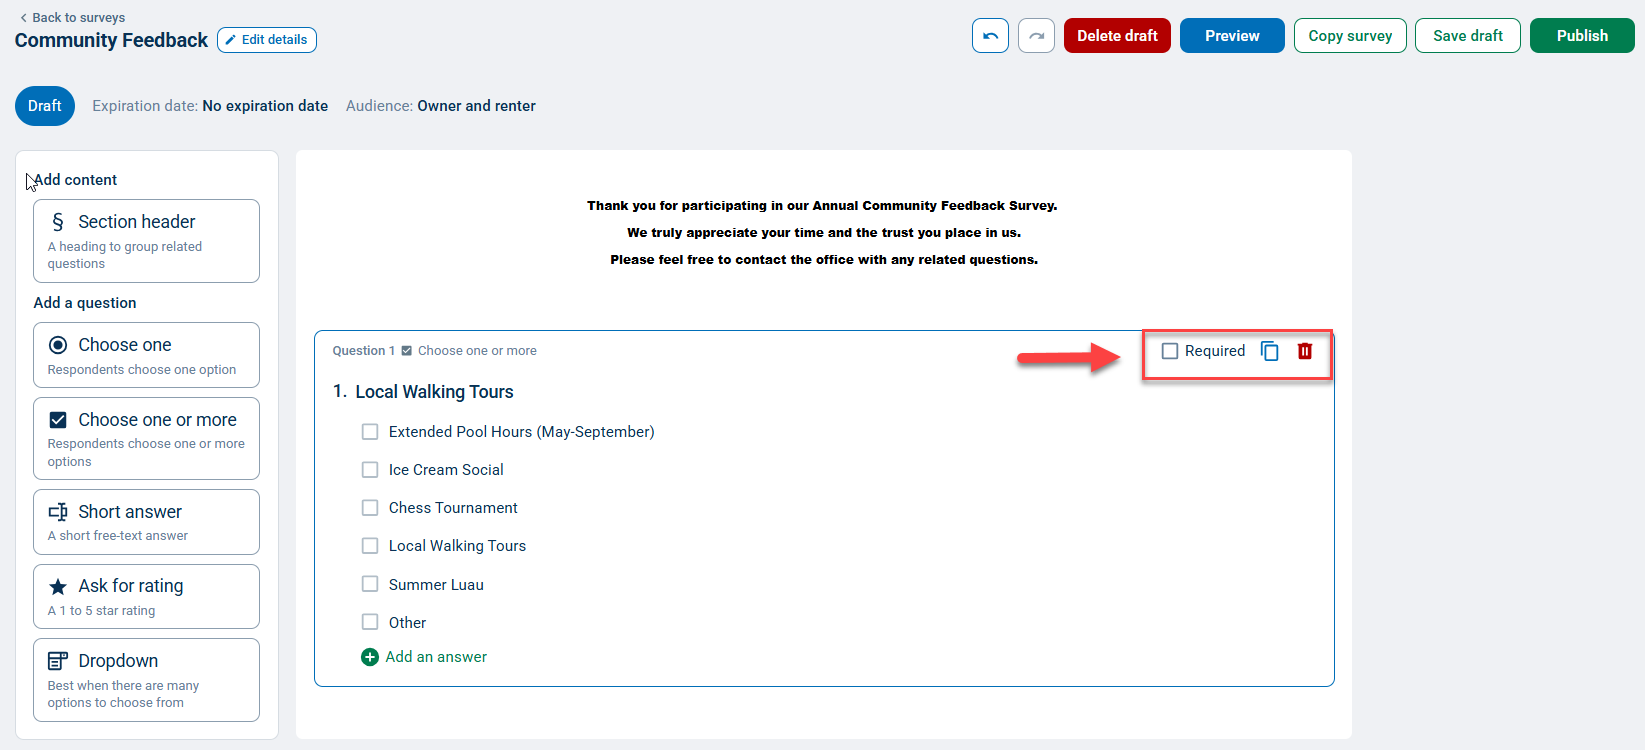
Click the checkbox next to Required in the upper right of the question to require a resident to answer it in order to submit the survey. To duplicate a question from your survey, click the blue Duplicate icon, and to remove a question from your survey, click the red trash can.
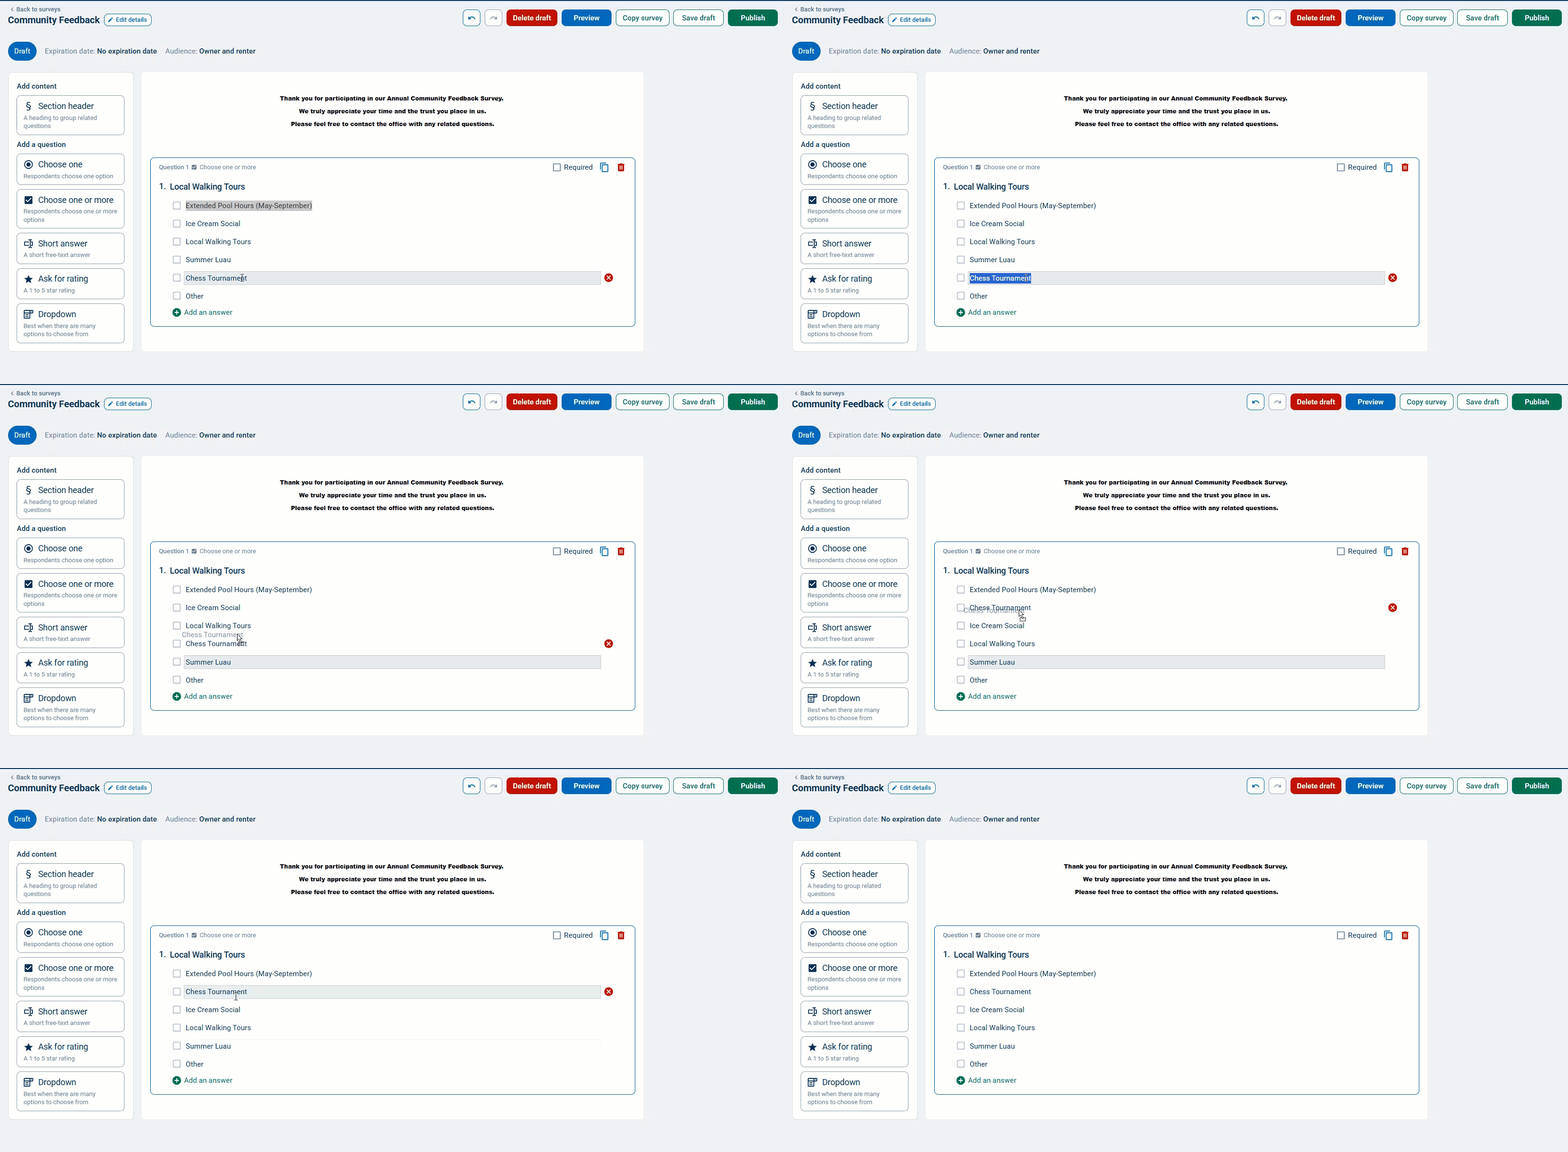
To reorder your answer options, click and hold in the option box and drag to the correct location in the answer list.
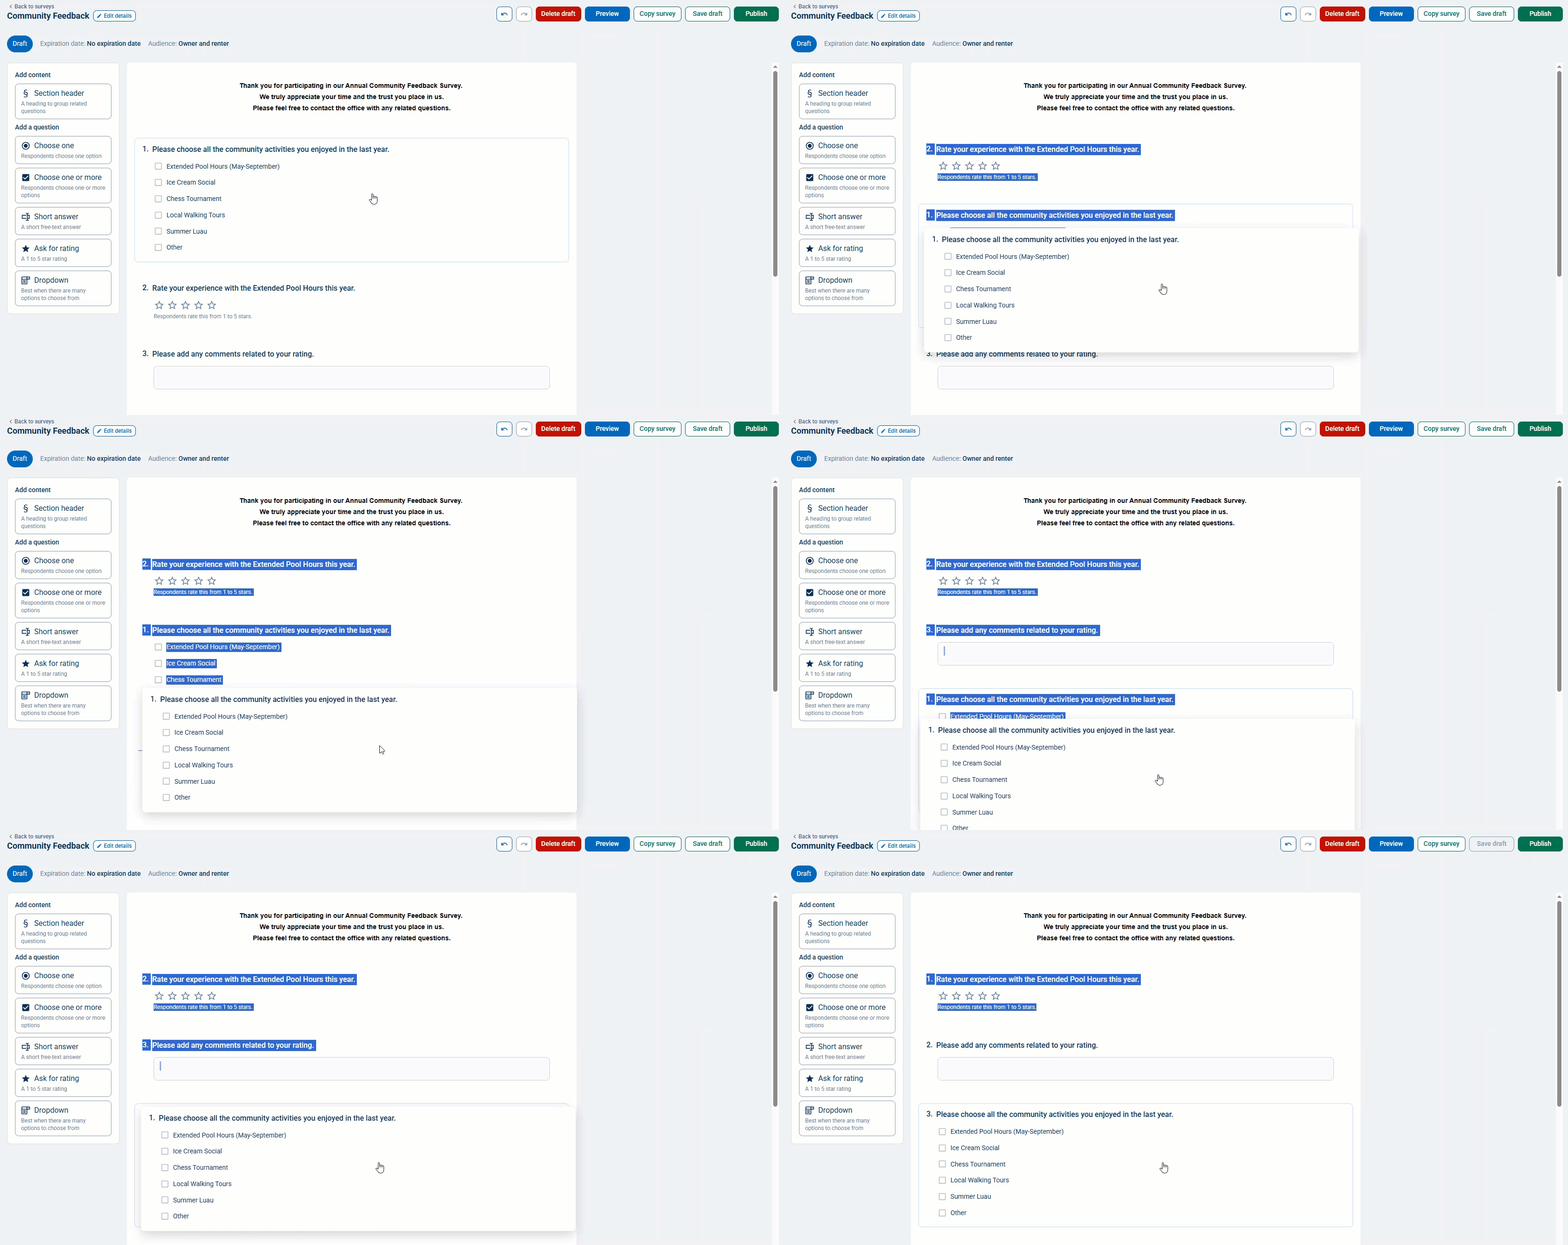
You can reorder your survey questions by clicking and holding the Question text, then dragging and dropping.
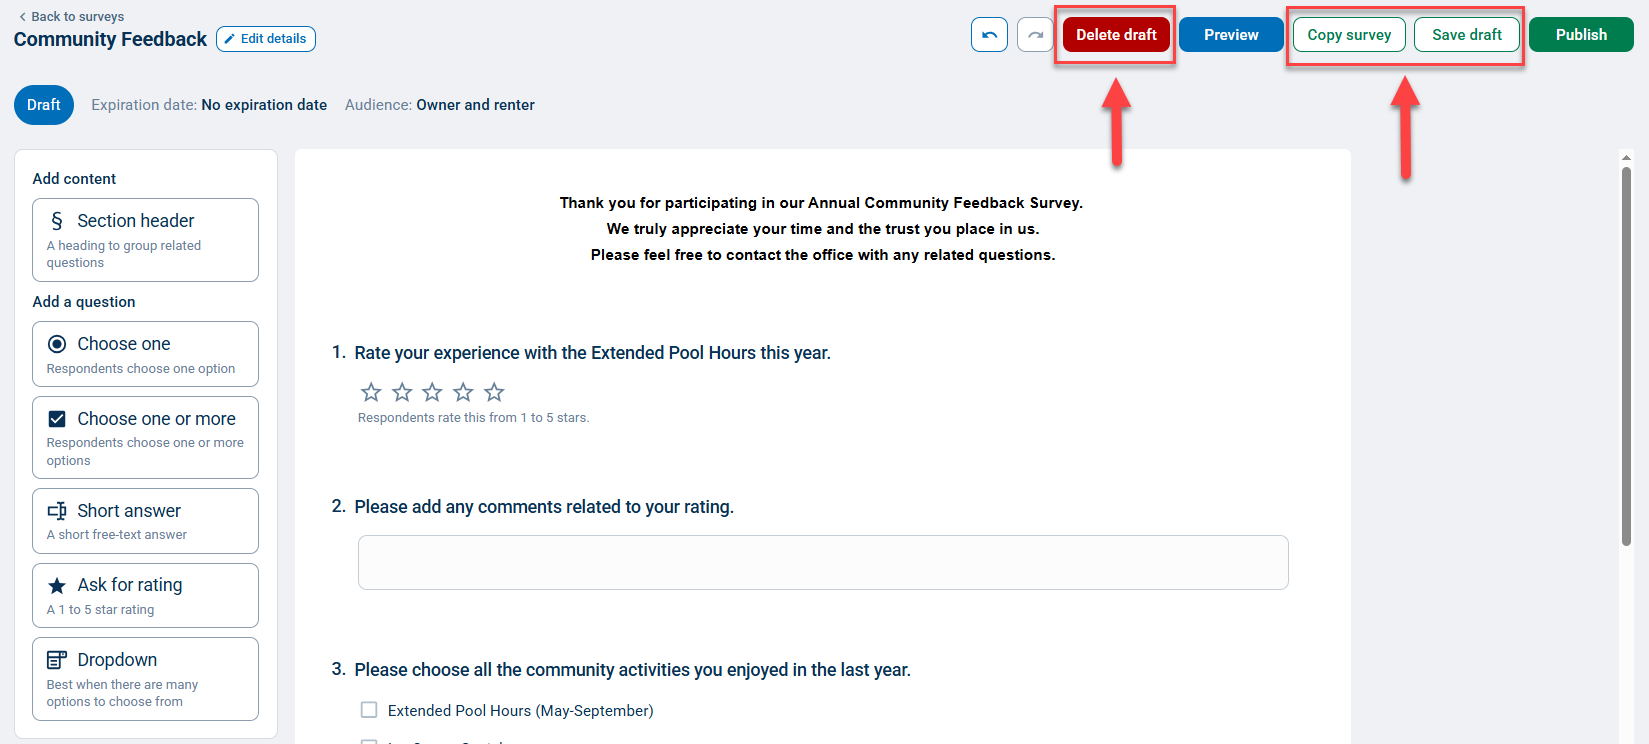
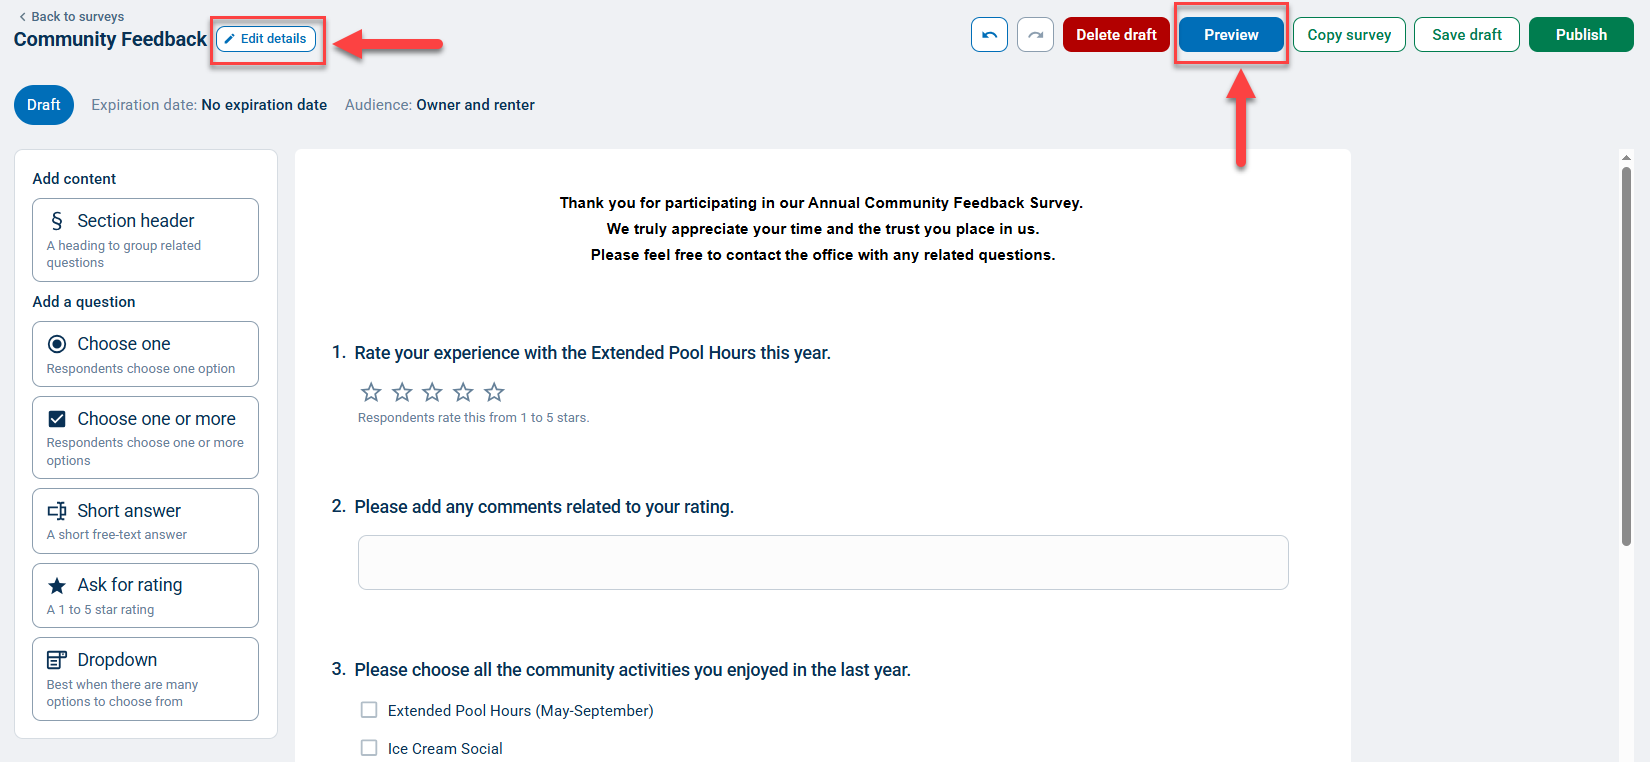
If you want to create a duplicate copy of a survey, click the Copy survey button at the top right of the page. Click the Preview button to view your survey and click the Save draft button to save your survey draft. To delete a survey draft, click the red Delete draft button. You will be asked to confirm. Once a survey is deleted, it cannot be recovered.
Finalizing Your Survey Options
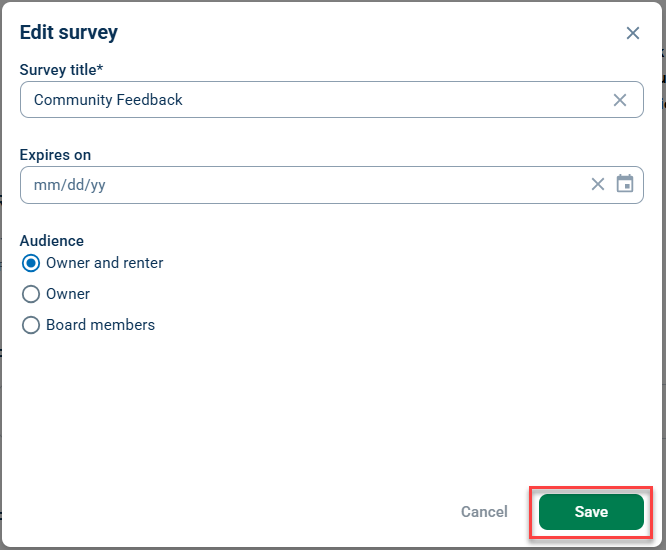
To change the Survey title, expiration date, and/or survey audience, click the Edit details button at the top left of the page. An Edit Survey Window will open; click the green Save button to save changes.
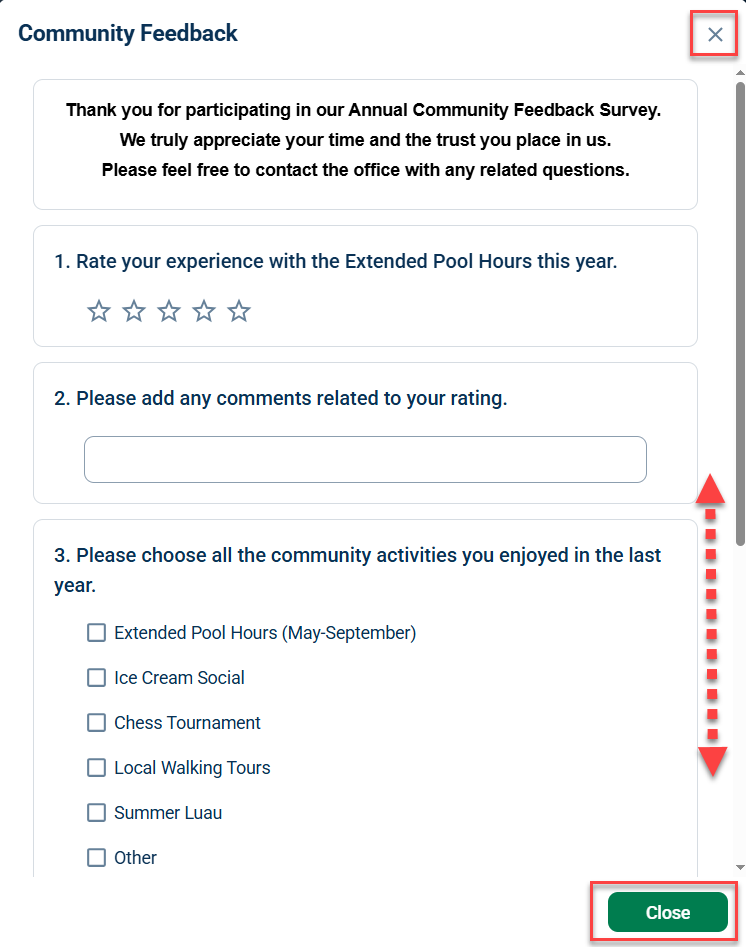
To preview a survey, click the blue Preview button; a preview window will open. Click the X in the top right corner or the green Close button to exit the preview.
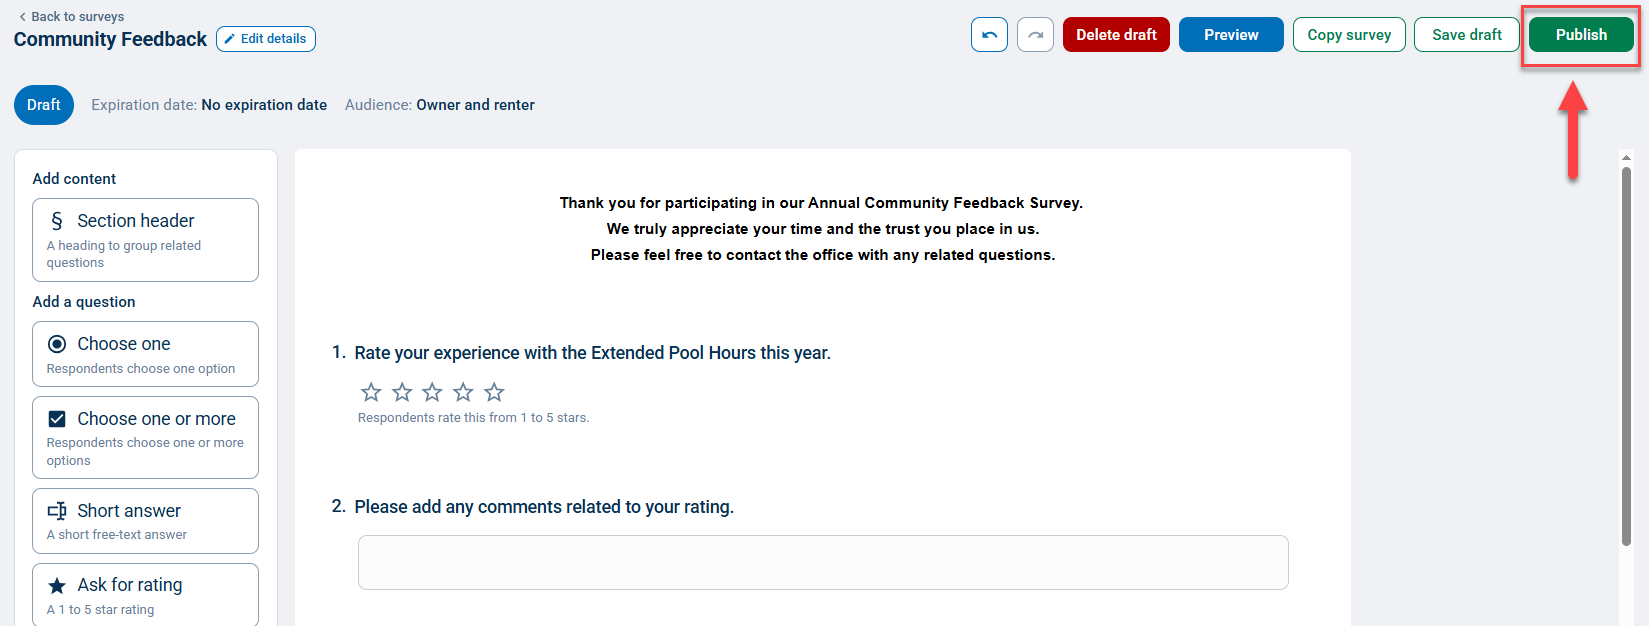
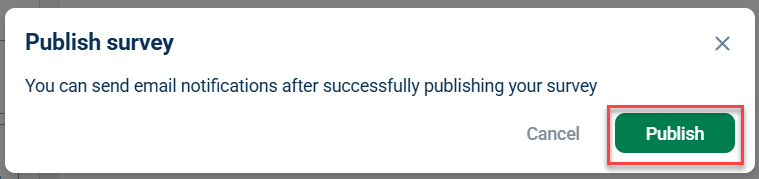
When you are ready to publish your survey, click the green Publish button and confirm on the next screen.
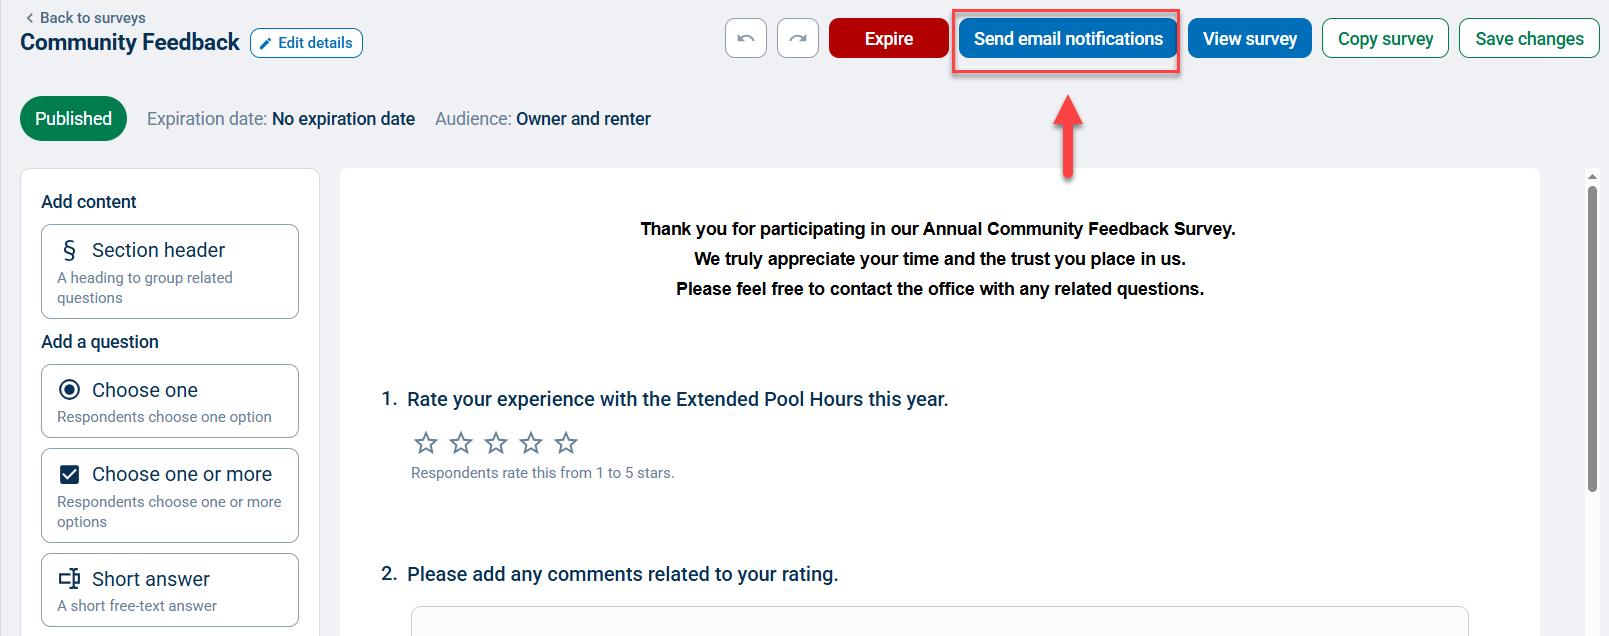
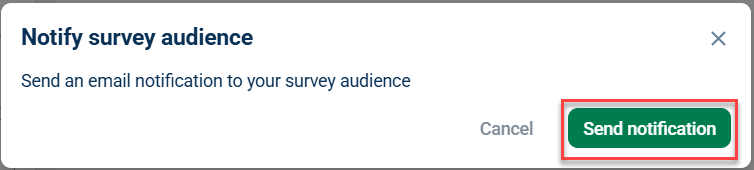
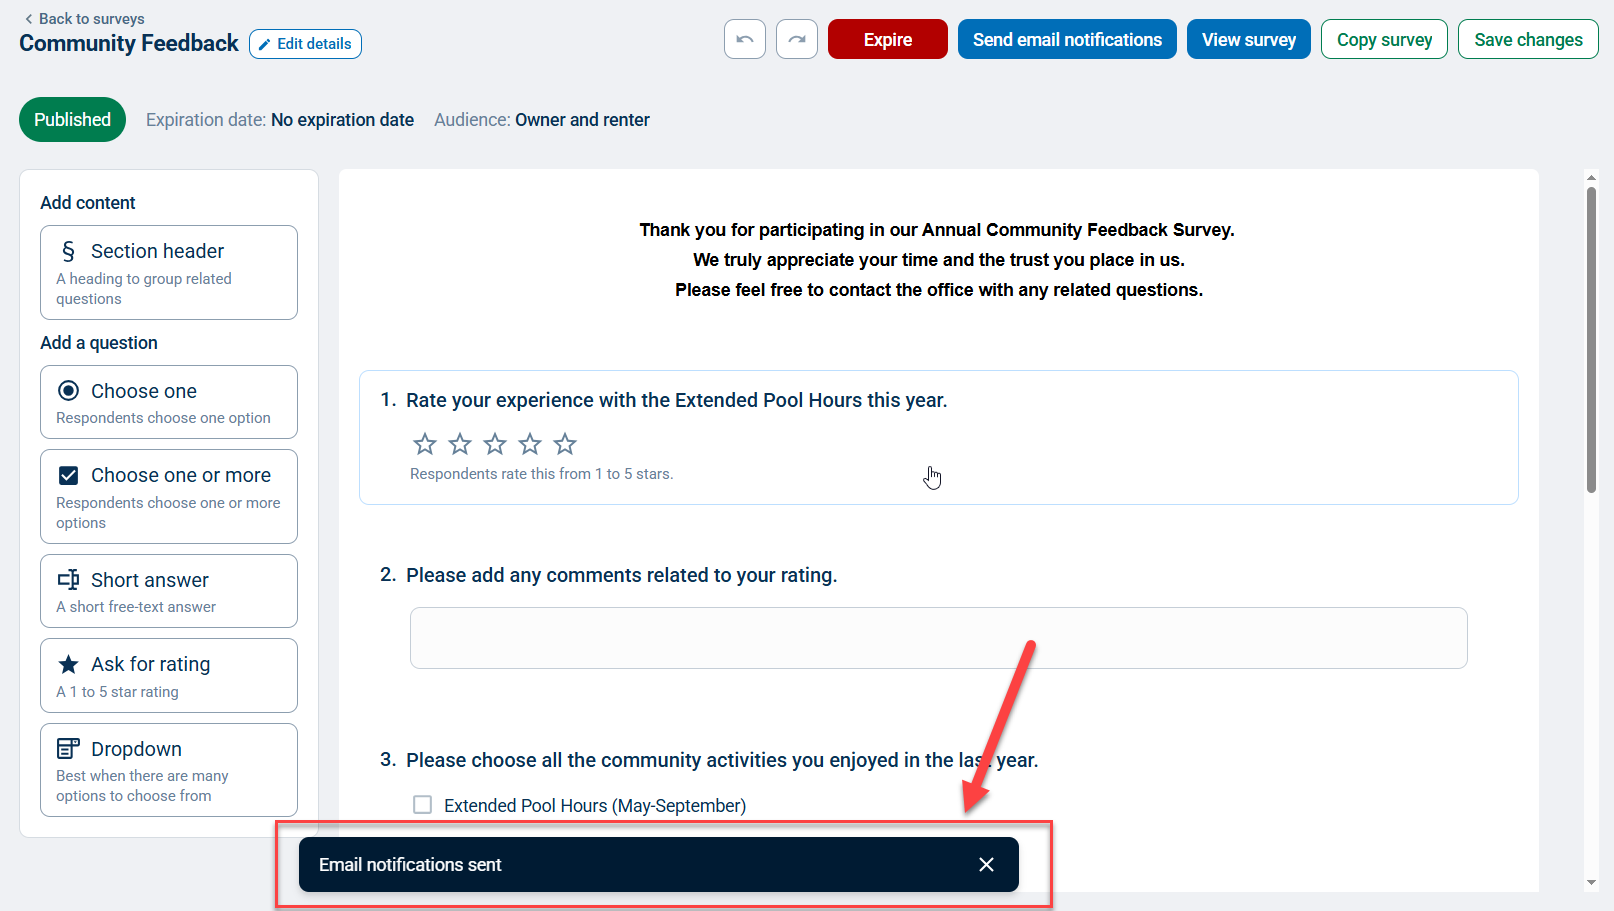
After a survey is published, click the blue Send email notifications button and click Send notification in the confirmation window to notify your survey audience. You will receive on-screen confirmation, and you can view these notifications in the Sent section in the Notifications folder of your BuildingLink Mailbox.
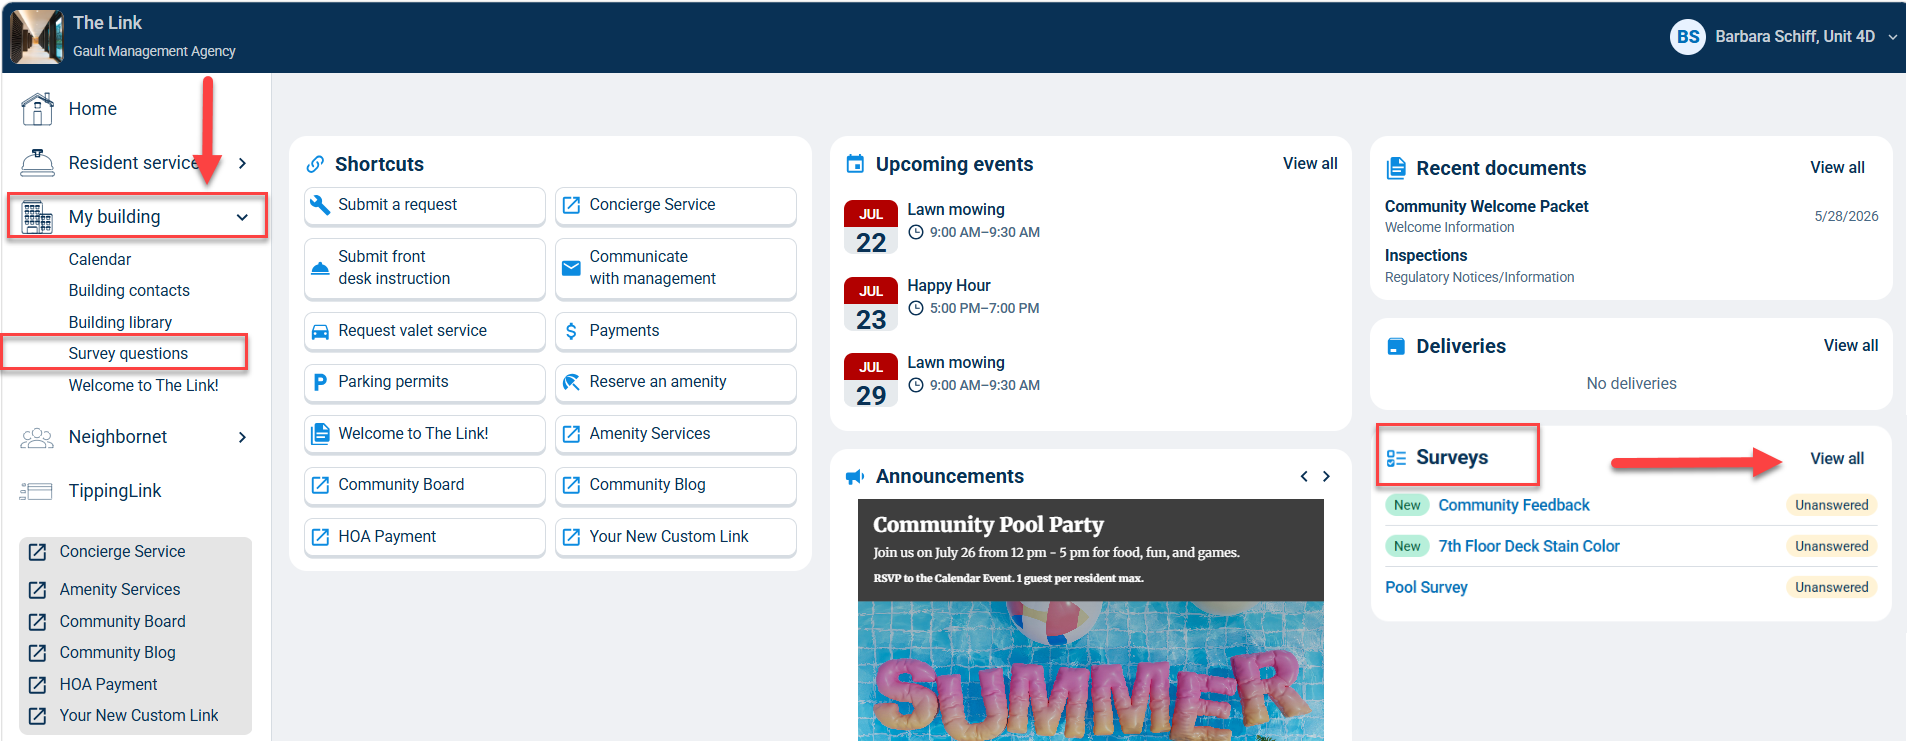
If you choose not to notify your residents, your residents will still see a list of available surveys on their dashboard and can click each one to respond. To go to the surveys page, they can also click View all or click My building on the left and select Survey questions. (To learn more about how residents will fill out your survey, see our resident survey questions article.)
Editing And Expiring a Published Survey
From the Manage Surveys page, click on the survey you'd like to edit or expire. If you want to create a duplicate copy of a survey, click the Copy survey button on the row of that survey. The sections above provide more information on editing questions and survey options.
Note: Once responses are received, questions and response options can no longer be edited.
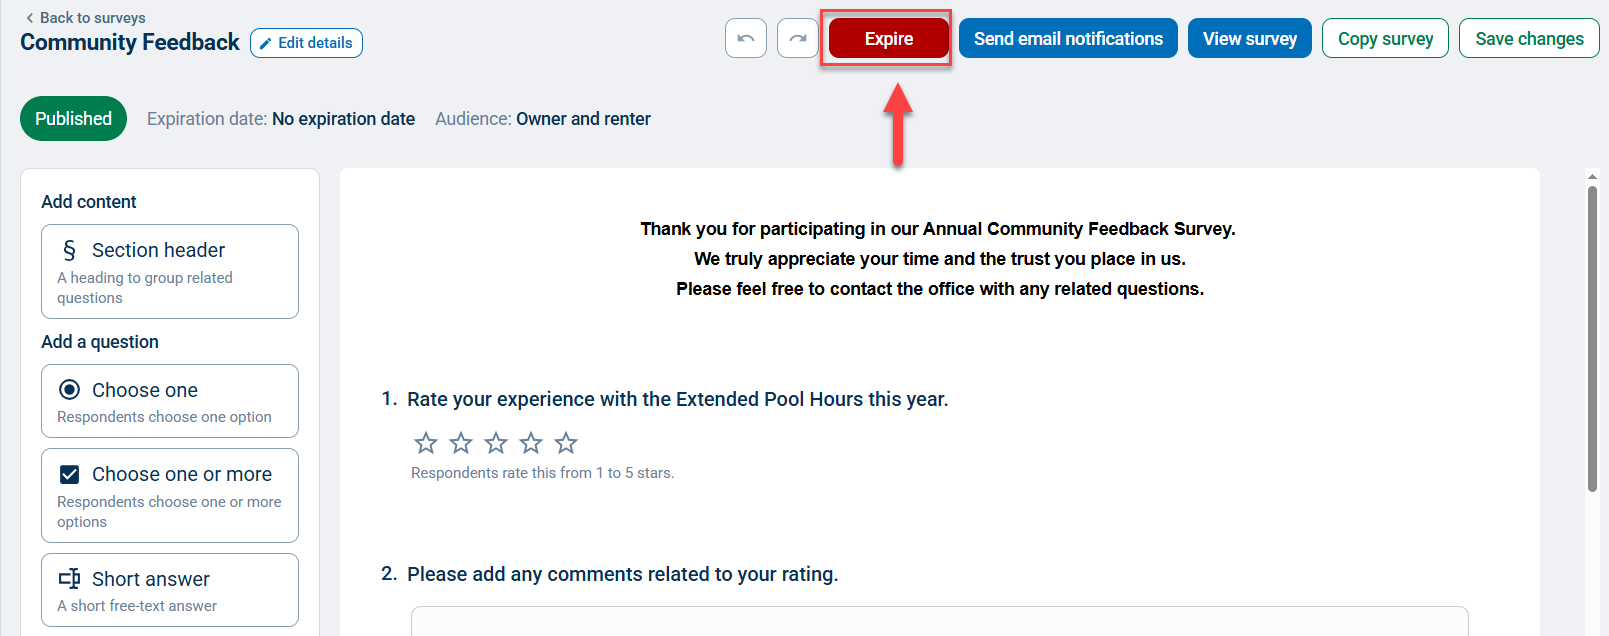
To expire a published survey, click the red Expire button. To reactivate an expired survey, click into its row and click Reactivate.


Viewing Resident Responses
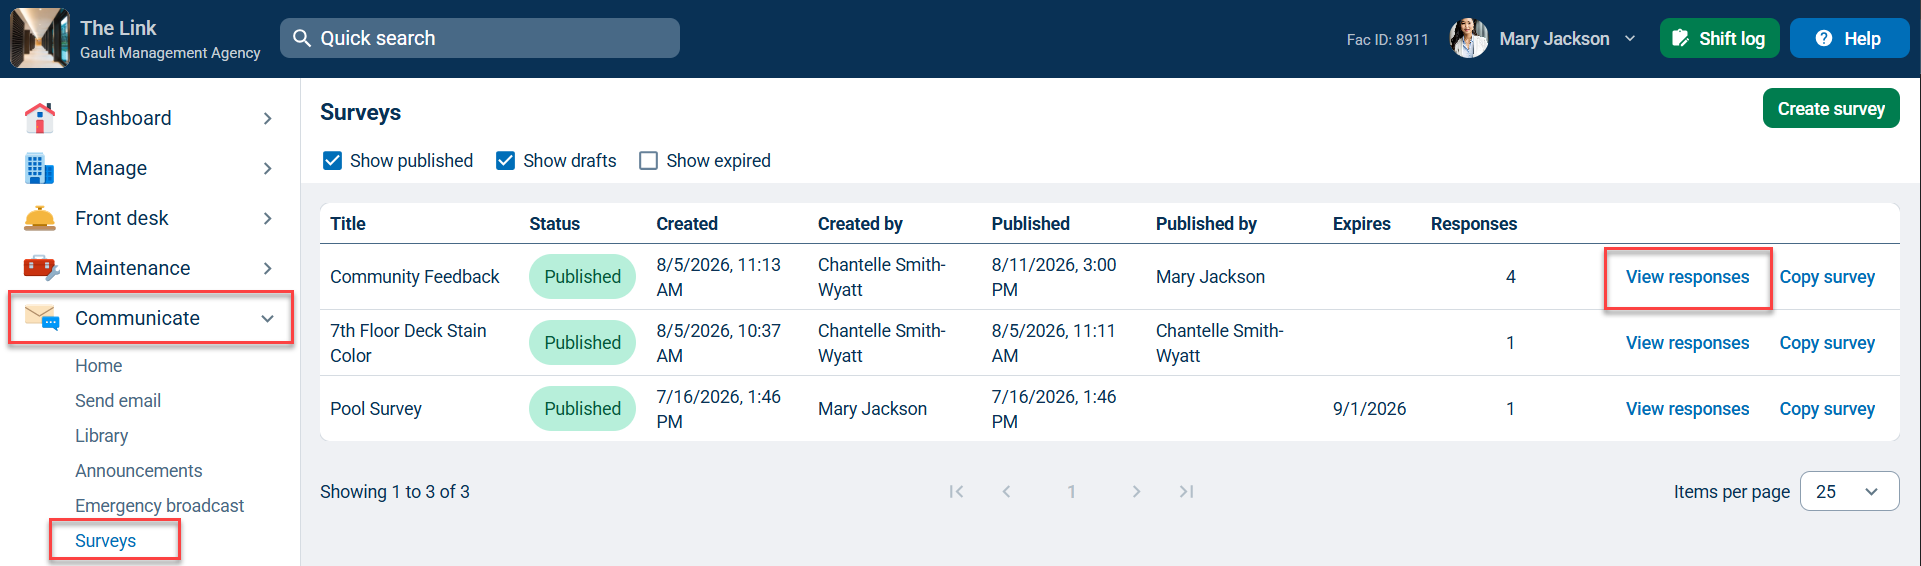
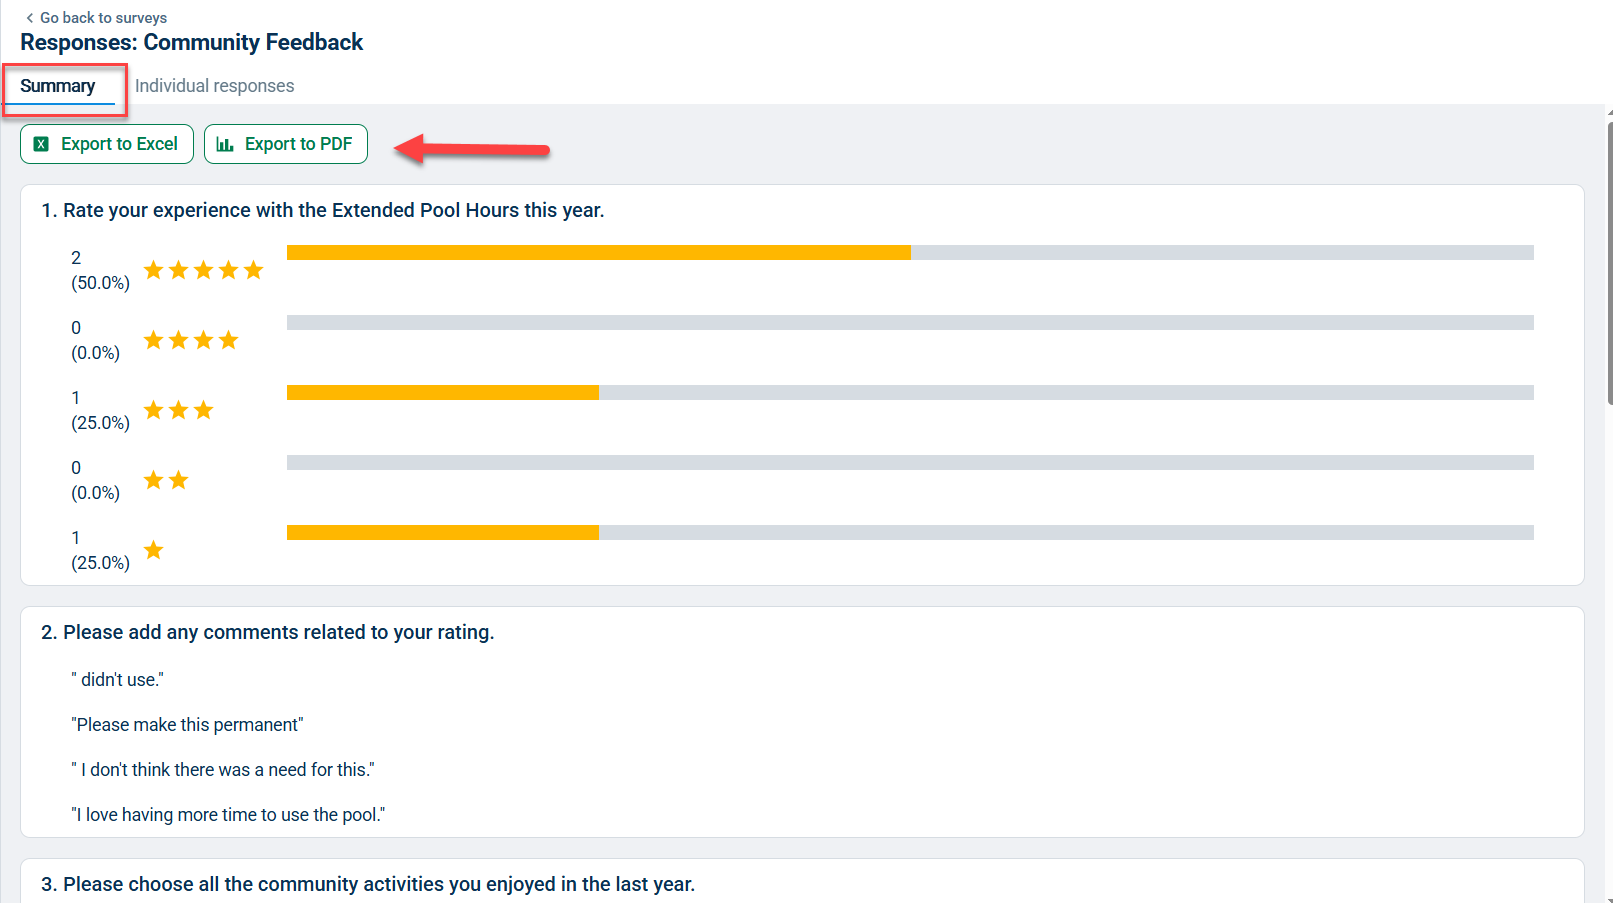
You can see how your residents have responded to a survey by clicking the View responses link next to the desired survey. You will see a summary of how your residents collectively responded to each question that you can export by clicking the Export to Excel or Export PDF buttons.
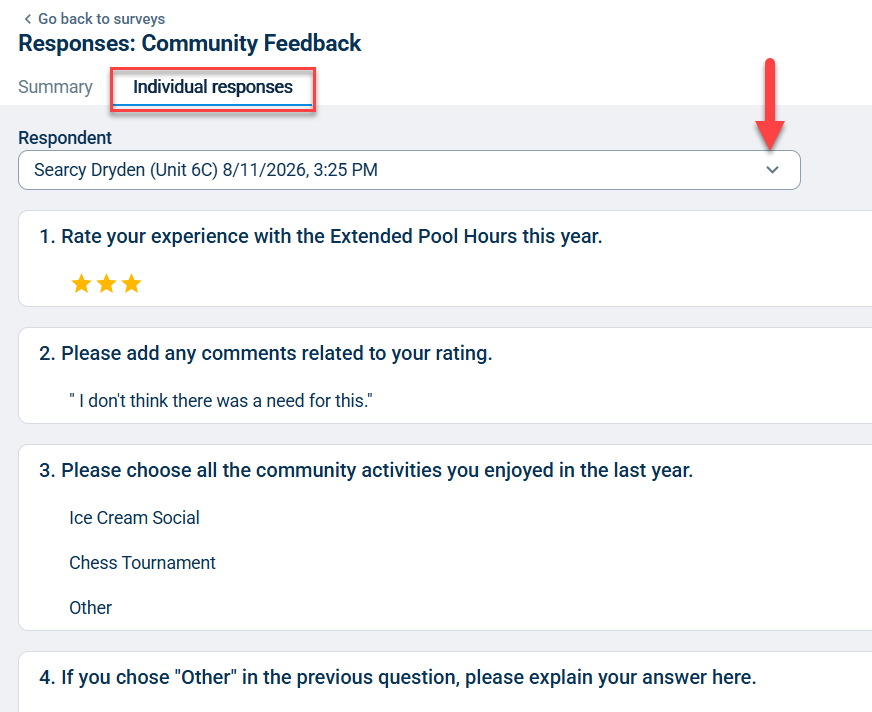
Click the Individual repsonses tab to search for and view a specific resident's responses.