Note: This article is for the newly redesigned module. This updated module is in the process of being rolled out and may only be available to some users.
Overview
The Send Email module makes it easy for you to stay connected with residents, staff, and management from one central location. Whether you're sending a building-wide announcement, reaching specific resident groups, or communicating by floor or line, you have the flexibility to deliver the right message to the right audience.
Powerful search and sorting tools help you quickly find past communications, while sender visibility and delivery tracking make it easy to monitor email activity and identify undeliverable messages.Draft management tools keep your communication process organized, while flexible branding, layouts, and templates make it easy to create polished, professional emails that reflect your property's unique identity and maintain consistency across communications.
For communities with residents who do not use email, individualized printable copies help ensure everyone stays informed. The module also supports communication on the go with the ability to send emails to residents and employee groups directly from the GEO mobile app.
Together, these features help save time, simplify day-to-day communication, and create a seamless experience for both residents and staff.
Note: Click on the images to enlarge them.
Table of Contents
- Email Settings
- Viewing Sent Emails
- Sending an Email
- Formatting Options
- Using Layouts
- Using Templates
- Adding Images
- Adding and Designing Email Signatures
- Printing an Email for Recipients
- Adding Attachments
- Scheduling Emails
- Sending Email Using the GEO app
Email Settings
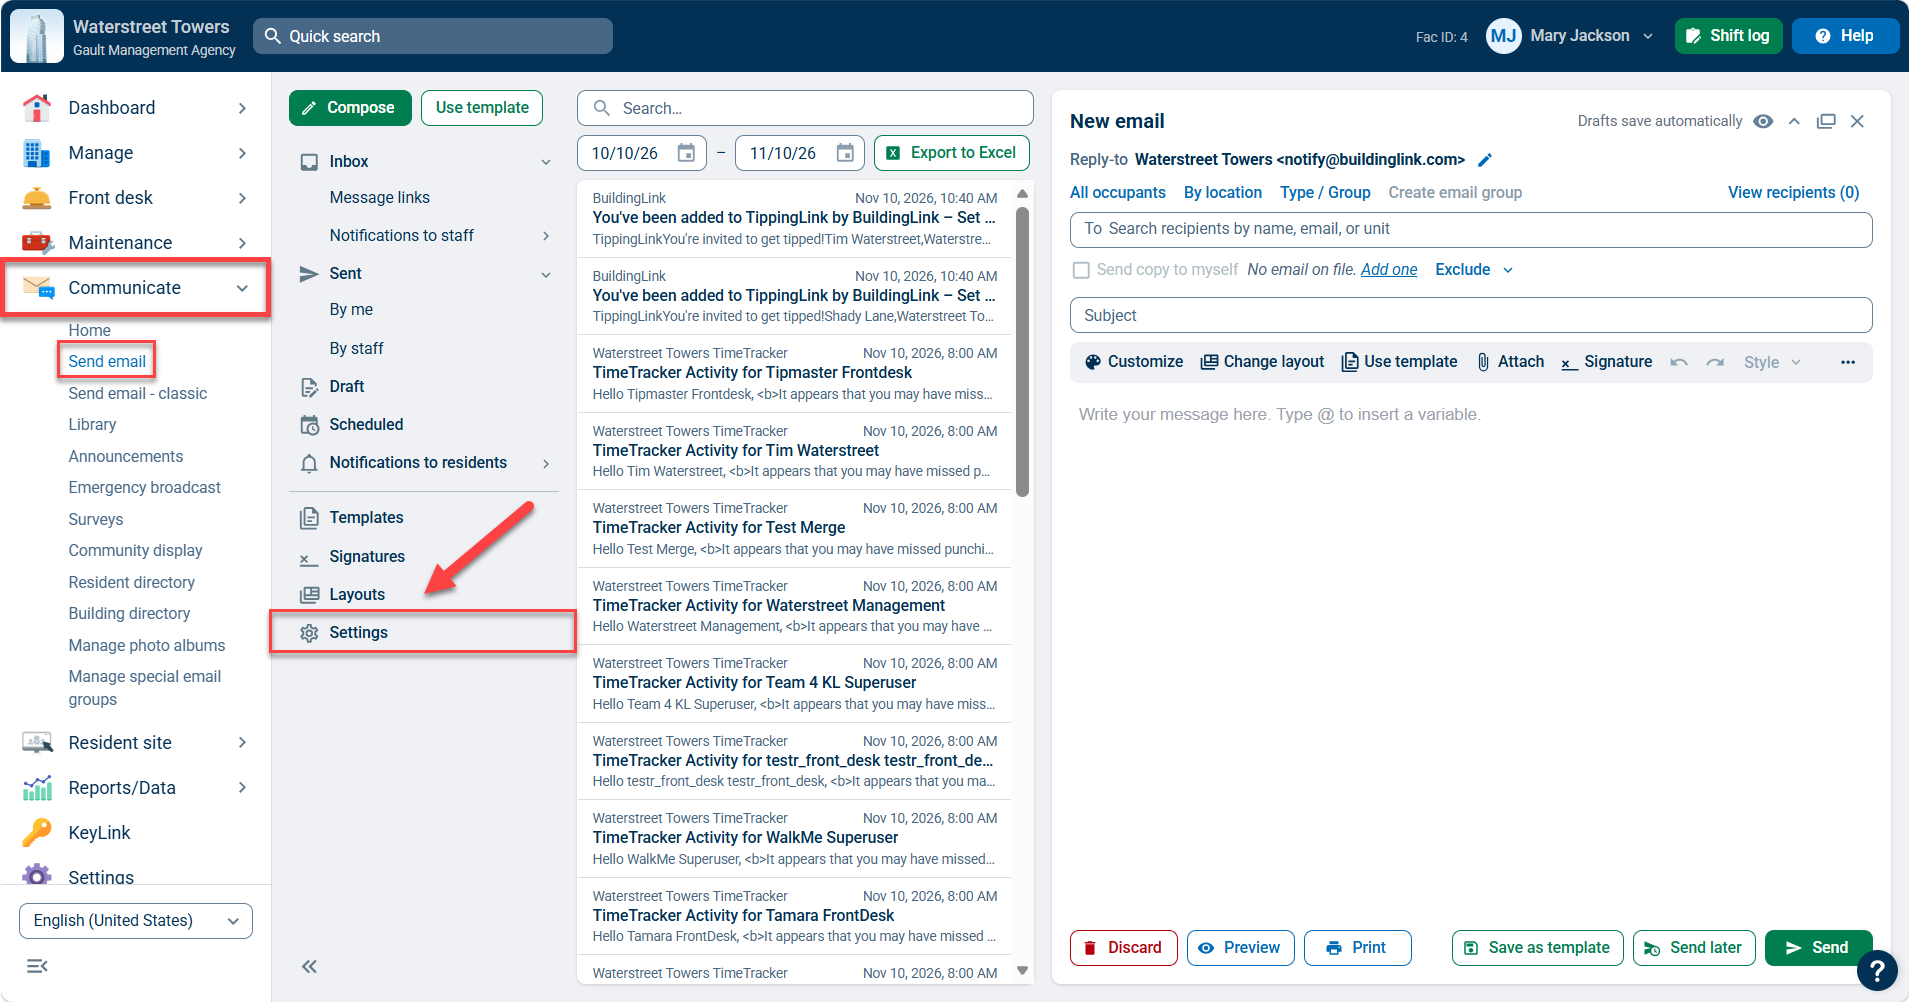
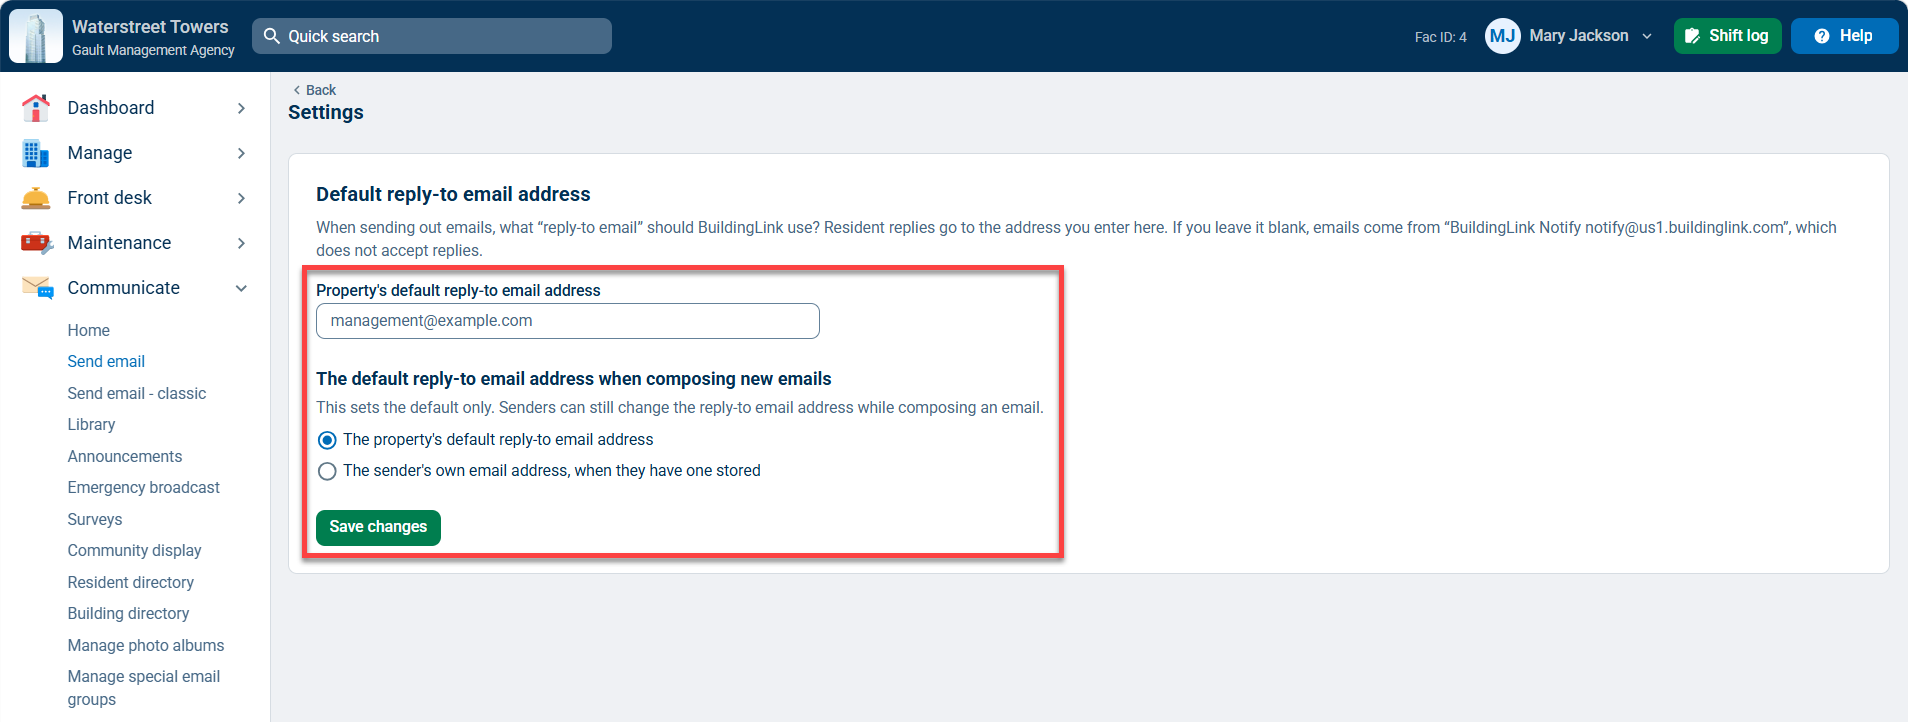
To set the default “Reply-to” email address for all manual emails, click on the Communicate tab and select Send Email. Click on Settings at the bottom of the mailbox menu.
You can decide if employees should, by default, send manual emails from the default email address or the email address saved in their BuildingLink user profile. Either way, the employee will always be able to edit the “Reply-to” field when sending a manual email.
Click Save changes to save your settings.
Viewing Sent Emails
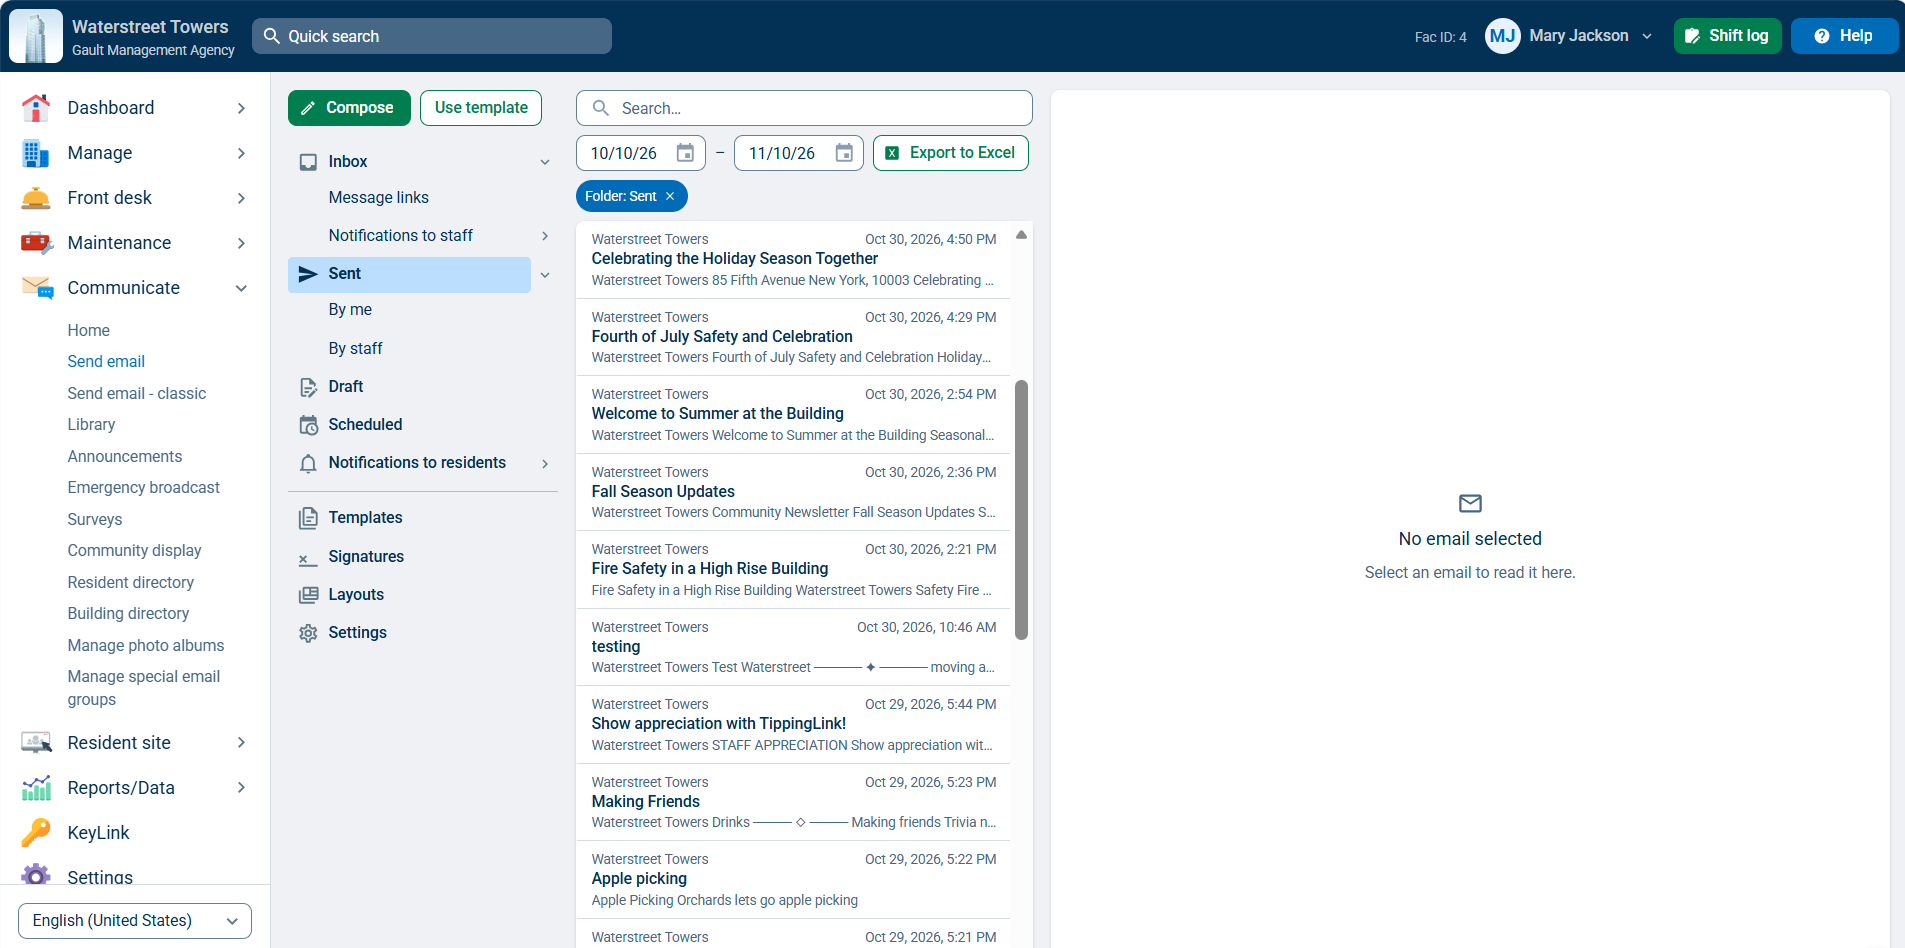
To view sent emails, click on the Communicate tab and select Send Email. This will take you to the Inbox tab that displays messages sent to recipients of any message links you've set up as well as any automatic notifications generated by BuildingLink to building staff. Selecting the Sent tab displays any emails manually sent by you or by staff.
Note: Only Security Officer Level users can see emails sent by all other staff by default.
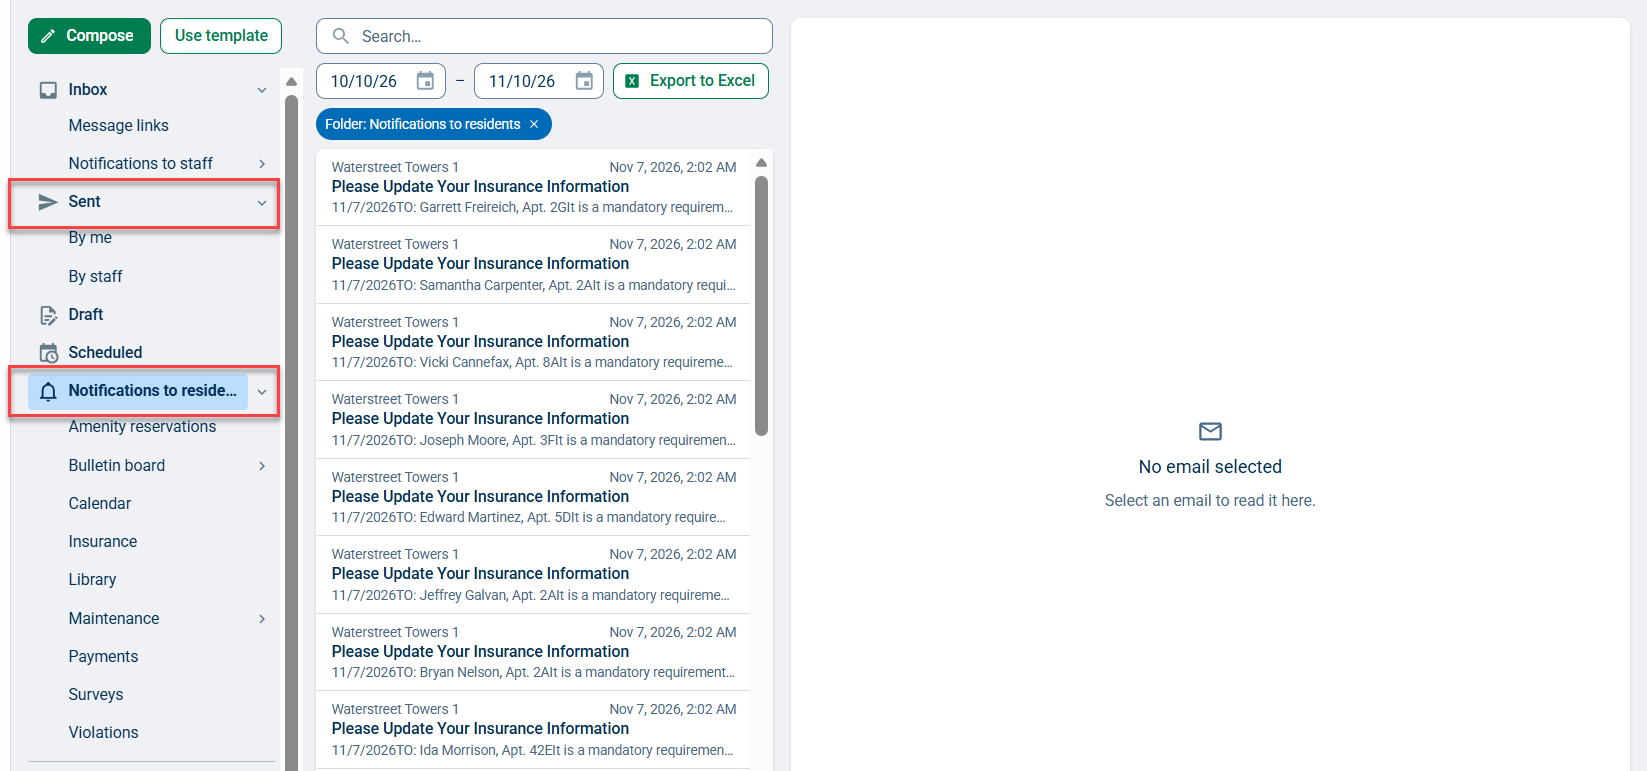
Finally, selecting the Notifications to residents tab will show a history of any automatic notifications sent to residents via BuildingLink. These notifications are even broken up by module for your convenience!
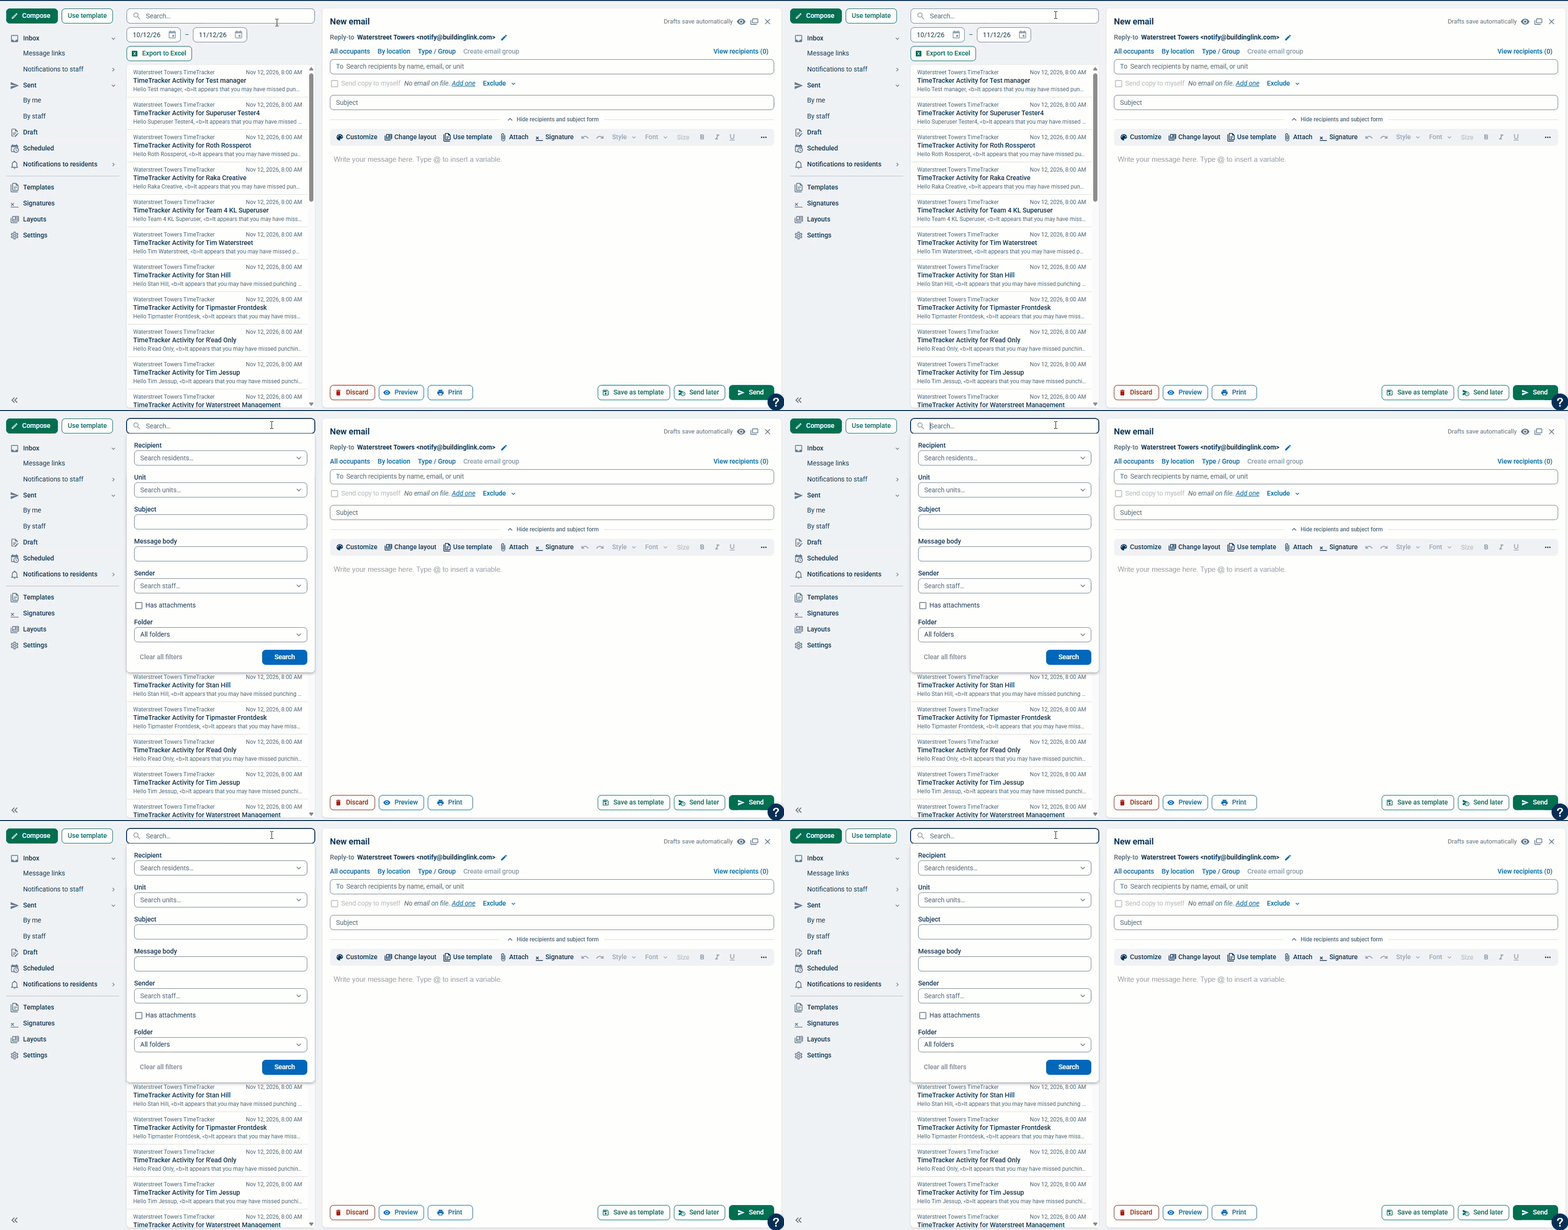
If you prefer, you can also use the search function at the top of your mailbox to find messages by date range, recipient,unit, subject, message body, sender and folder. You can also export your results to Excel.
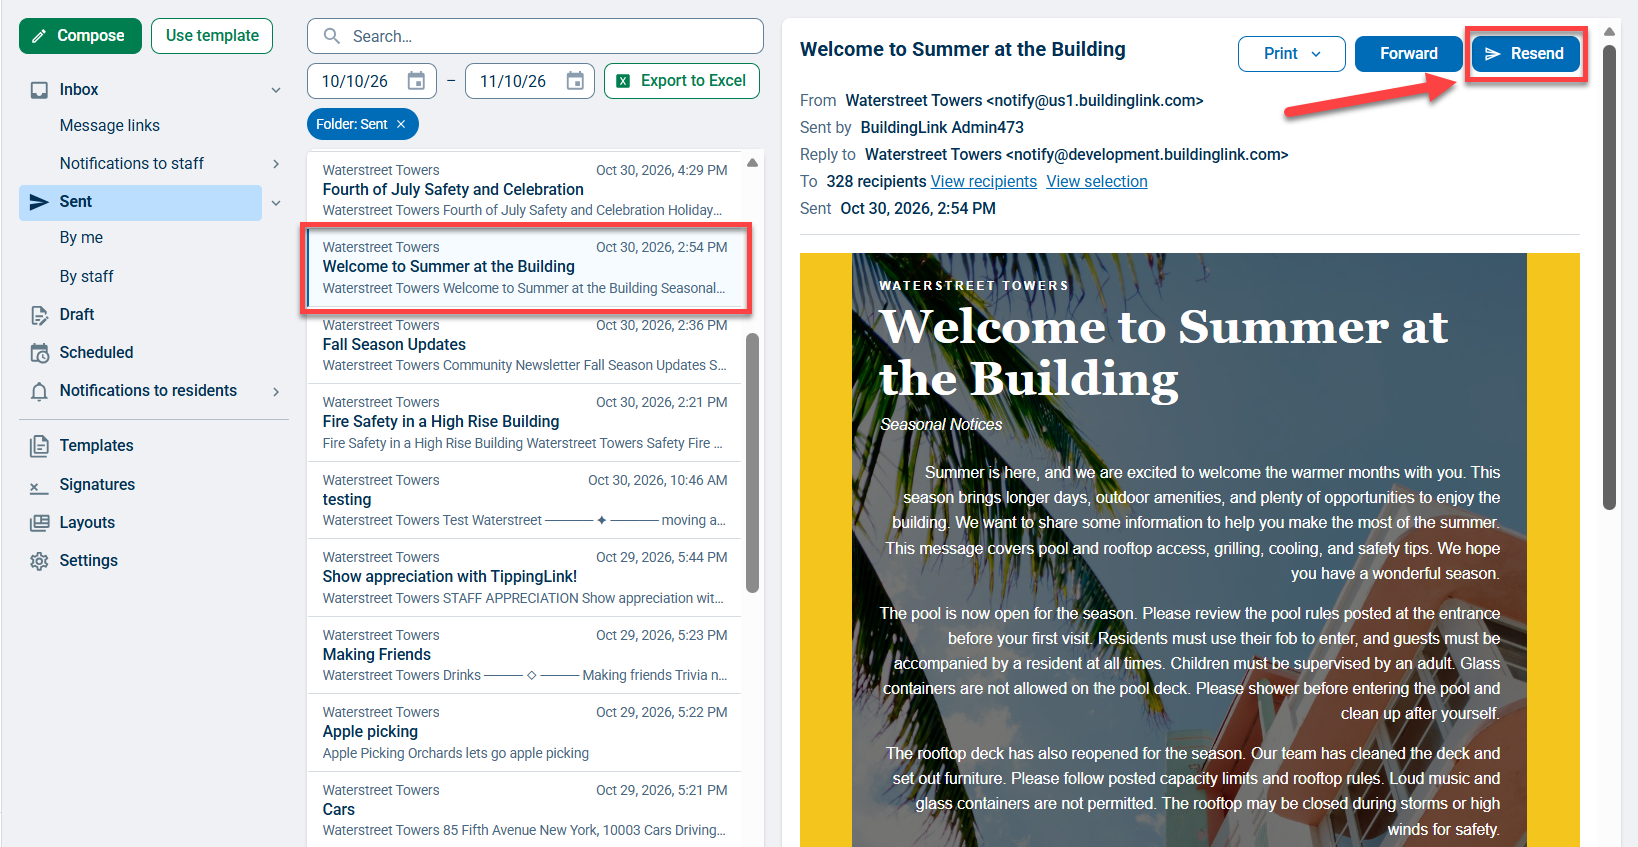
You can also resend any previously-sent message from the Mailbox. Just click on the message you'd like to resend and click the Resend button. You can even make changes to your recipients and/or text before resending!
Sending an Email
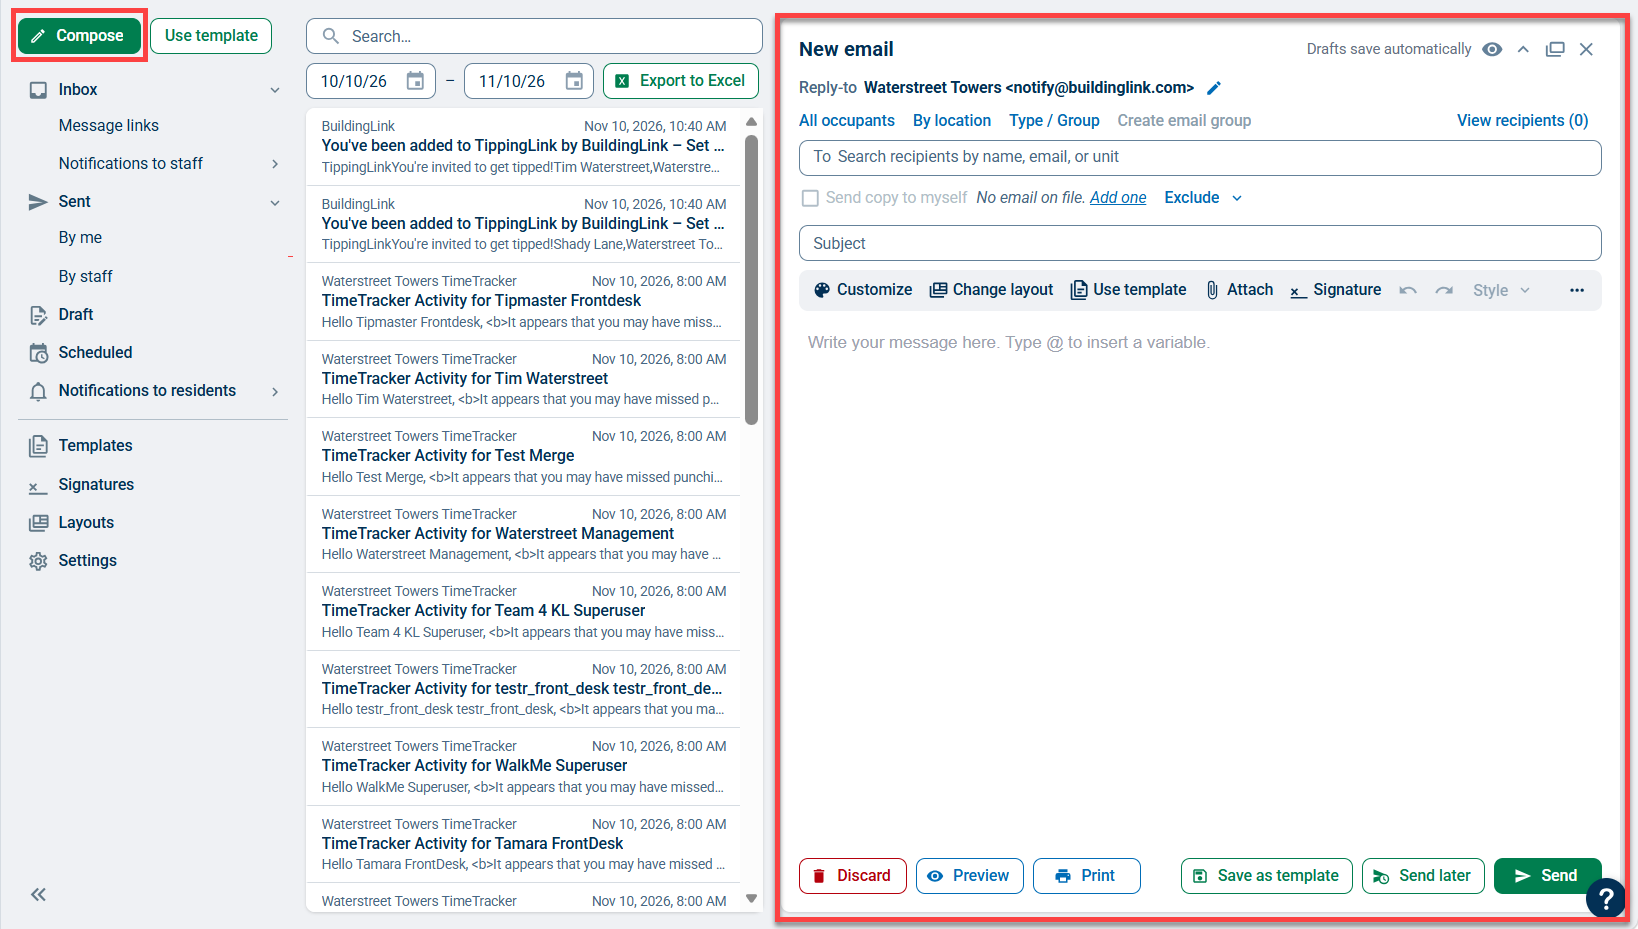
To send an email through BuildingLink, click on the Communicate tab, select Send Email, and click the Compose button in the top left corner of the page. You can also immediately start drafting a new email using the new email composer that appears on the right of the page.
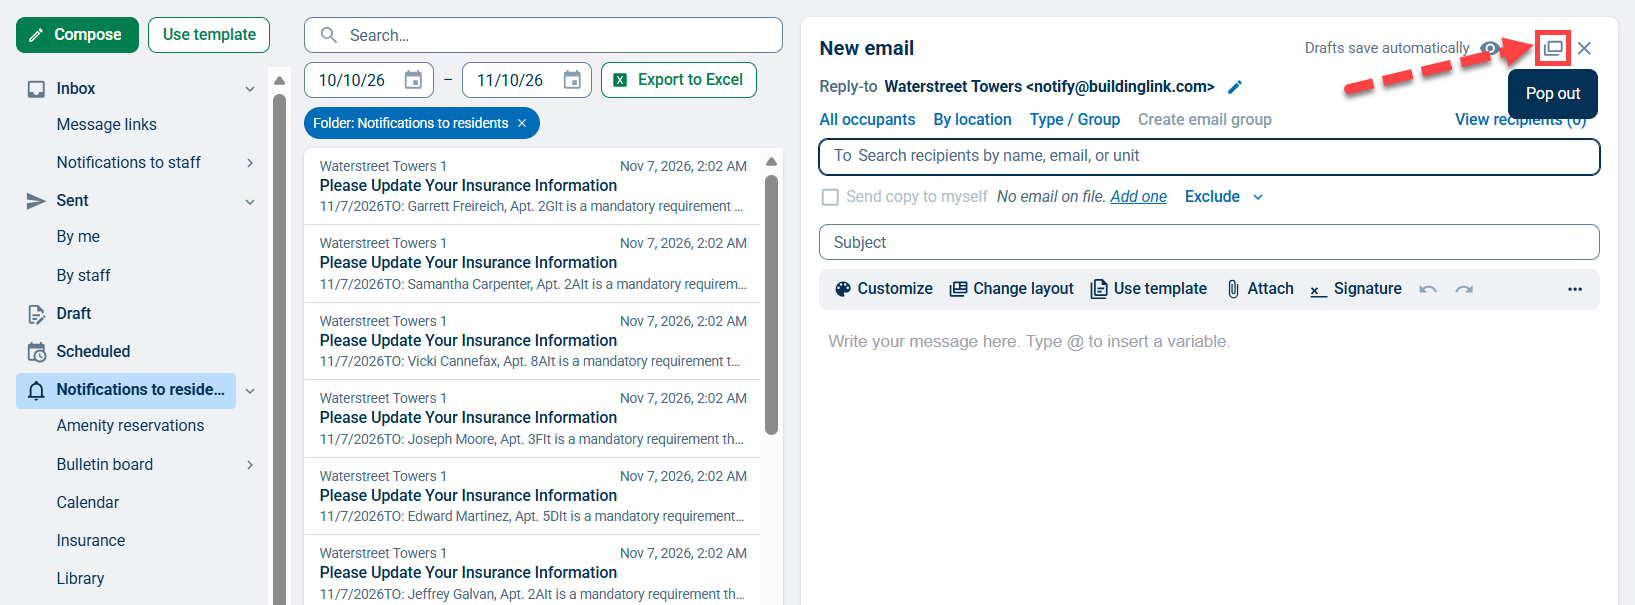
Click the Pop out icon at the top of the new email composer to have it fill the screen and undock from the mailbox view.
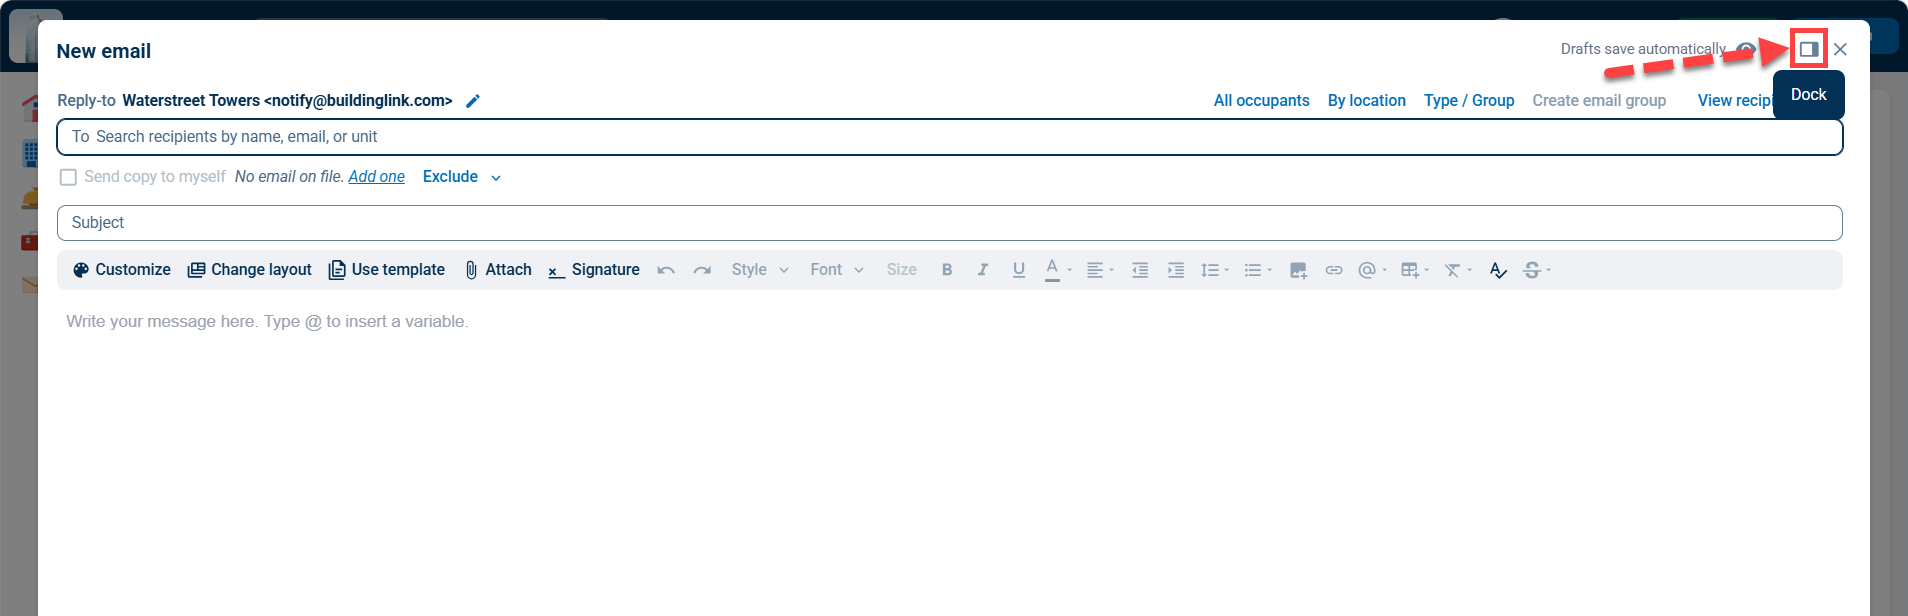
Click the Dock icon to bring the composer back to the right side of the mailbox view.
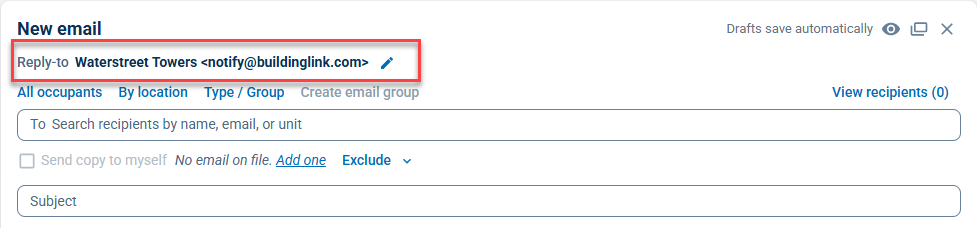
When sending an email, you’ll see the default “Reply-to” email address at the top of the email. However, you can always replace this email with another email address by clicking on the  pencil icon to edit. For example, you could type in the super’s email address if responses about a water shutdown should go directly to him. Your name will auto-populate as well, but you can choose to alter that in the moment, or use the building name by checking or unchecking the boxes below those options. Click Done to save any changes and minimize the section.
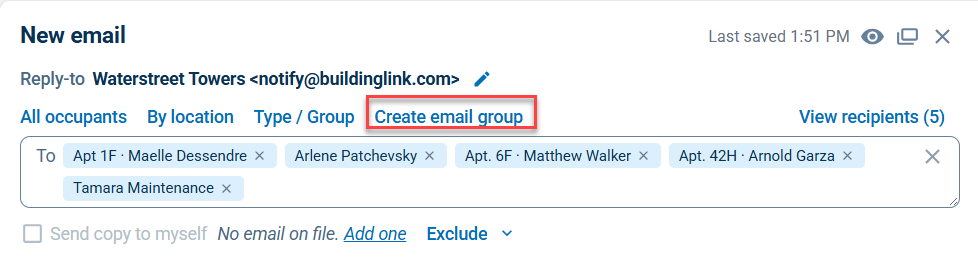
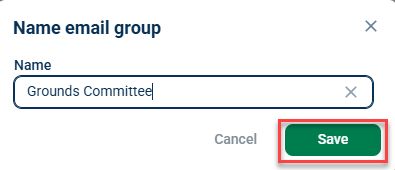
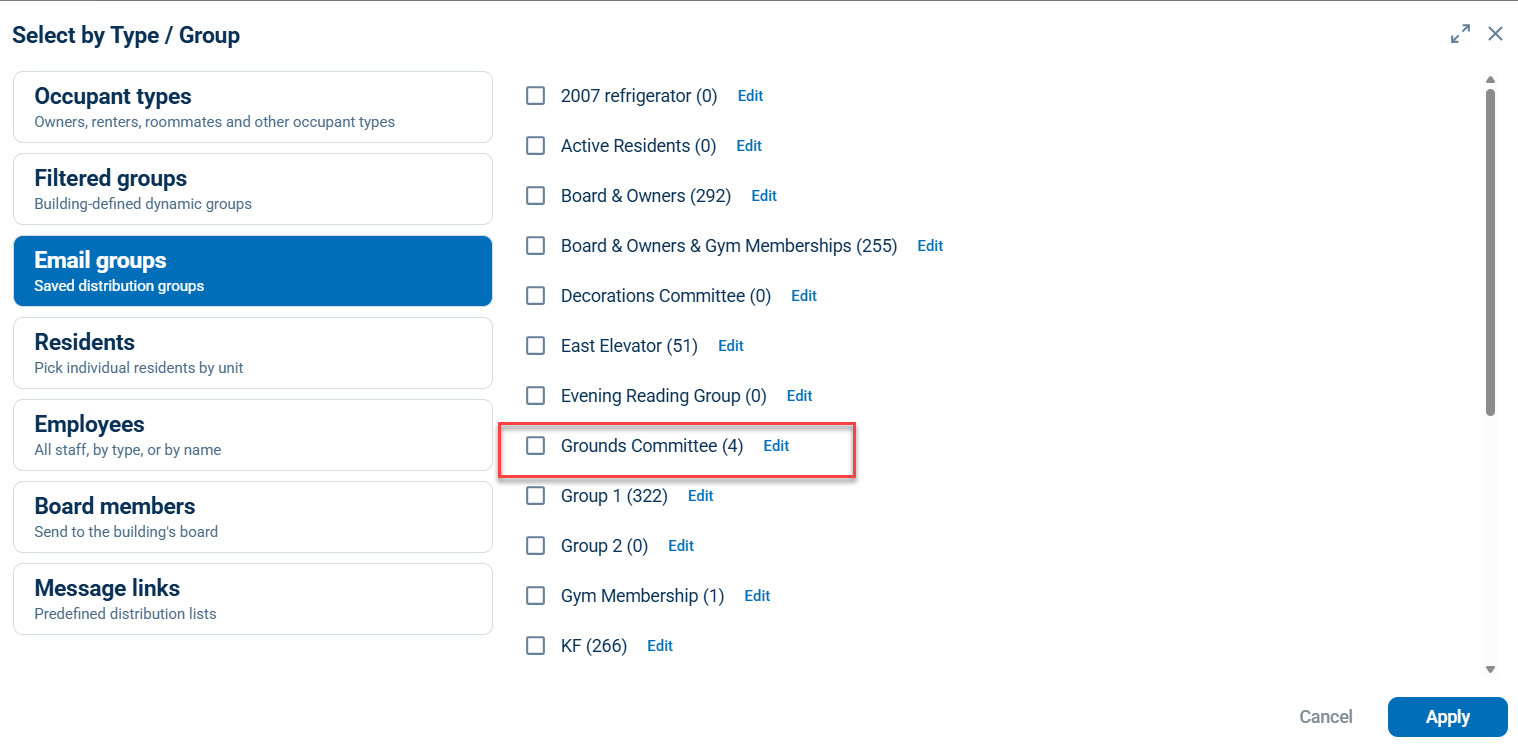
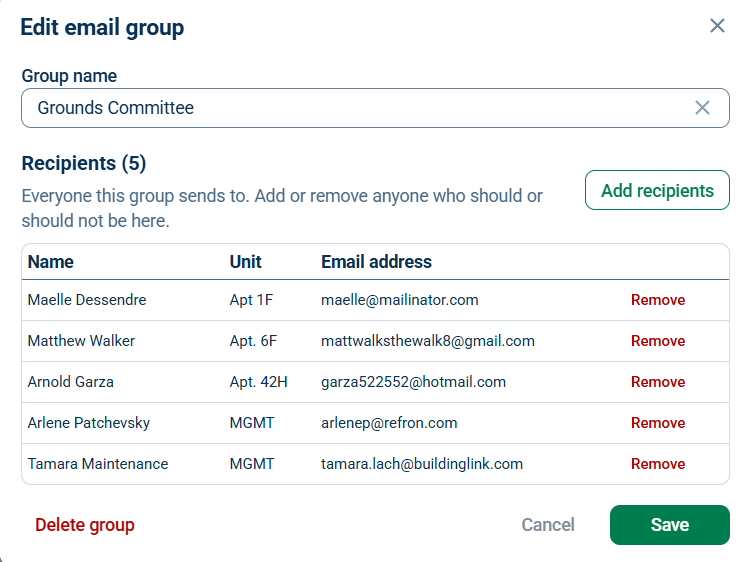
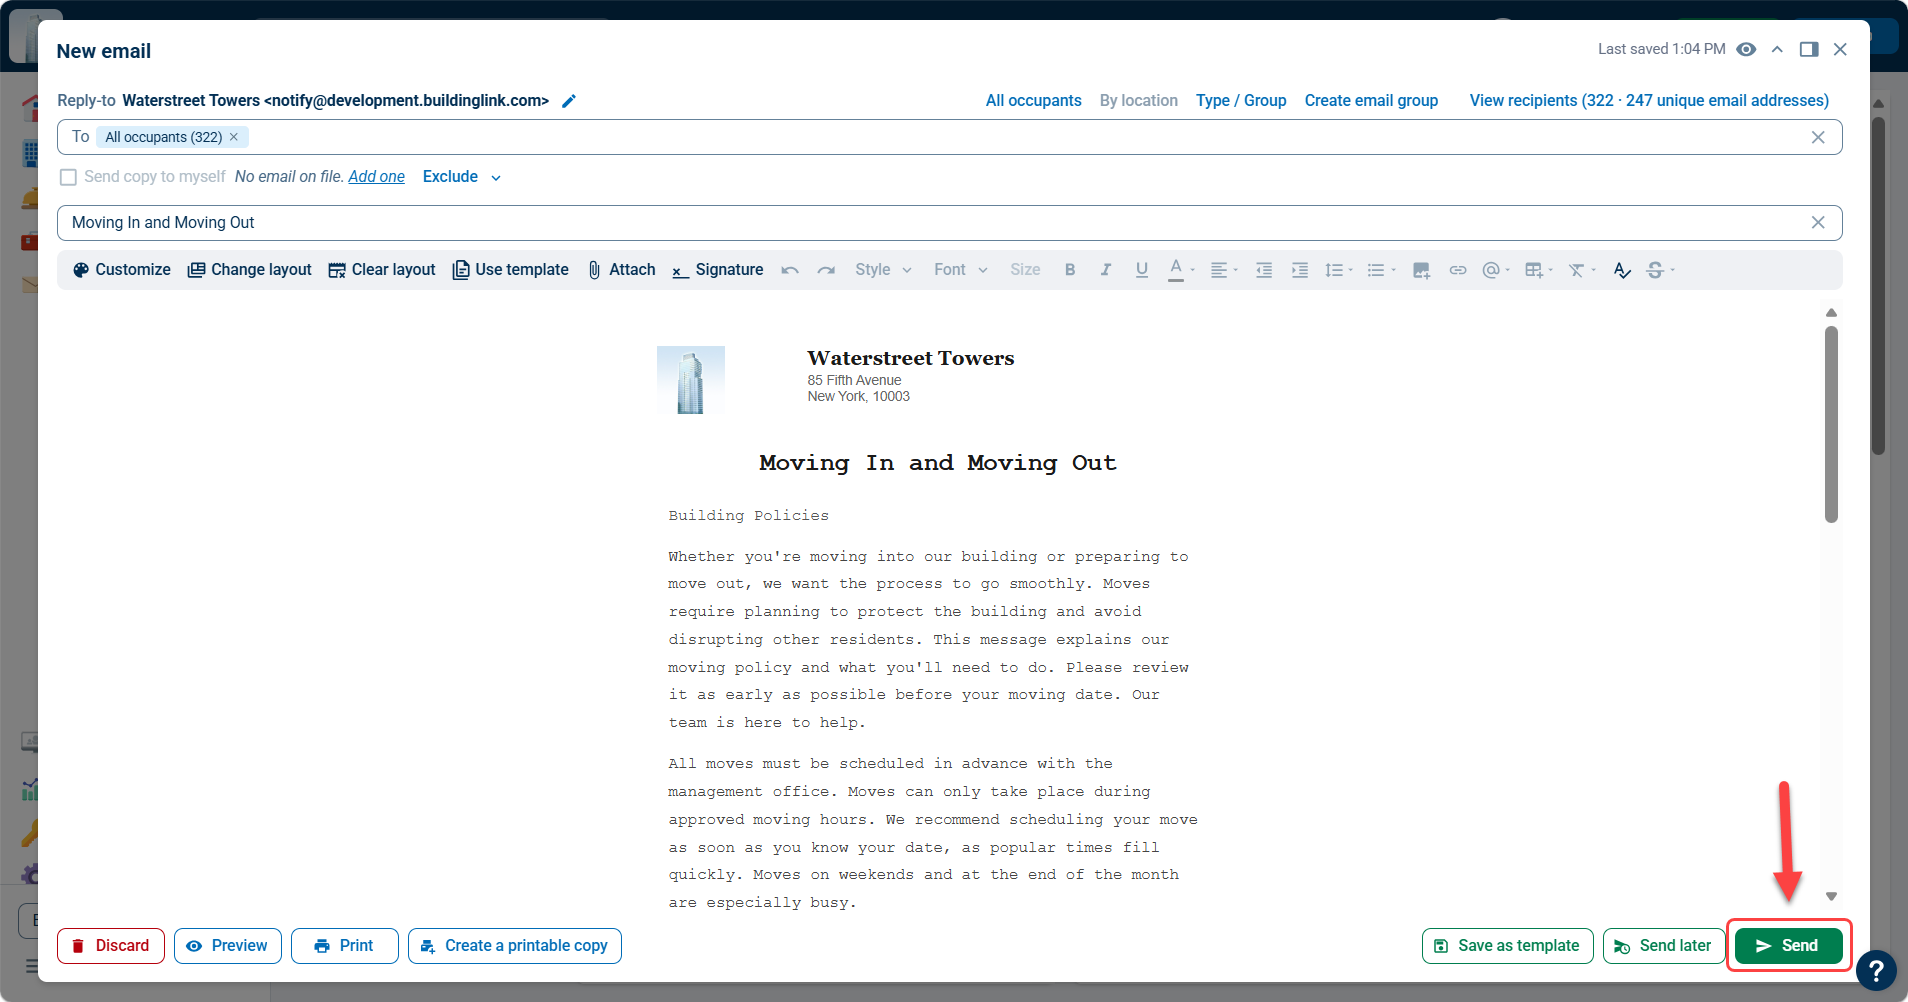
Next, choose who should receive the email by typing in specific units, occupants, or employees using the "To" field or by clicking any of the options via the blue links on the right (detailed below). To save your recipients to an email group by click Create email group, in following popup type a group name and click Save.
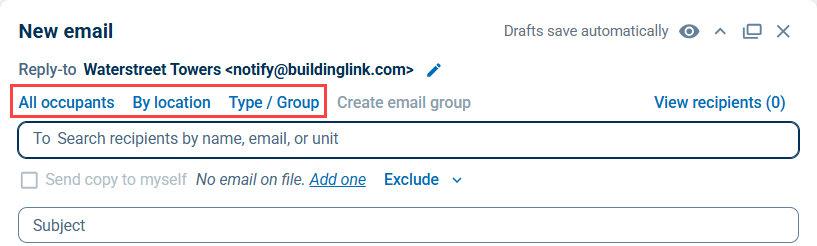
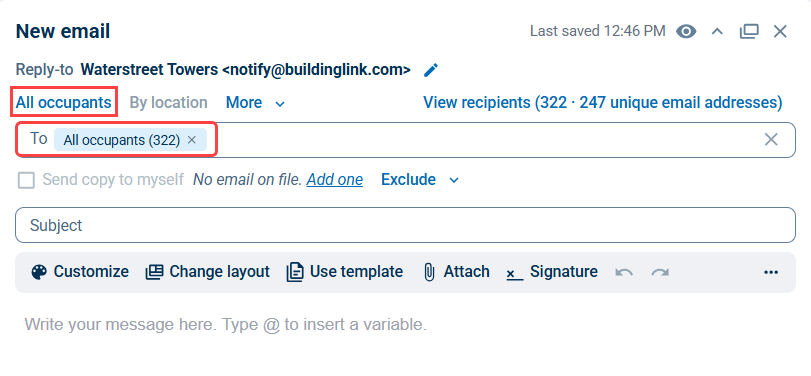
All Occupants: This allows you to email all residents/occupants in the BuildingLink database.
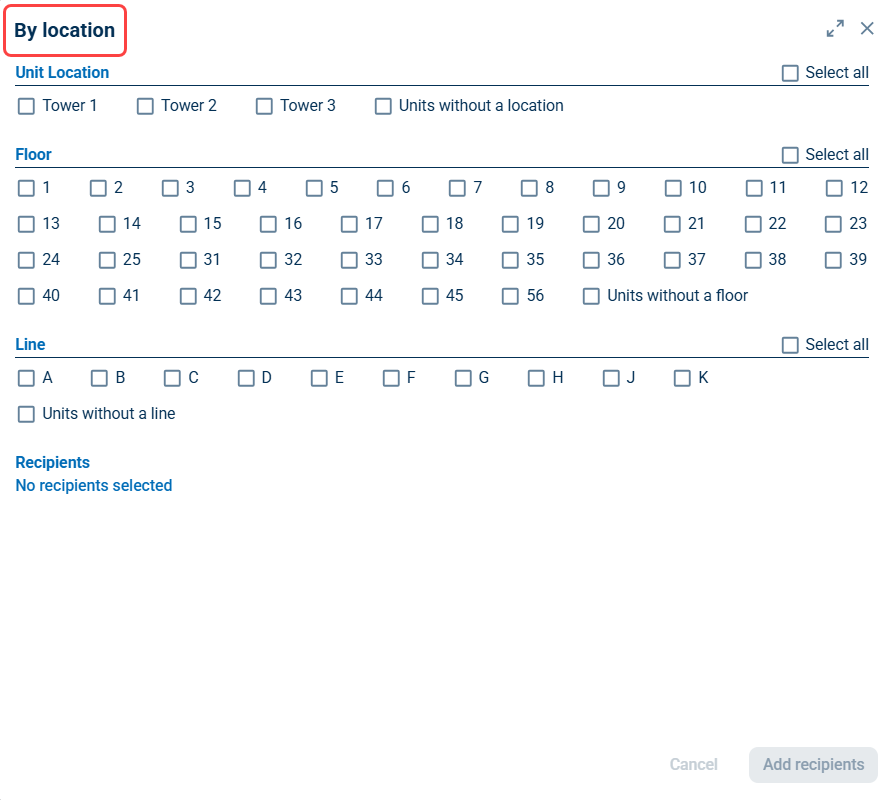
By location: This allows you to select occupants based on their location. You can choose to email everyone on the East side of the building, for example, or everyone on the A line.
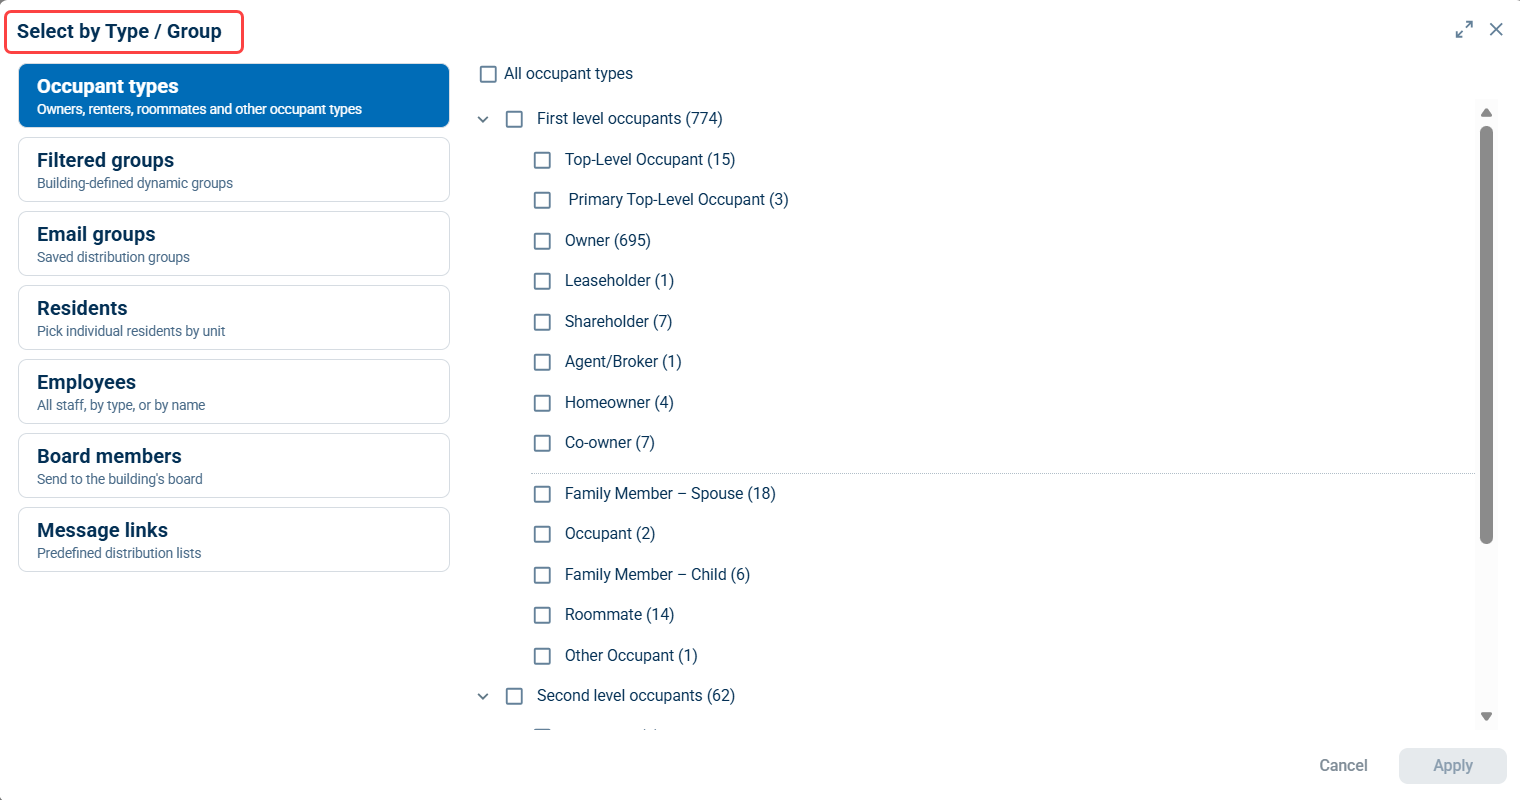
Type/Group:
- Occupant types: This allows you to select occupants based on their type, such as Owner, Renter, Roommate, Family Member, etc.
- Filtered groups: This allows you to choose a specific filtered group.
- Email groups: This allows you to select and edit a specific email group.
- Residents: This allows you to select occupants based on units.
- Employees: This allows you to email all employees, all employees of a specific type (Ex. Front Desk or Management) or select specific employees by name.
- Board Members: If Board Members are applicable at your property, and they are coded in the system, you can also select them here.
- Message Links: If you've created message links in your Building Directory (Ex. Email the Board, Email the Communications Committee), you can email those groups by selecting Message Links.
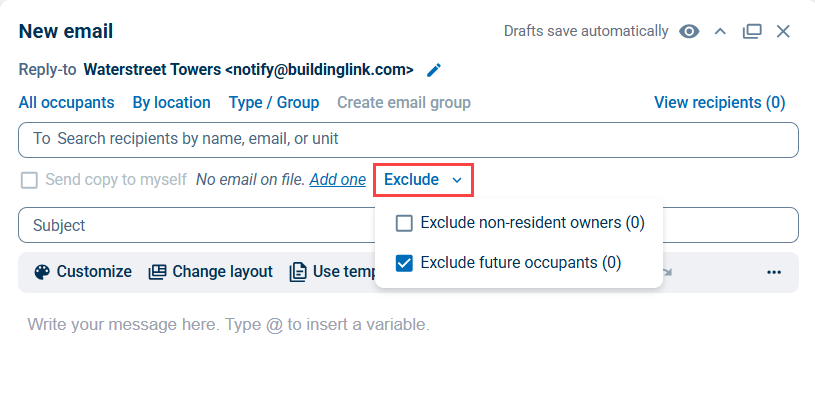
Exclude: This allows you to "Exclude non-resident owners" which will omit any owners with renters in their units from your recipient list, so that only people actually living on-site will receive the email. If you have future occupancy enabled for your property, you will also see the option to "Exclude future occupants" here.
Additional Recipient Options
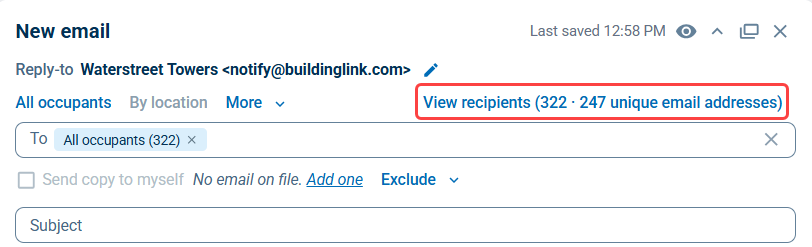
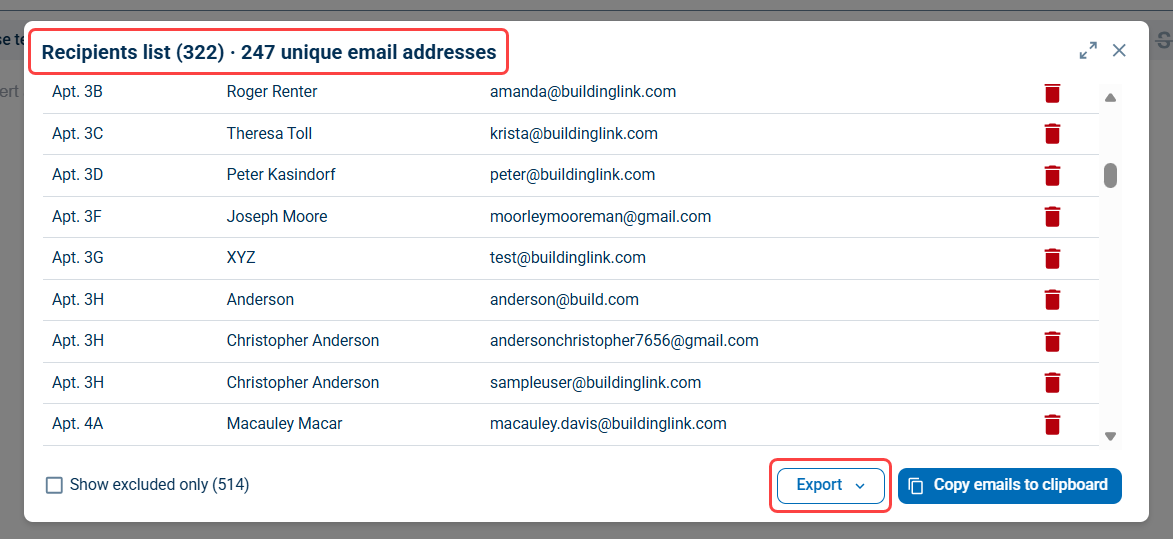
If you'd like to view a list of your selected recipients’ names and email addresses, click the blue View Recipients link. A box will pop up that displays all contacts in the “To” field of your email. If you'd like to export this, you can select the Export button in the bottom right corner.
Once you’ve selected your recipients, type in the Subject and Message for your email then click Send.
Formatting Options
Craft more engaging and professional-looking emails with our improved formatting tools. Organize the content in the body of your email by arranging content blocks: Text, Image, Image + text, Button, or Columns. Content blocks can be rearranged any time and new emails start with a text block.
Click the plus sign at the bottom of a block to view a list of options and select one to add that type to the body of the email. Each type can be formatted even further by editing its layout, padding, and position between the other blocks.
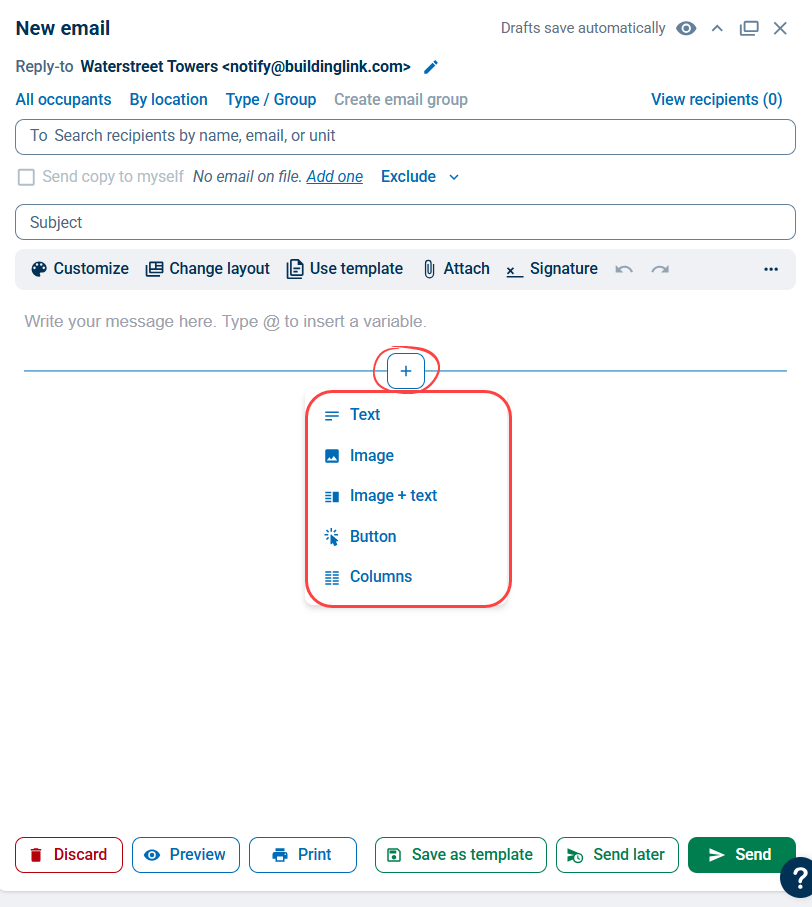
Select Text to insert a text block.
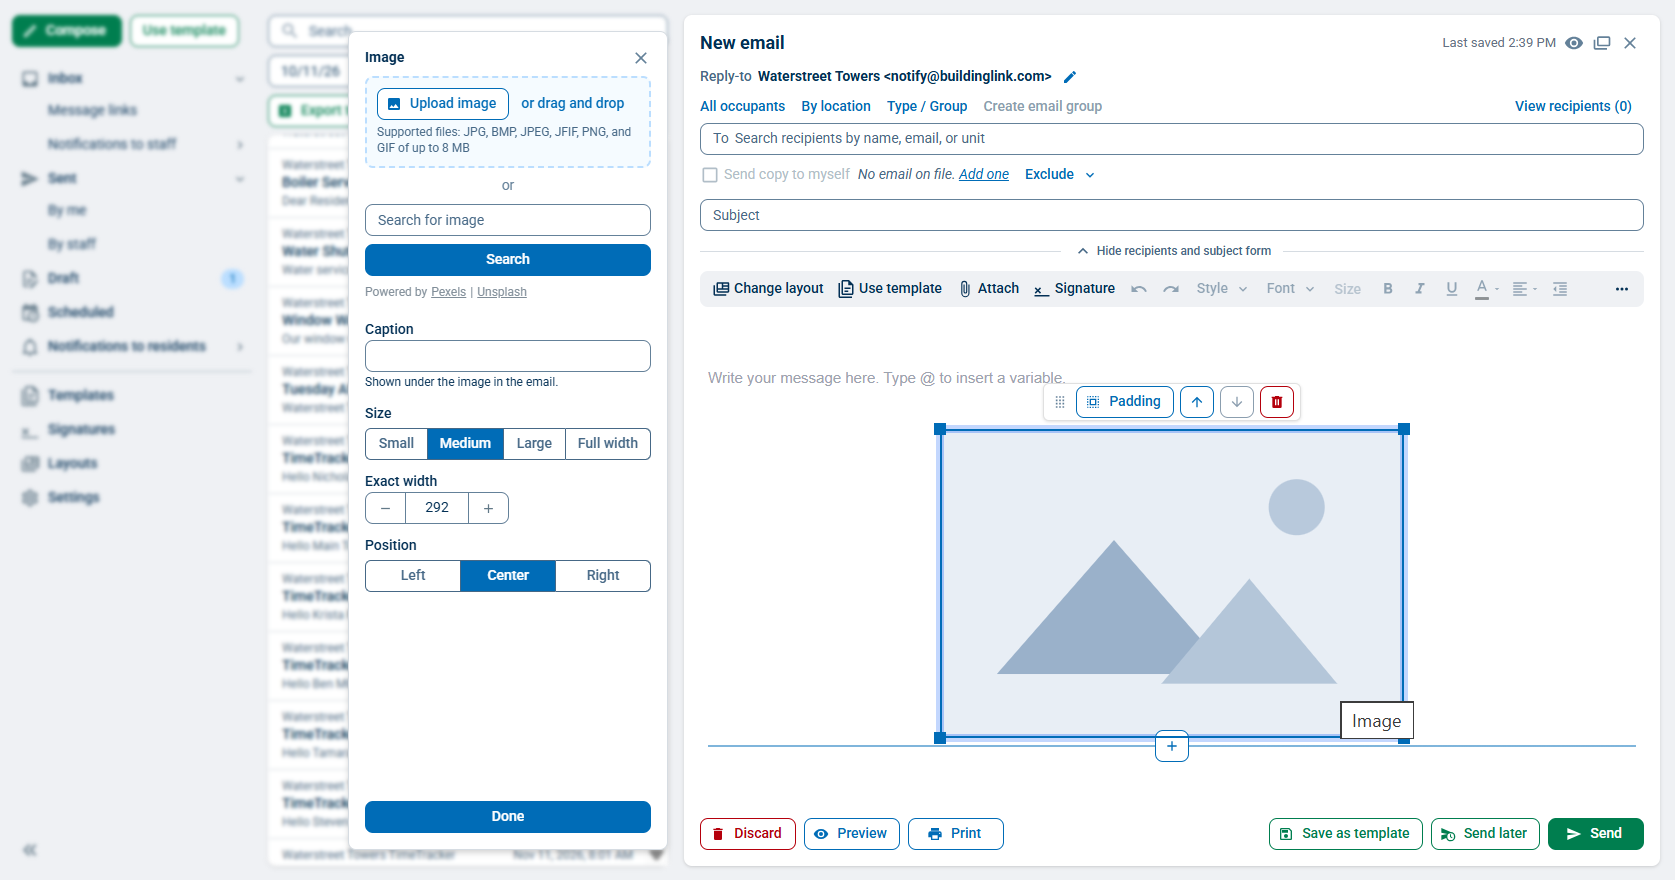
Select Image to insert an image block. You can either upload an image or search an image gallery. If you search for an image in our gallery, you can enter in a keyword and the image gallery will provide you with a list of images you can use.
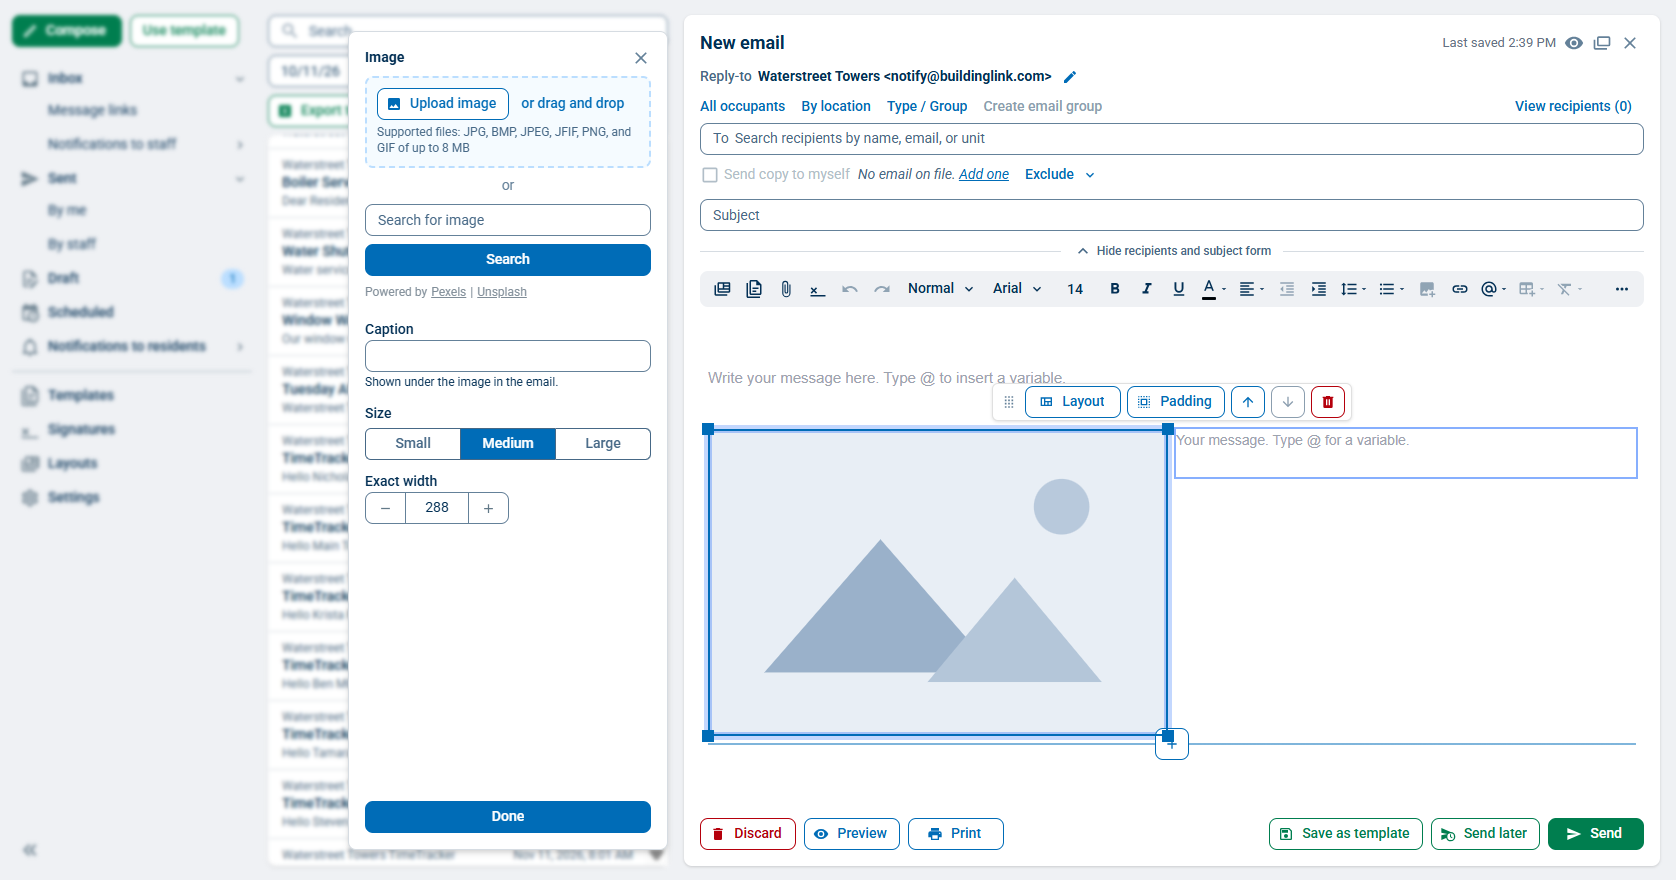
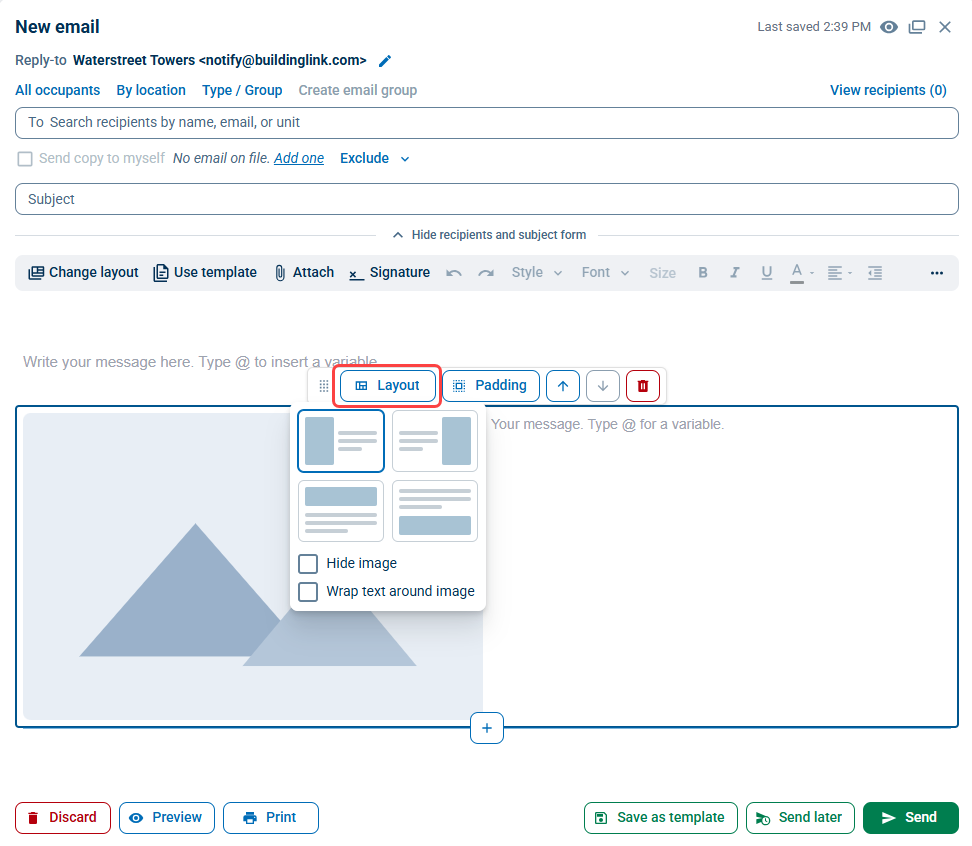
Select Image + text to insert a combination image and text block. Click Layout to select a different structure for the block.
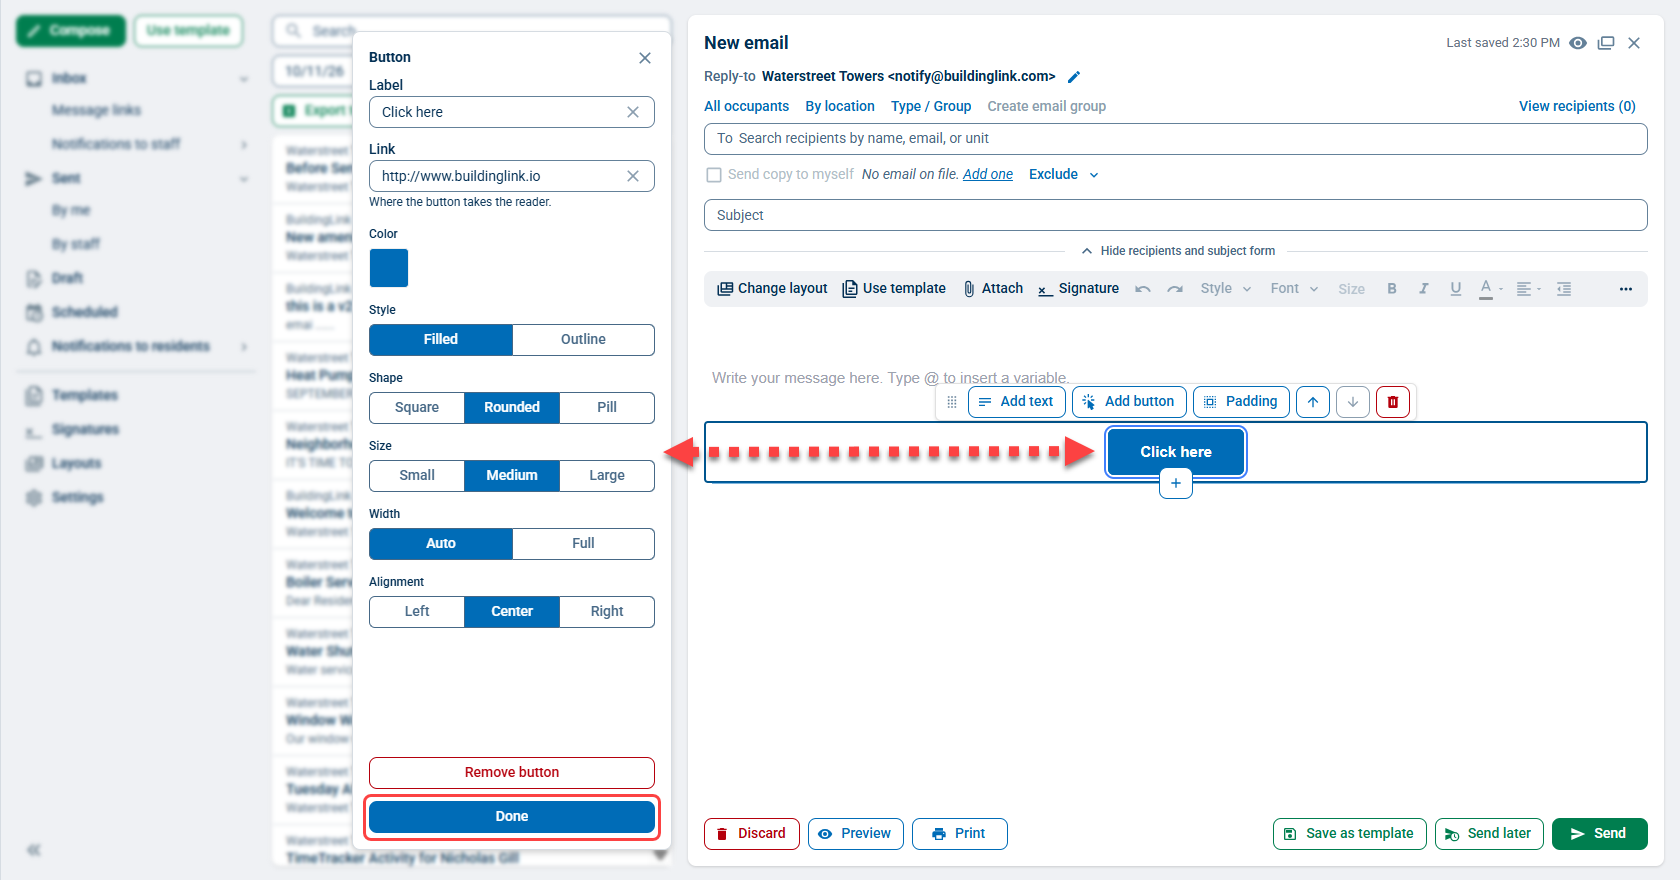
Select Button to insert a clickable button directly into any email. Include a Label, Link, and determine the look of the button using the options that appear after adding the block.
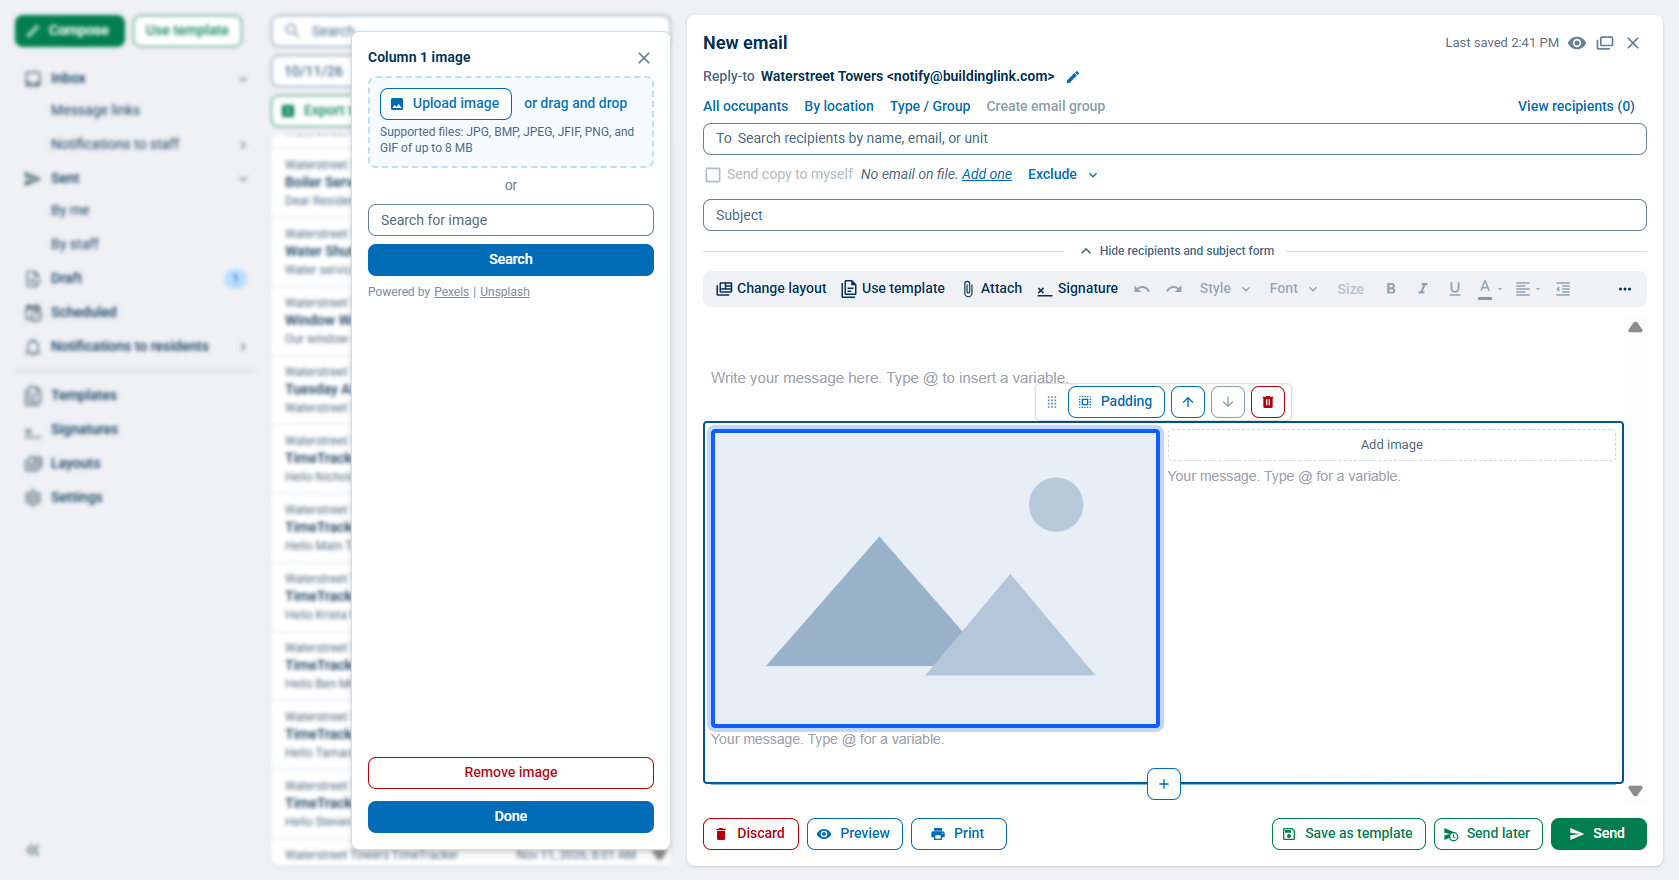
Select Columns to insert a block of two columns that can each have an image and text.
Using Layouts
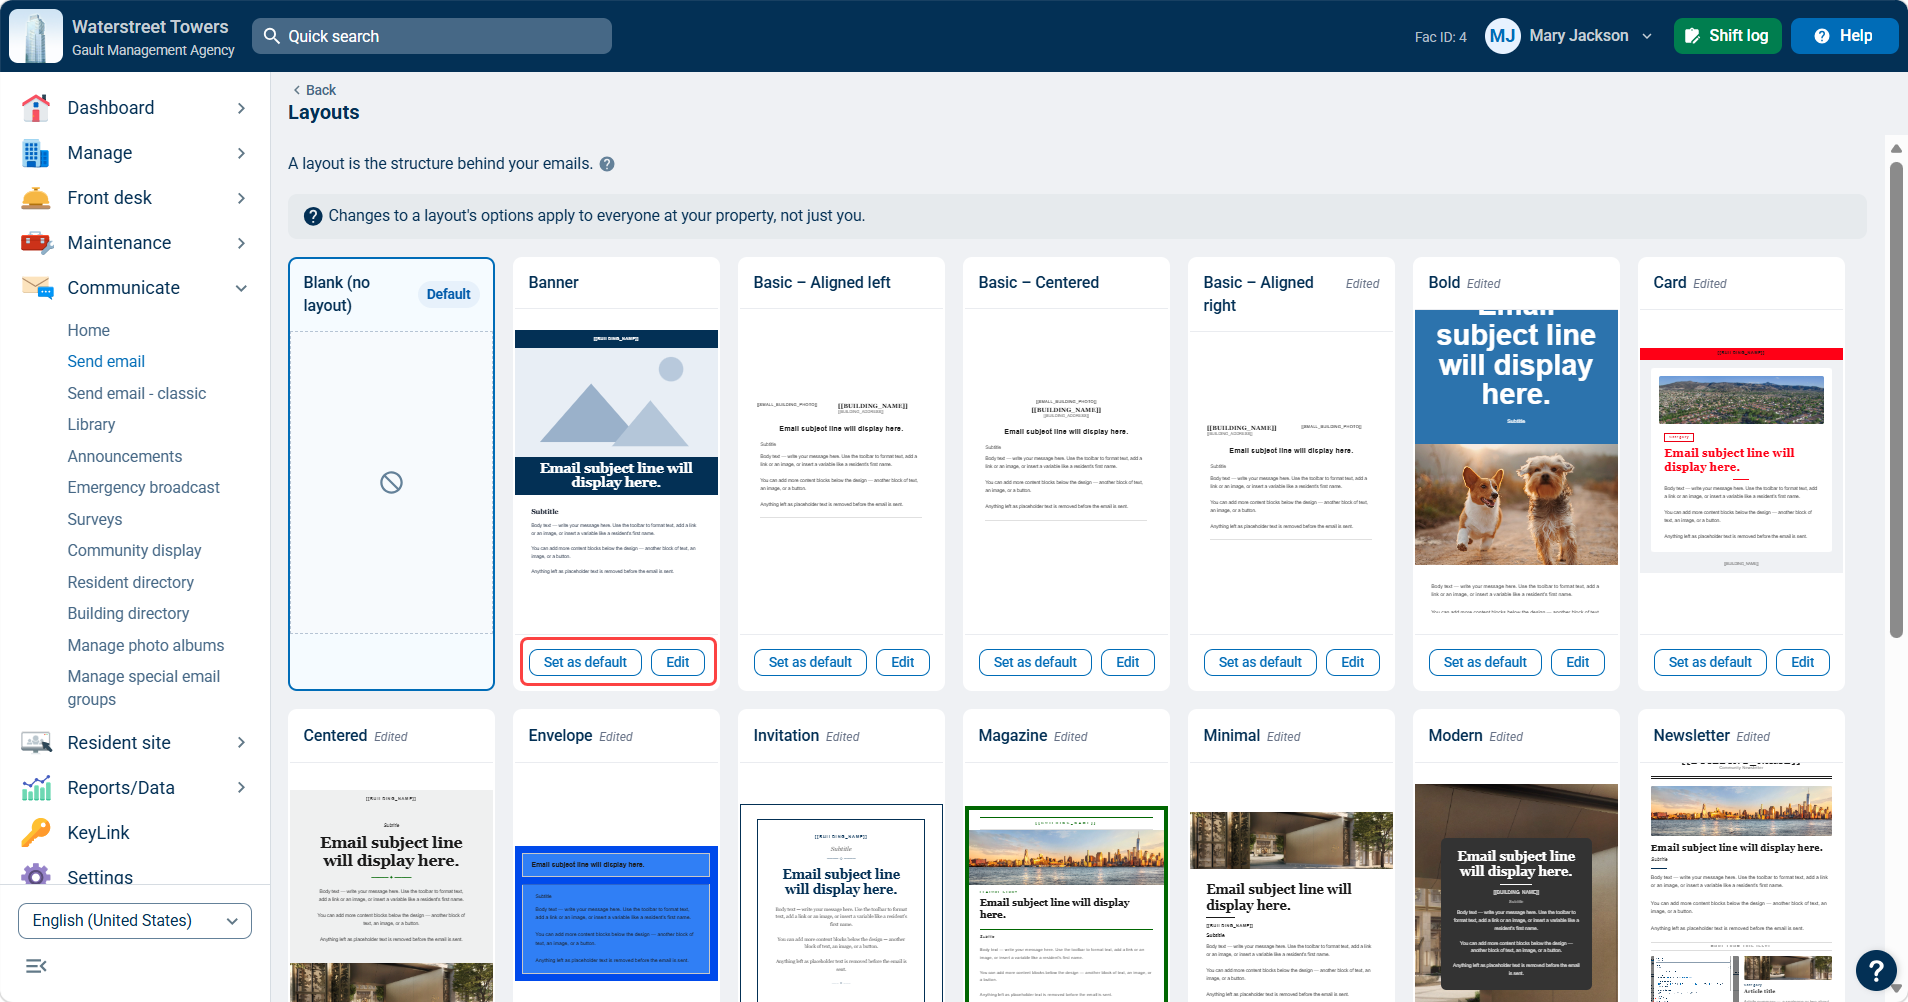
Select the structure of your email by using a Layout. A layout sets how your email looks and you can switch layouts anytime while writing. New emails start with your default Layout.
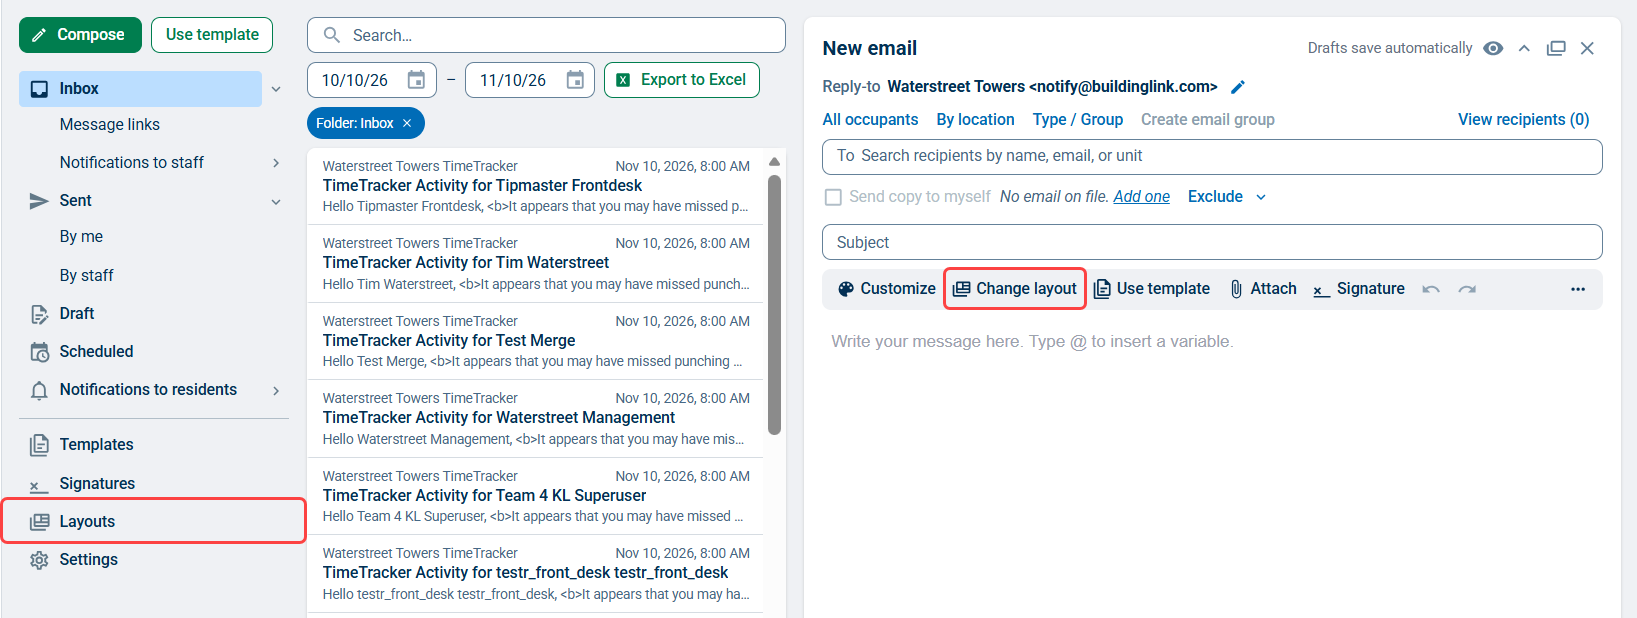
Click Change layout when composing an email to choose and apply a different layout.
Click Layouts at the bottom of the mailbox menu to view available layouts. Click Set as default to use that Layout for every new email automatically. Click Edit to make changes to the layout.
Using Templates
Templates are complete, ready-to-send emails and you can save any email as a template.
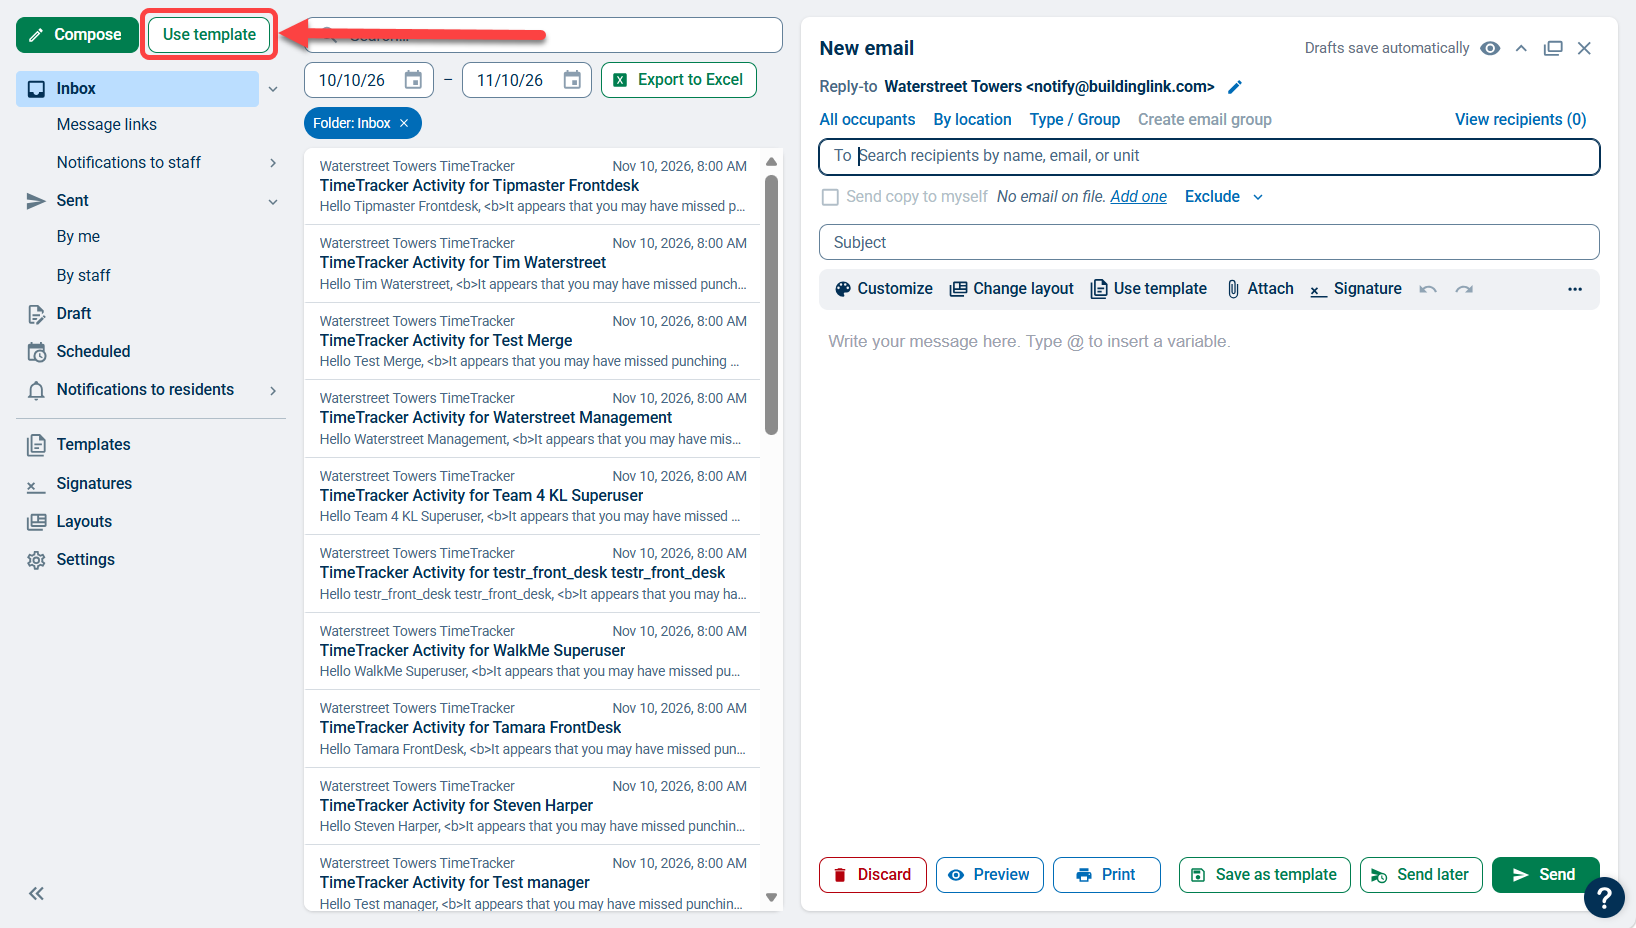
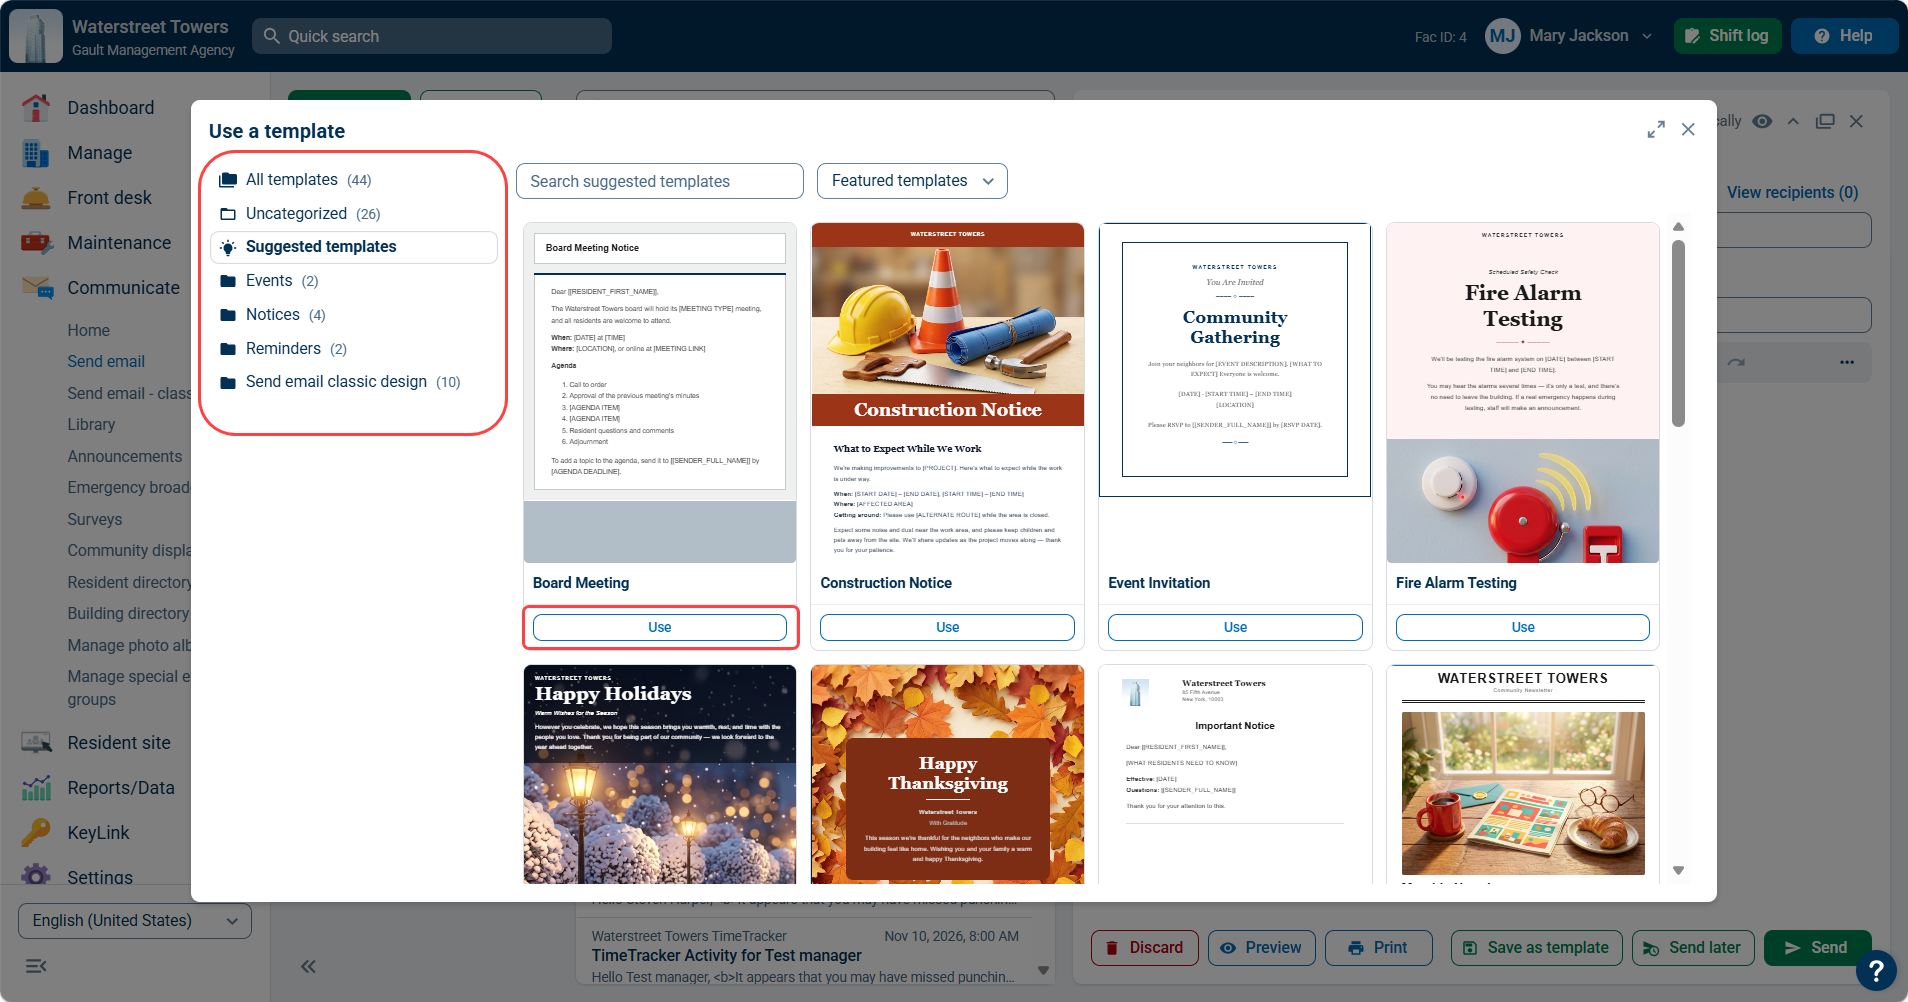
Click Use template at the top left corner of the page to start a new email using a saved template. Click the Use button under a saved template to start a new email using that template.
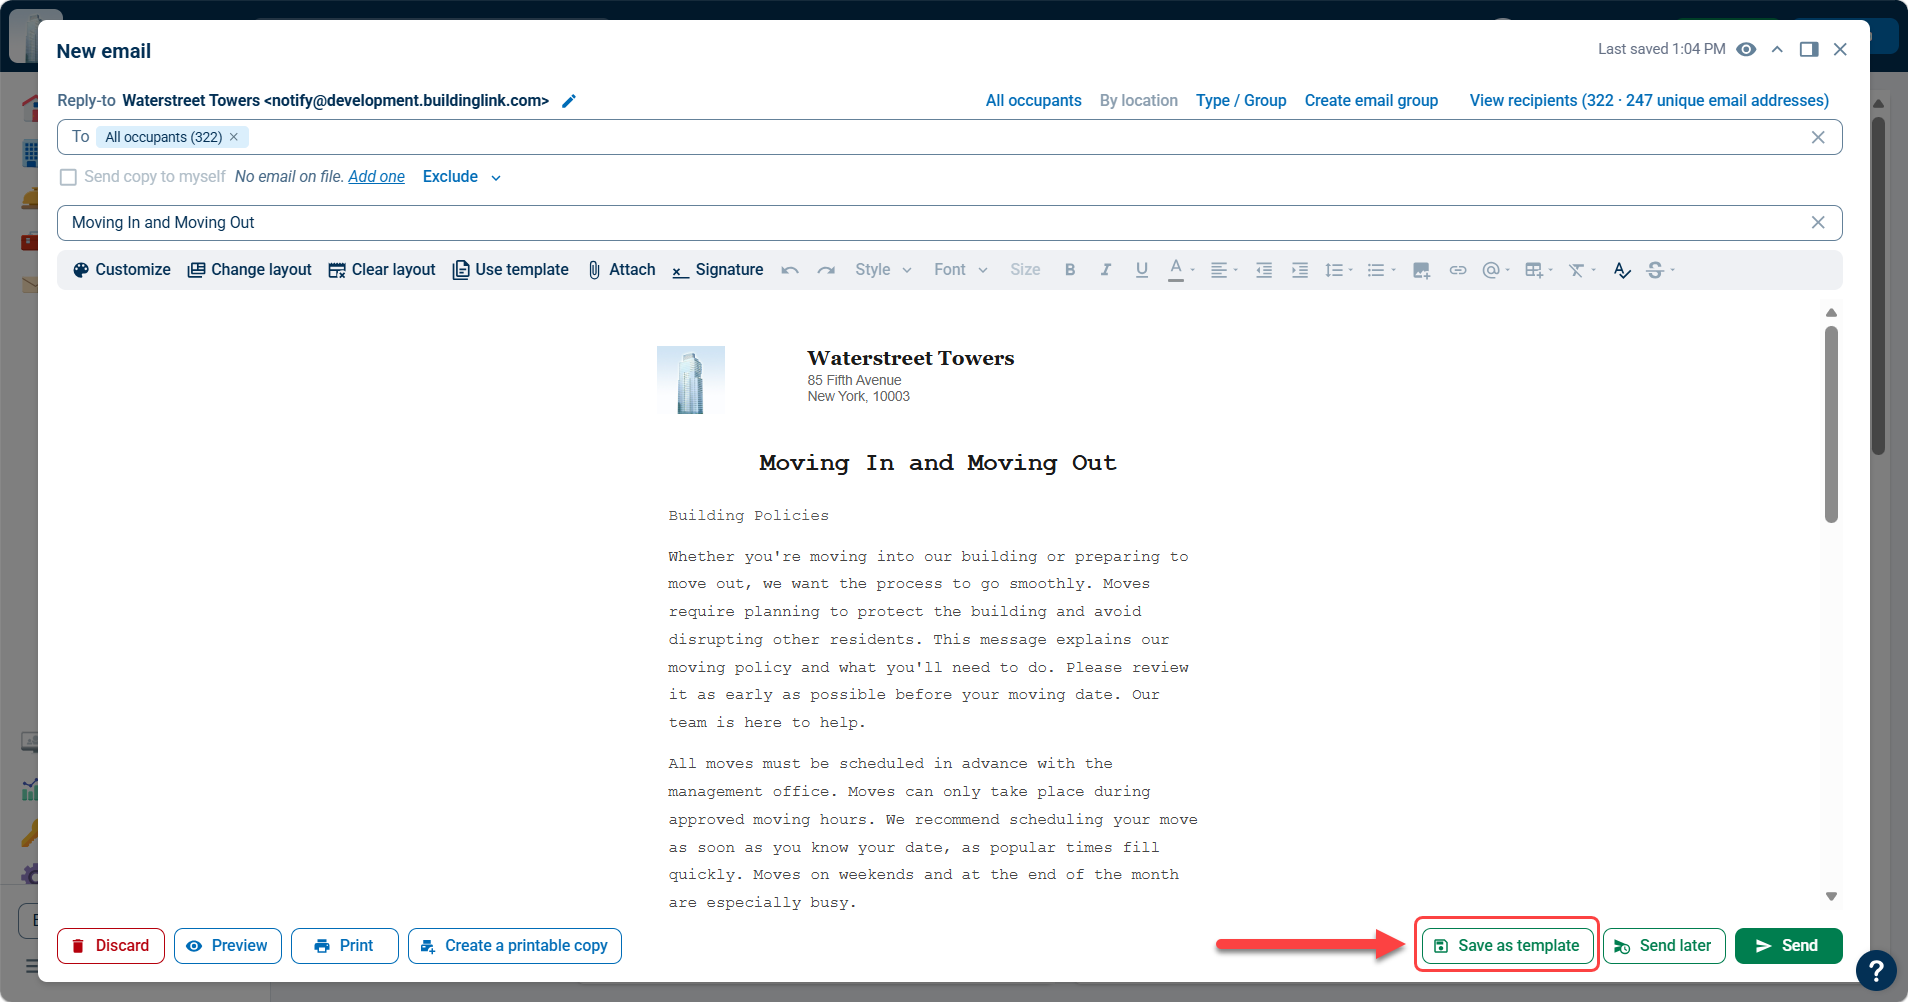
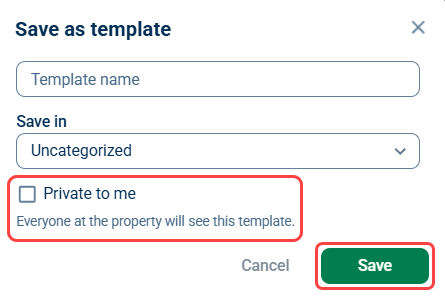
Click Save as template at the bottom of an email to save it as a new template.
Add a template name, and select the folder it will be saved to.
If you want to make it a template that is only available to your profile, check the Private to me box before saving.
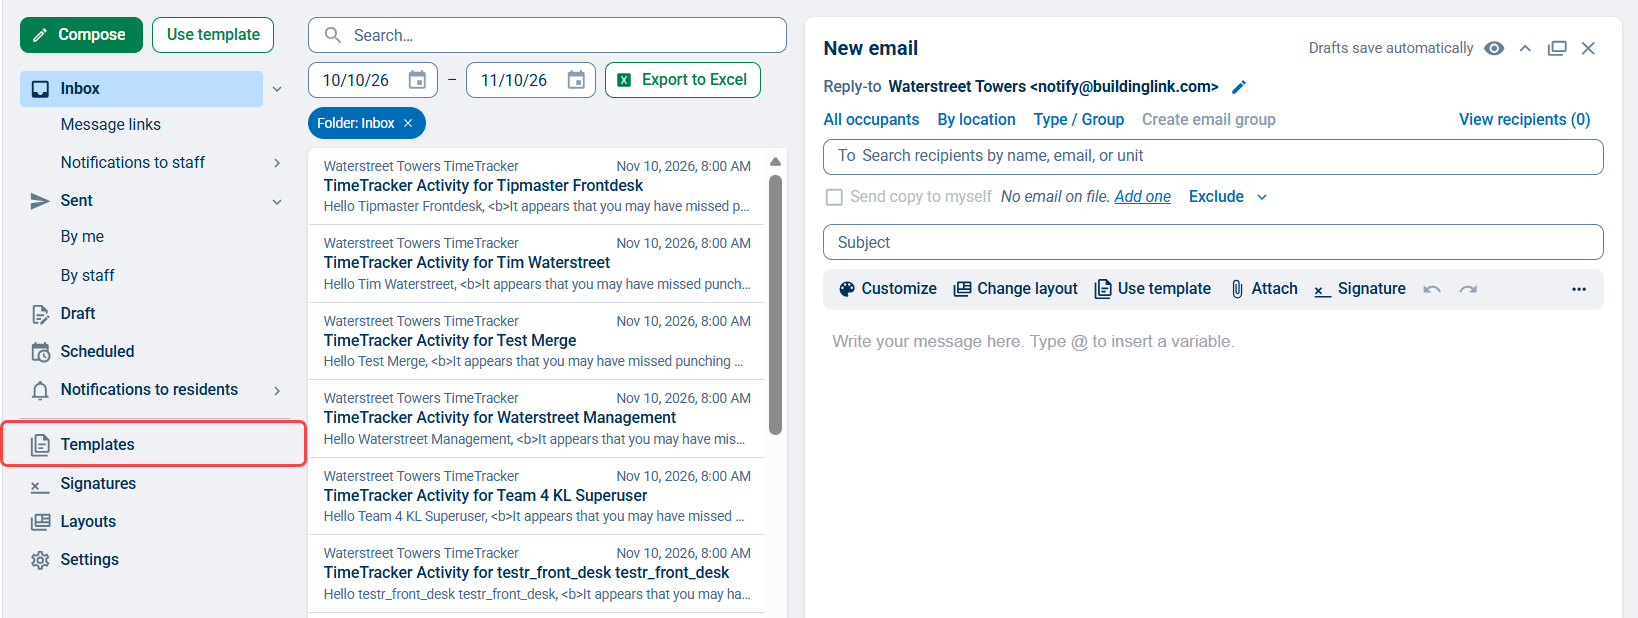
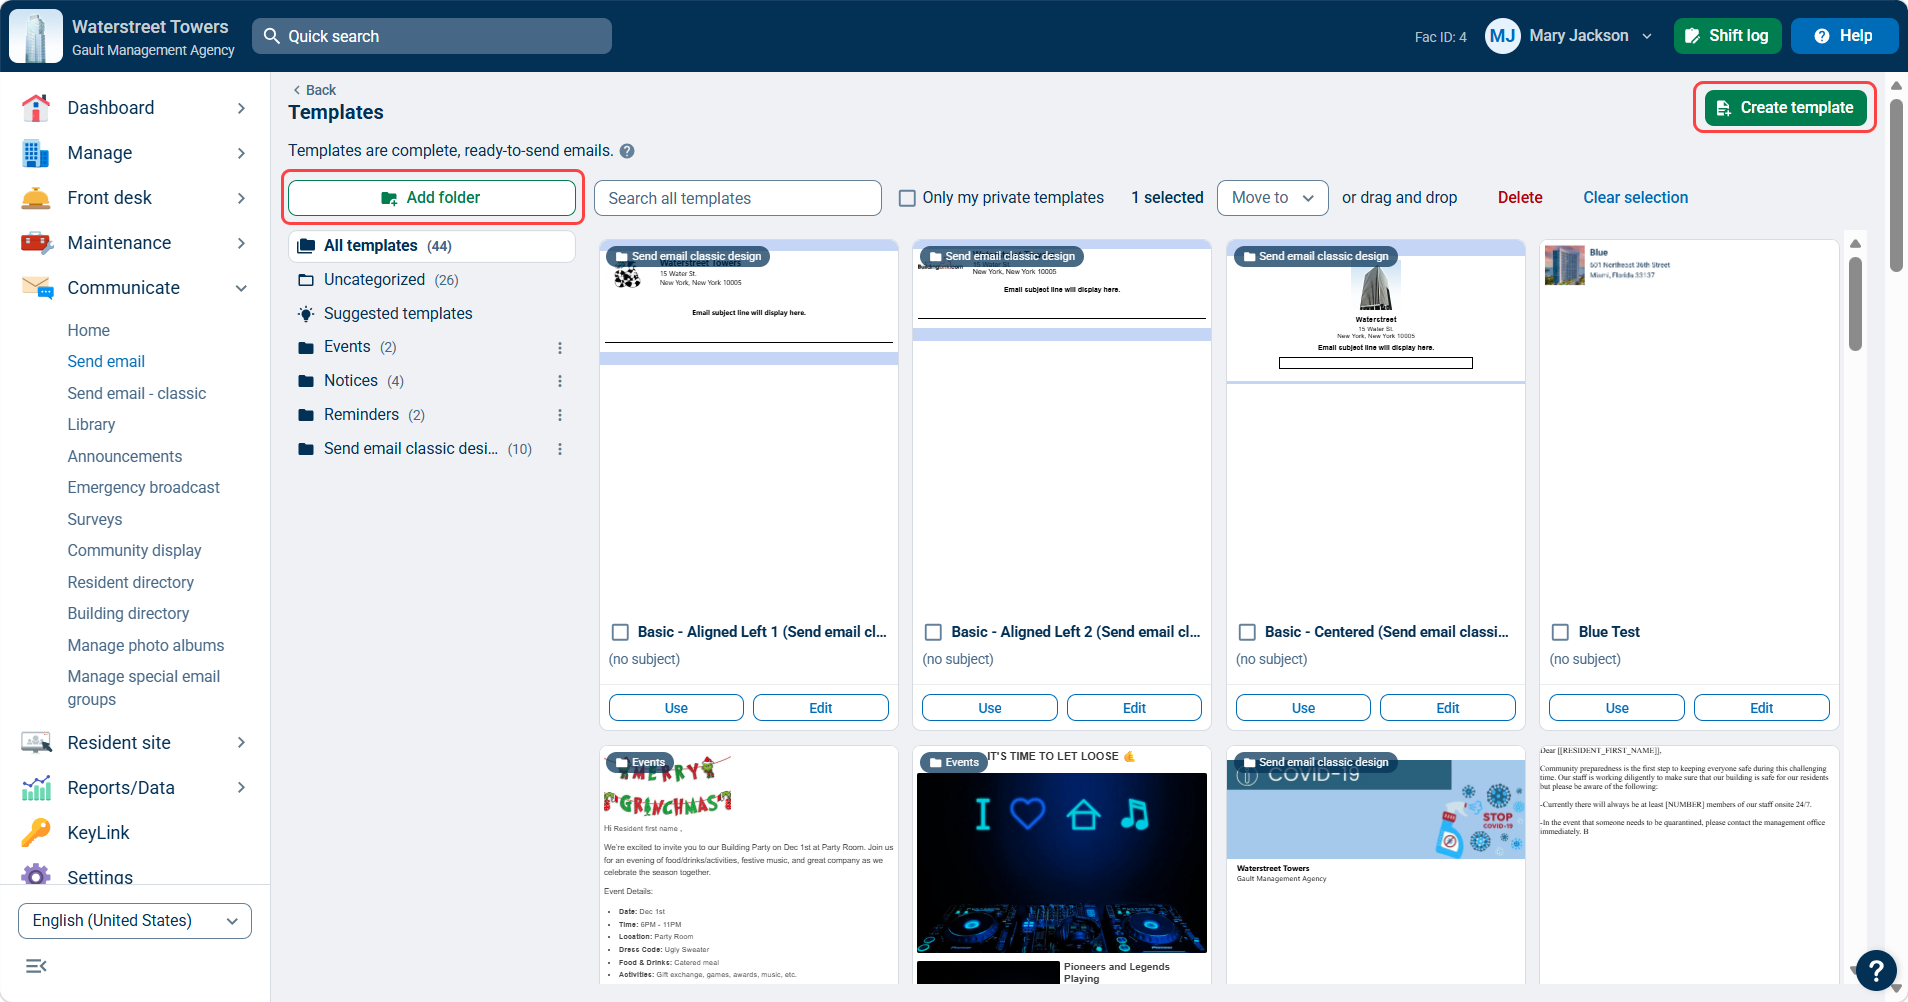
Click Templates at the bottom of the mailbox menu to view all saved templates.
Click Create template at the top of the page to start a new template from scratch.
Click Add folder to create a new folder to save templates for more organization.
Adding Images
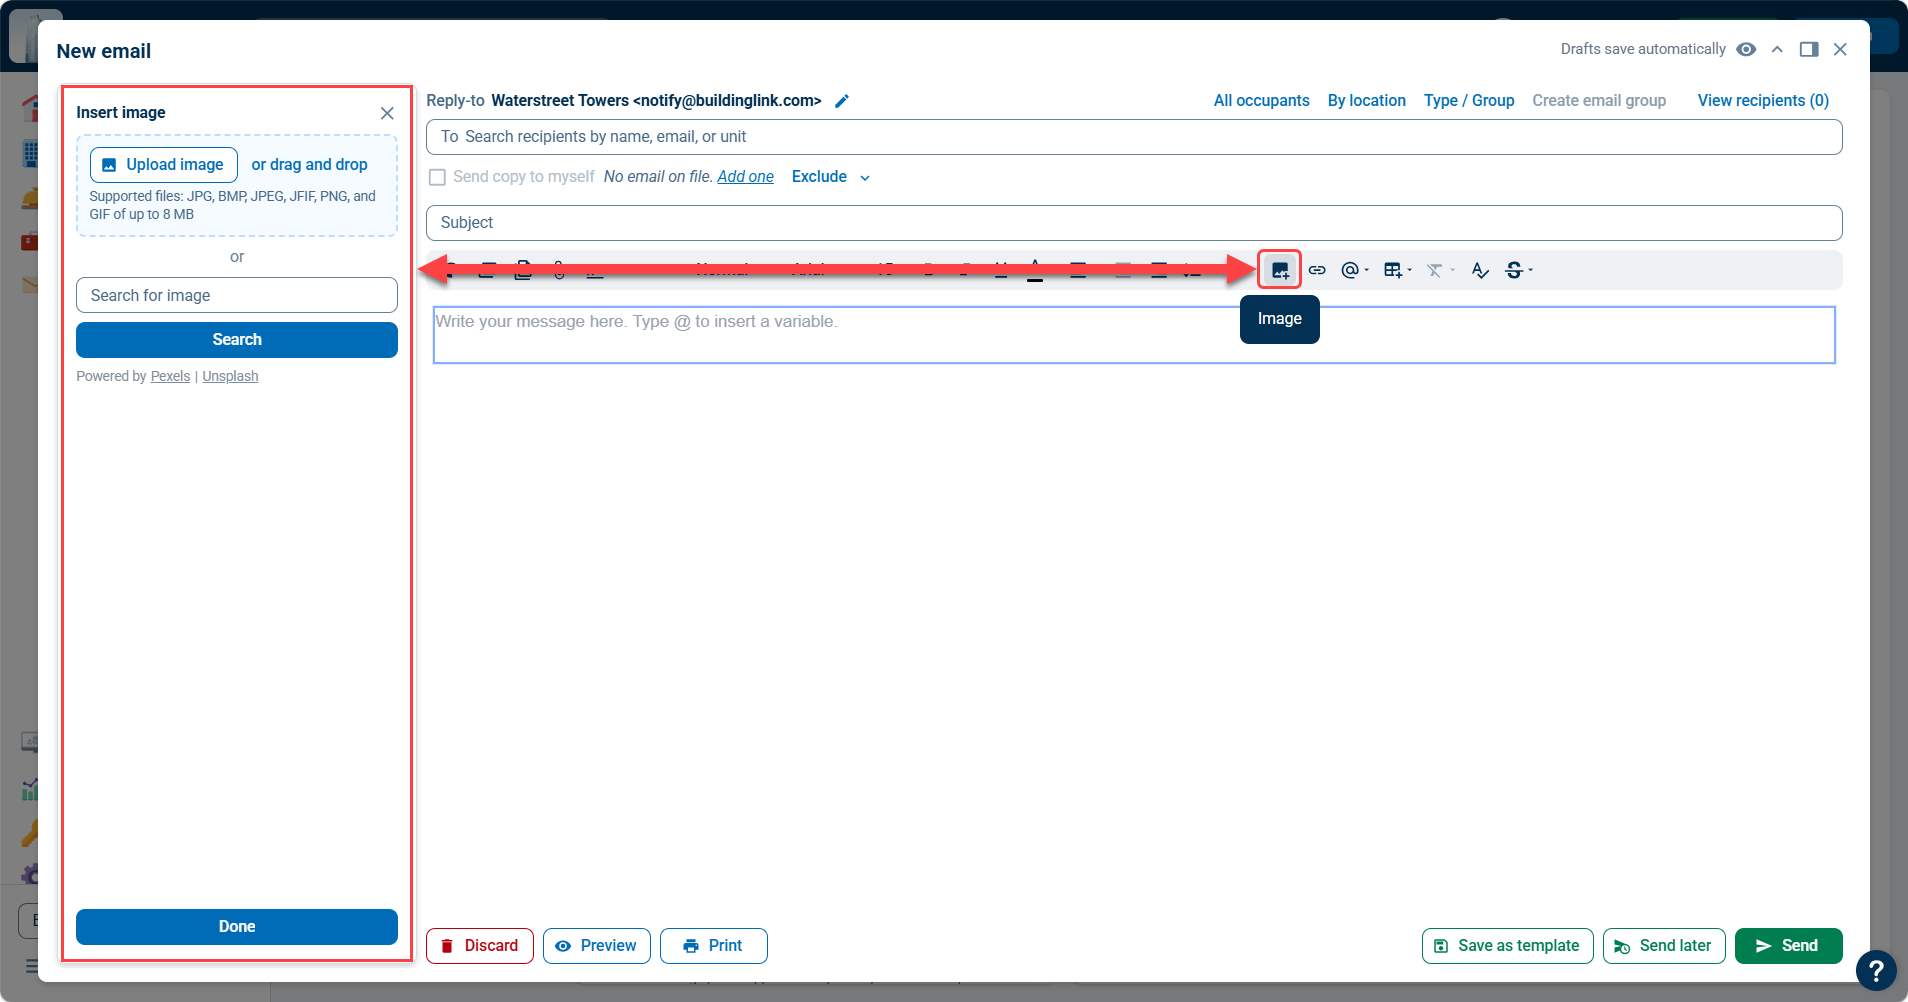
You can embed images into your email body by clicking on the Image icon in the toolbar.
You can either upload an image or search an image gallery. If you search for an image in our gallery, you can enter in a keyword and the image gallery will provide you with a list of images you can use.
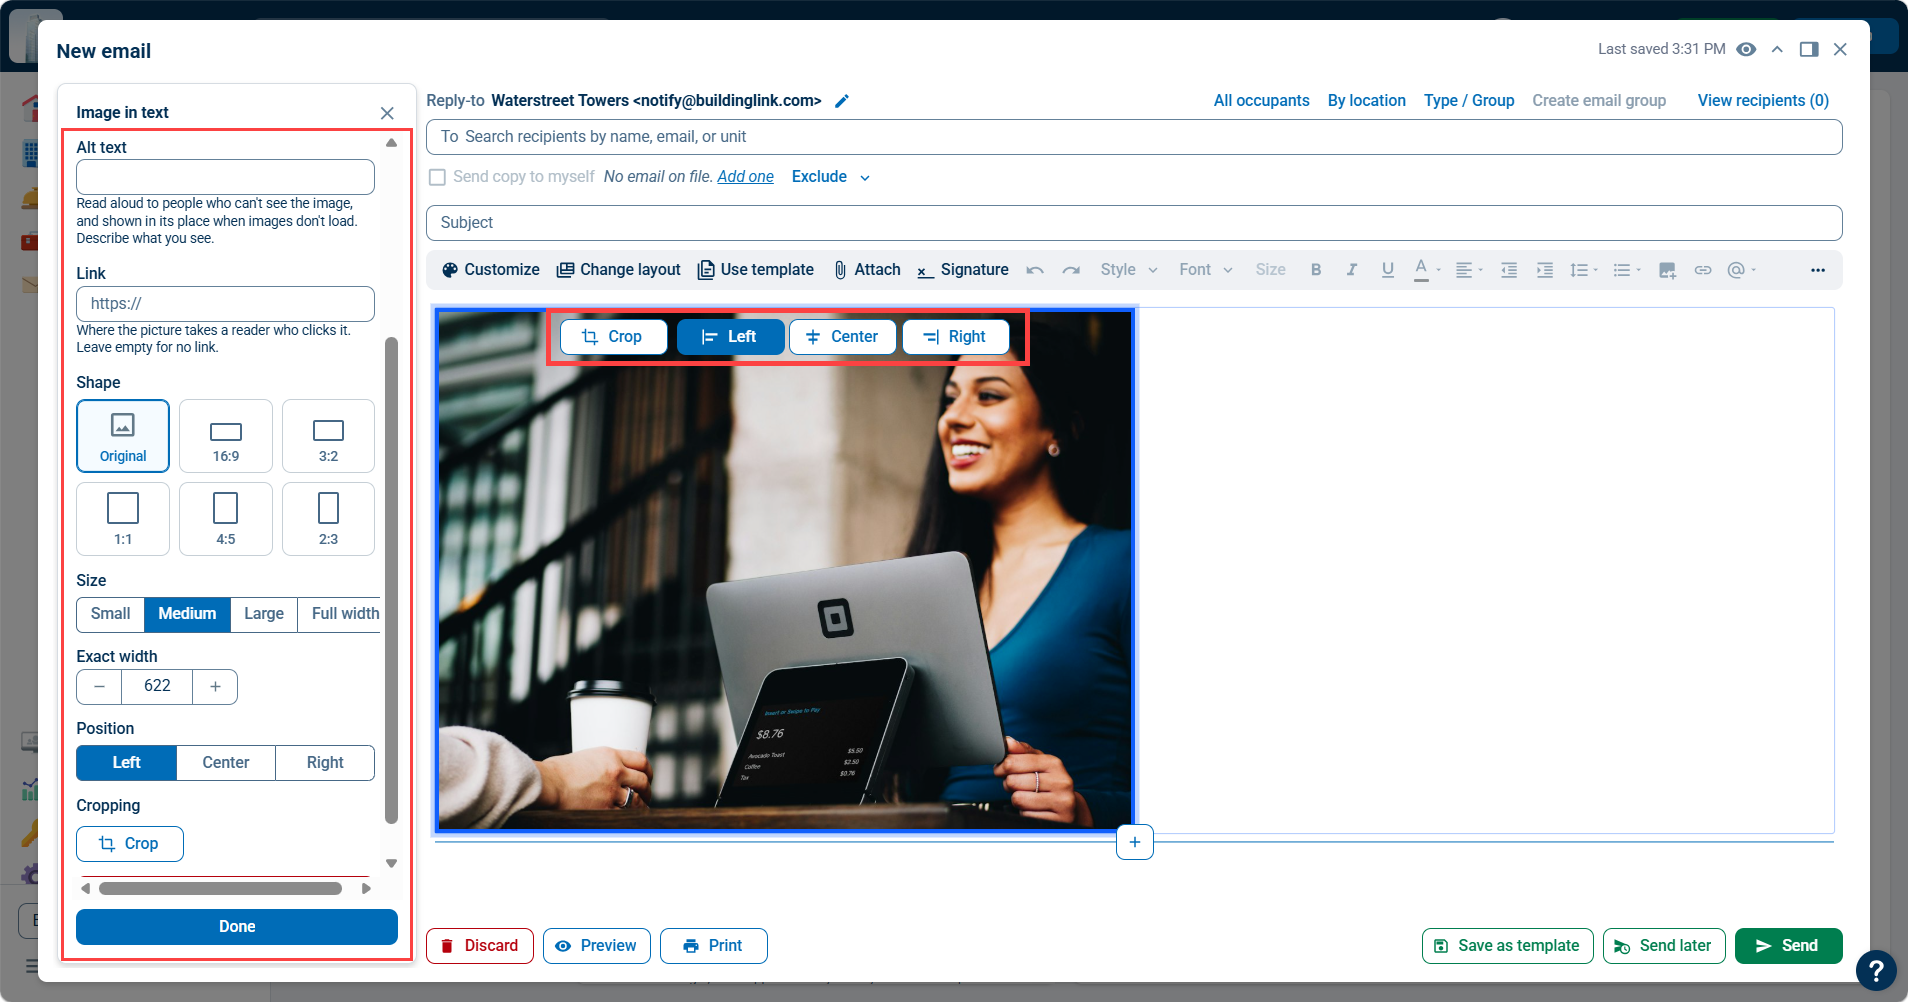
After adding an image, you can make additional edits to the image, including adding Alt text, adding a link to the image, choosing different shapes and sizes, and adjusting the alignment within the body of the email. Click Done to close the image options and continue writing your email.
Adding and Designing Email Signatures
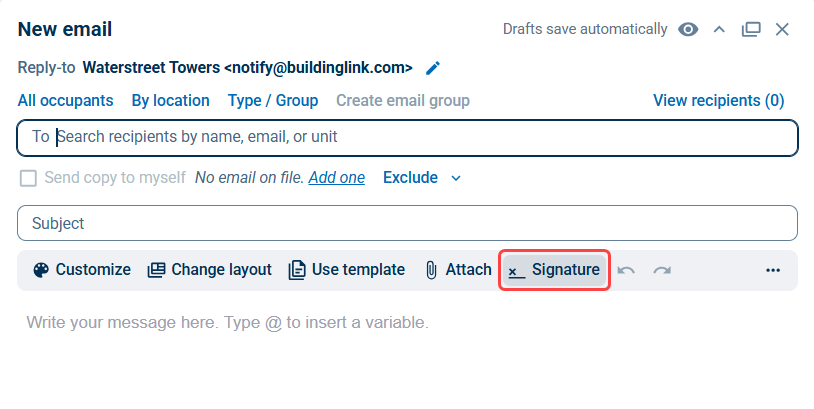
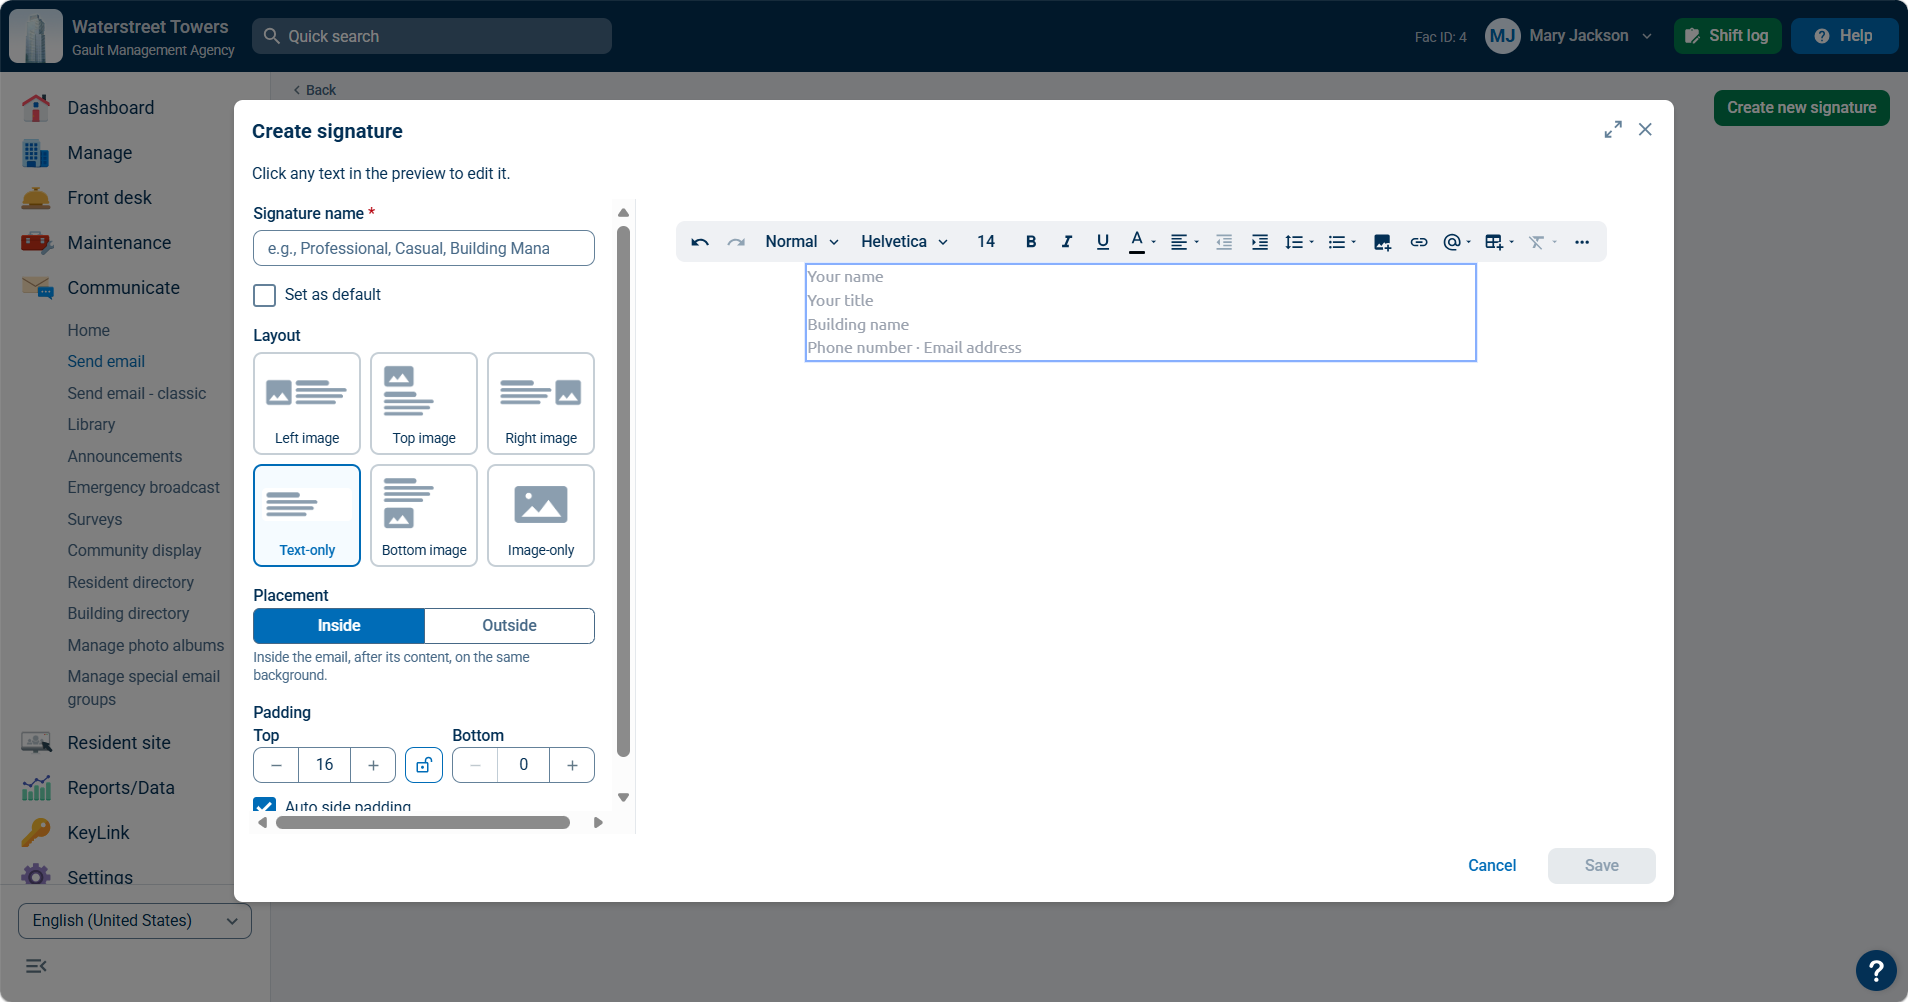
If you'd like to send your emails with customized signatures, click the Signature icon in the editor’s toolbar. If you've already designed and saved any signatures, they will appear below. You can click on any of your signatures to add them to the end of your email.
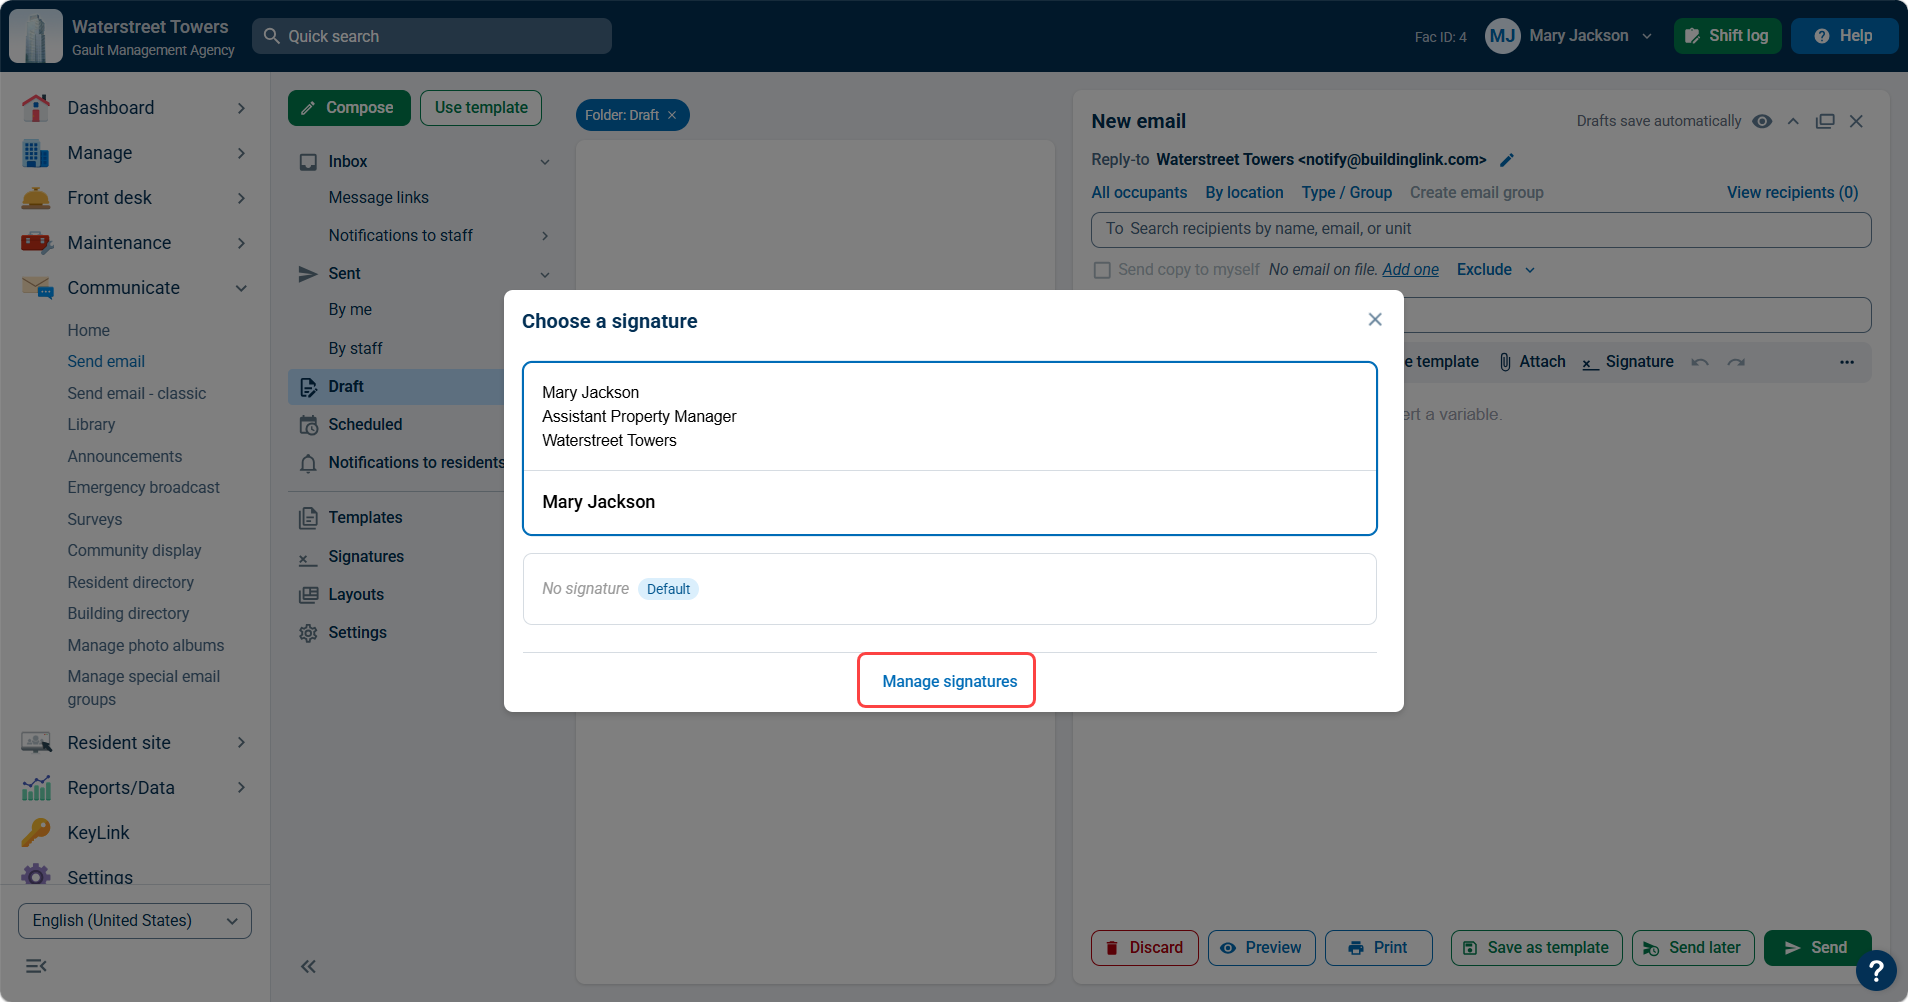
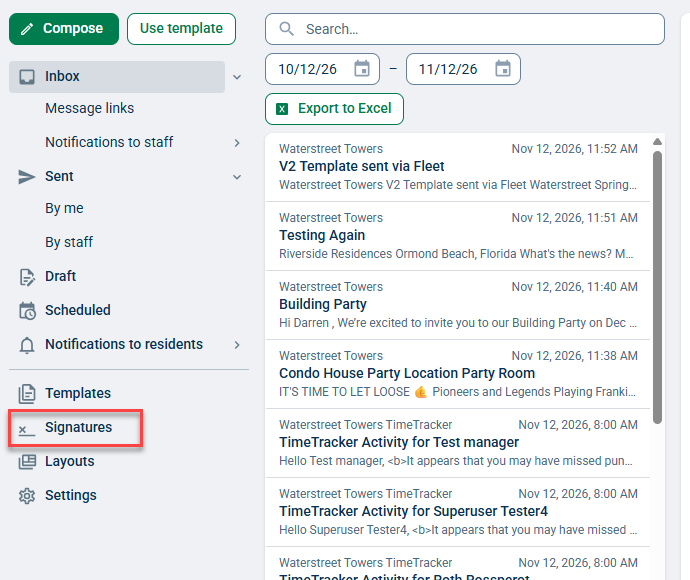
To design a new signature, click Manage signatures or you can click Signatures at the bottom of the mailbox menu to view your saved signatures.
Click Create new signature at the top of the page to add a new signature, or click Edit under an existing signature to make any changes.
Click Set as default to use that signature by default for your emails.

Printing an Email for Recipients
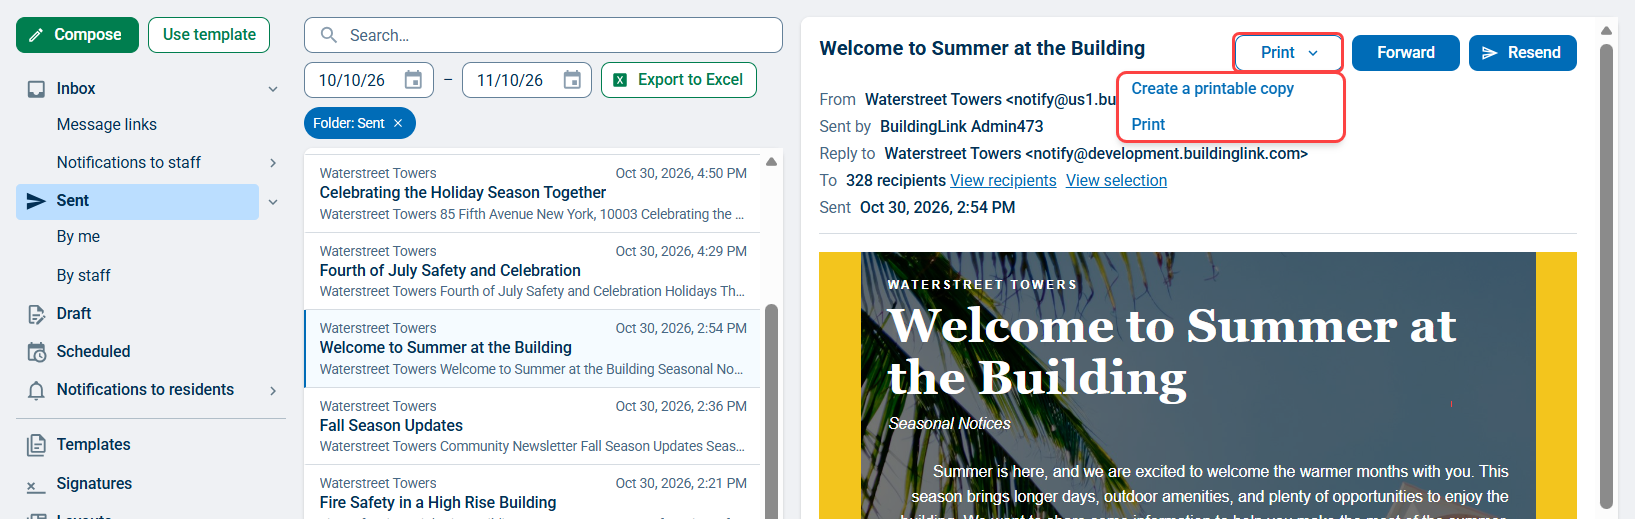
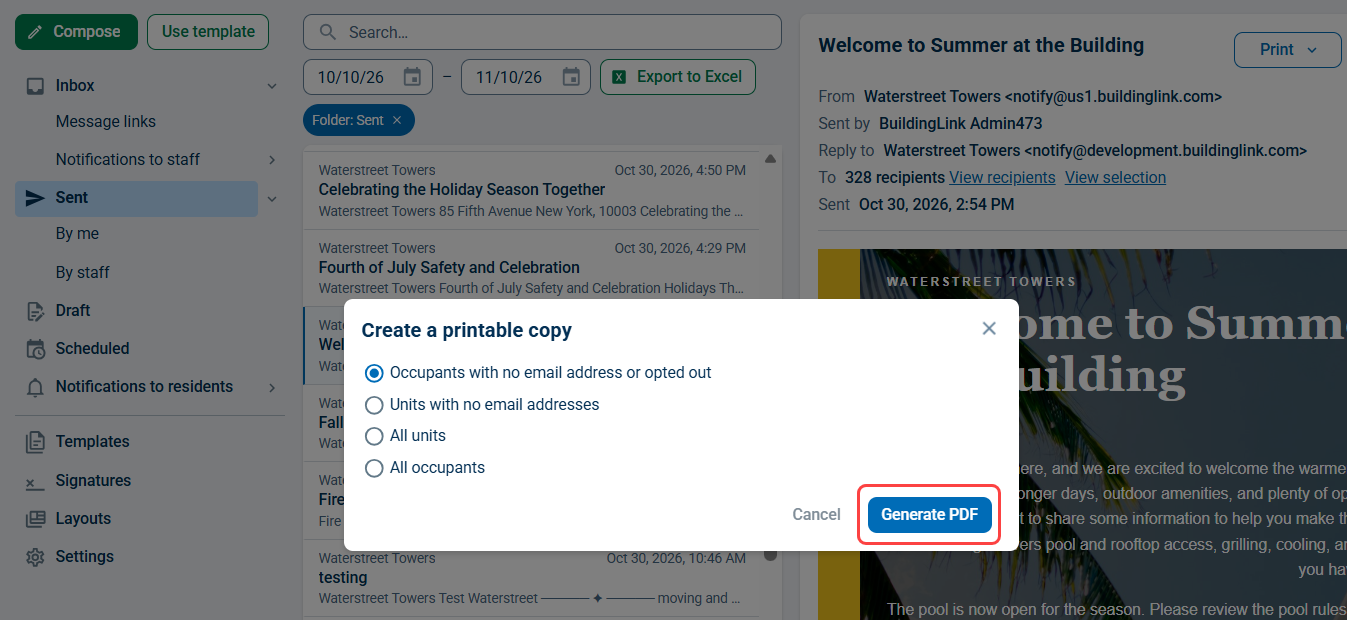
If you'd like to create a printable copy of your email for recipients that might not have emails in the system, select the option to Print at the top of the sent email, then select Create a printable copy. Once selected, you can choose to print copies for any of the options detailed below:
- Occupants with no email addresses or opted out: If you'd like one hard co per occupant without an email address or who has opted out.
- Units with no email addresses: If you'd like one hard copy per unit where nobody has an email address specified.
- All units: If you'd like one hard copy per unit, regardless of whether or not they have an email address in the system.
- All occupants: If you'd like one hard copy per occupant, regardless of whether or not they have an email address in the system.
Once you make your selection, click Generate PDF. This will open a PDF file of automatically individualized and addressed printable hard copies of your exact email which can then be distributed via mailboxes or underneath doors. If you don't have a printer attached to the computer you are working on, you can also choose to save the PDF copies on your computer then email them to yourself (as an attachment) to print them from a computer with printer.
Adding Attachments
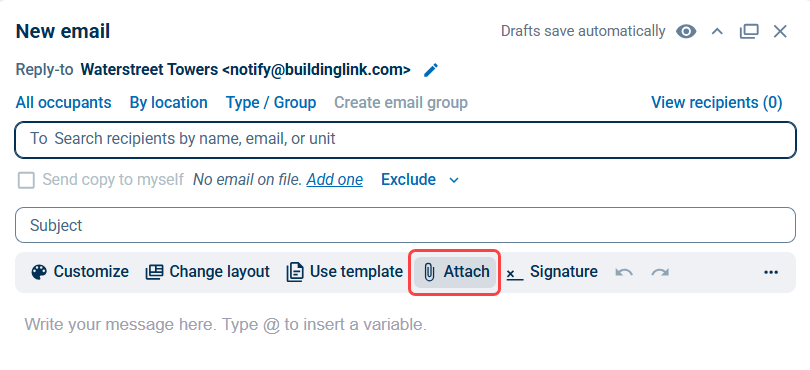
To add an attachment to an email, click the Attach button in the editor's toolbar and select a file to attach from your computer. BuildingLink supports email attachments up to 40MB in size for total attachments and body of your email.
Scheduling Emails
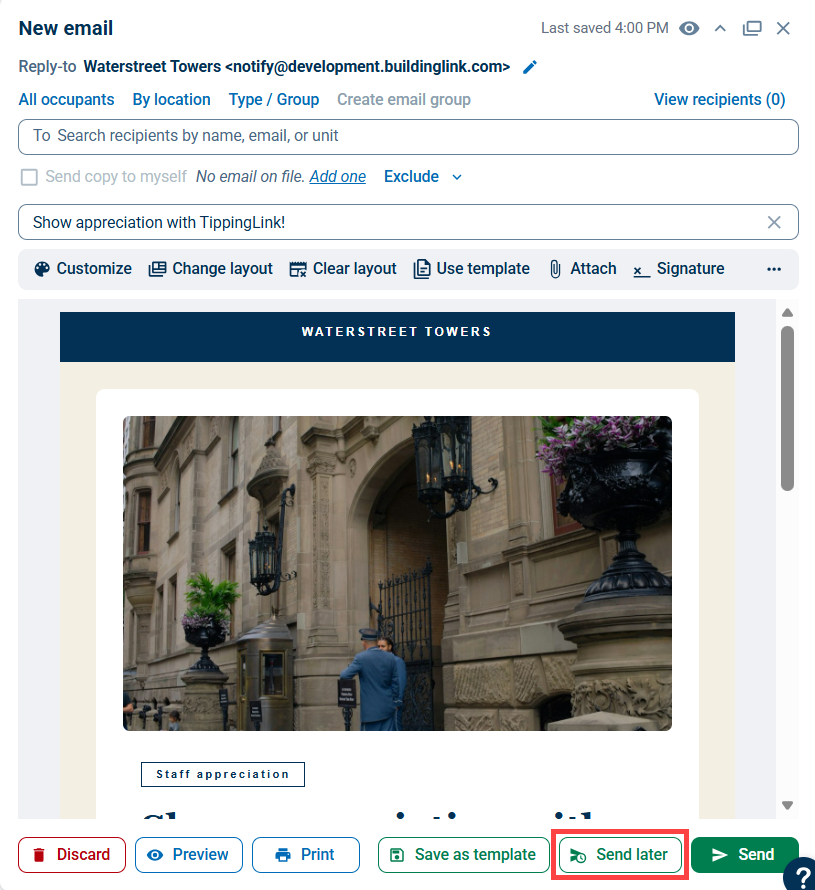
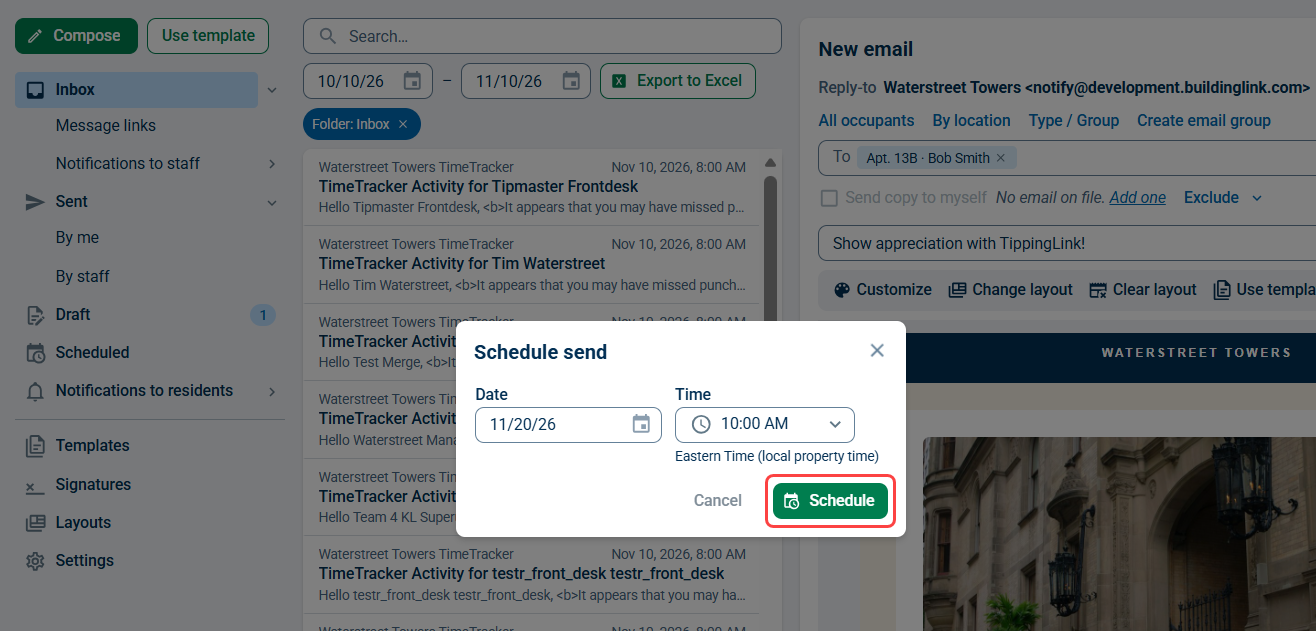
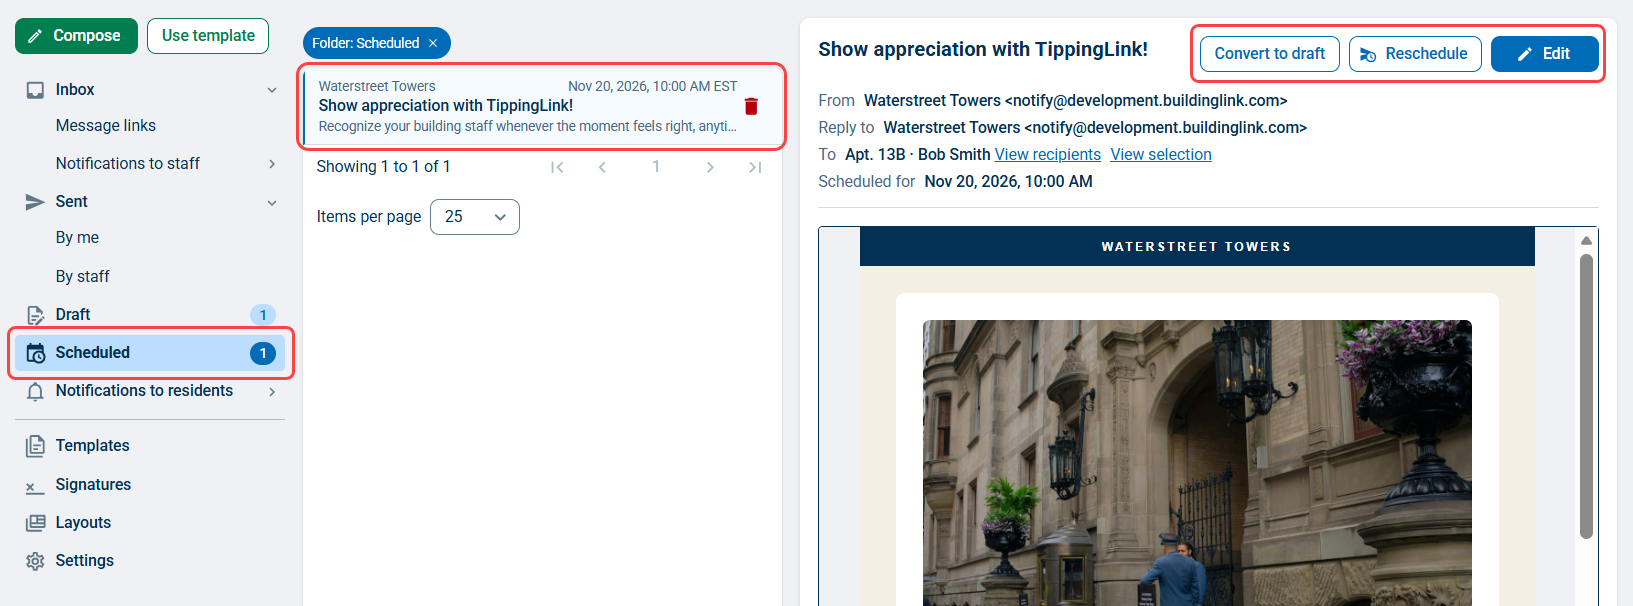
To schedule your email to be sent out at a later date, click the Send Later button on the bottom right below the body of your email. Next select a future date and time, then click Schedule and your email will be sent then. The email will also appear in the Scheduled folder in your mailbox if you need to make any changes to it before it is sent out.