Note: This article is for the newly redesigned module. This updated module is in the process of being rolled out and may only be available to some users.
Overview
The Valet Module allows you to track and receive vehicle requests from residents and staff. Residents can submit requests online or from their BuildingLink Resident app. Your valet staff will be able to receive, accept, and close out those requests.
Note: Click on the images to enlarge them.
Table of Contents
- Activating and Customizing the Valet Module
- Adding a Valet User
- Submitting a Vehicle Request
- Receiving and Accepting Vehicle Requests
- Viewing Car Request History
- Editing Vehicle Information
- Using the Valet App
Activating and Customizing the Valet Module
Please contact BuildingLink support if you would like to activate this module for your property. The module can be activated to allow valet staff to access and manage vehicle data as well as receive and accept requests. You can also prohibit valet staff from accessing and managing vehicle data, but still allow them to receive and accept car requests. (Please let us know your preference so that we can choose the correct setup option for you.)
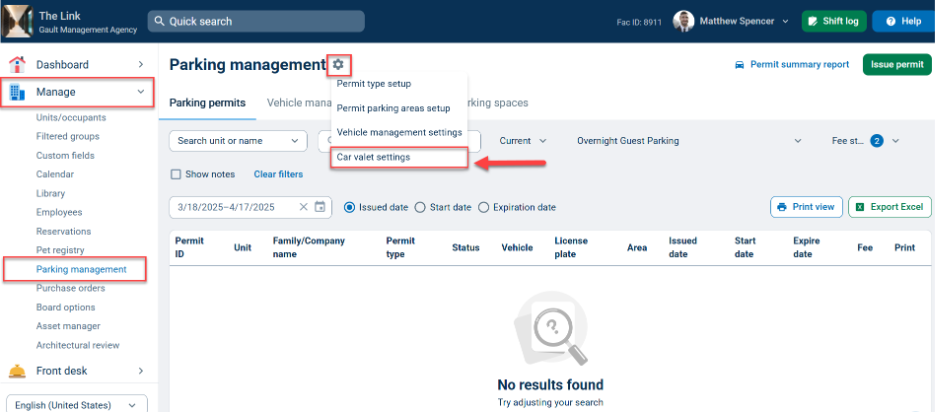
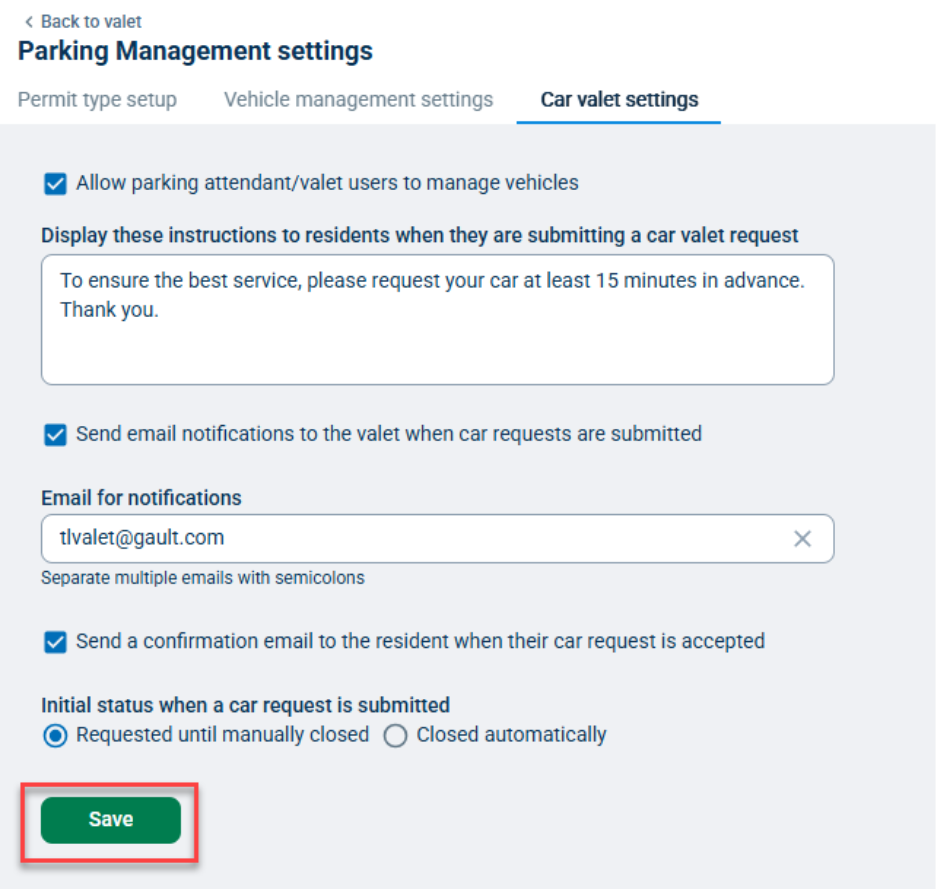
If you are a Management or Security Officer user and you’d like to add instructions for residents to see when submitting a car request, click on the Manage tab and select Parking management. Next, click the gear icon next to the page title and select Car valet settings.
You can also set up email notifications to your valet staff when new requests are submitted, as well as confirmation emails to your residents when their requests are accepted. Be sure to click Save.
Adding a Valet User
Employees must be on the "Parking Attendant" authority level to receive, accept, and close out car requests.
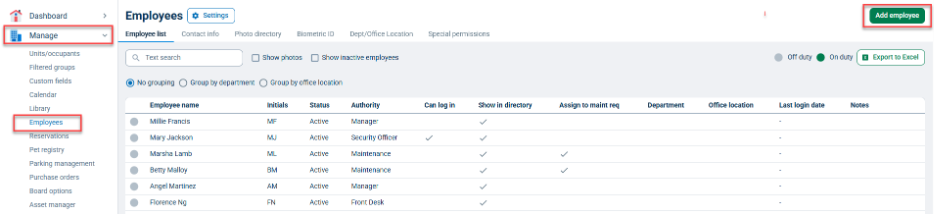
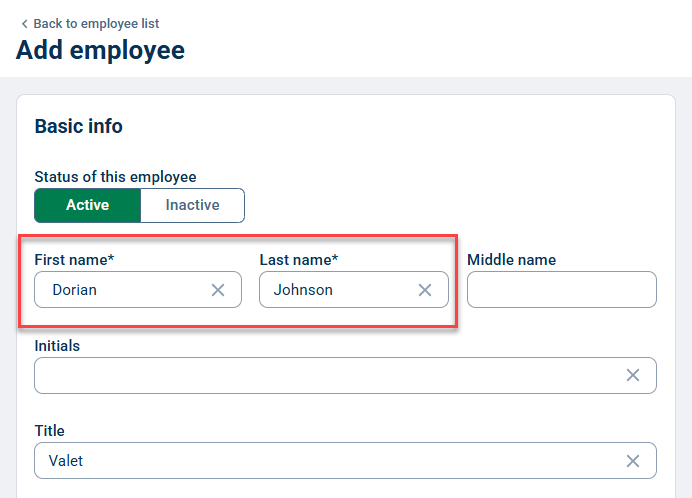
To set up an employee "Parking Attendant" user, select the Manage tab and click on Employees. Click Add New Employee. In the Basic Info section, enter the first and last name of the valet user.
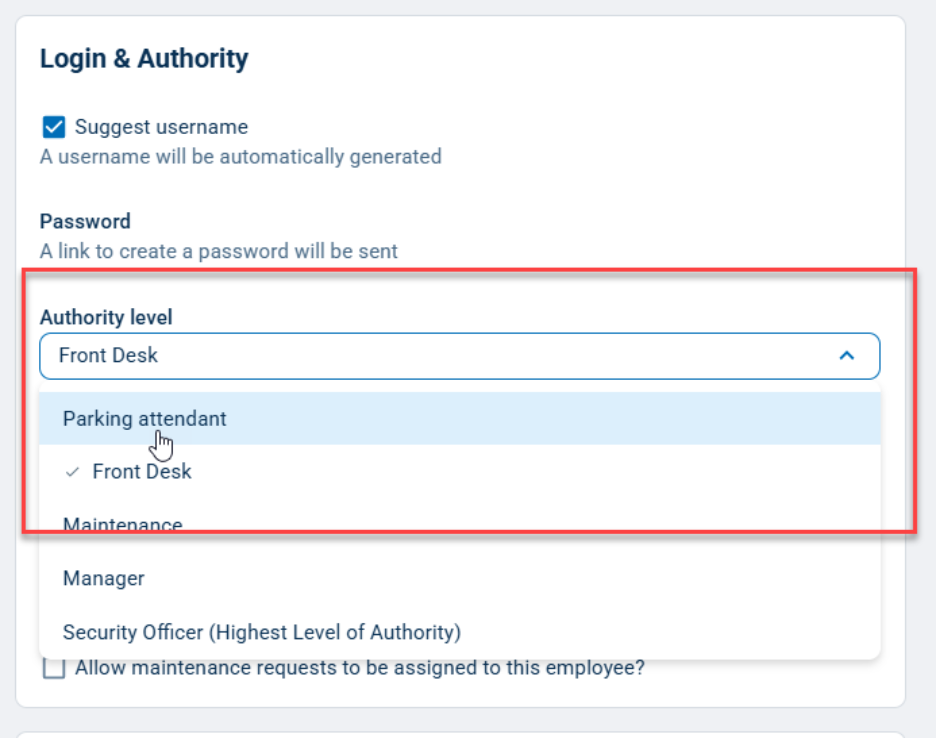
Next, scroll to the "Login & Authority" section, click the Authority Level drop-down box, and select Parking Attendant. Click Save at the top or bottom of the page.
Submitting a Vehicle Request
Residents can submit car requests from the resident portal or the BuildingLink Resident App, but building staff can also submit requests on a resident's behalf.
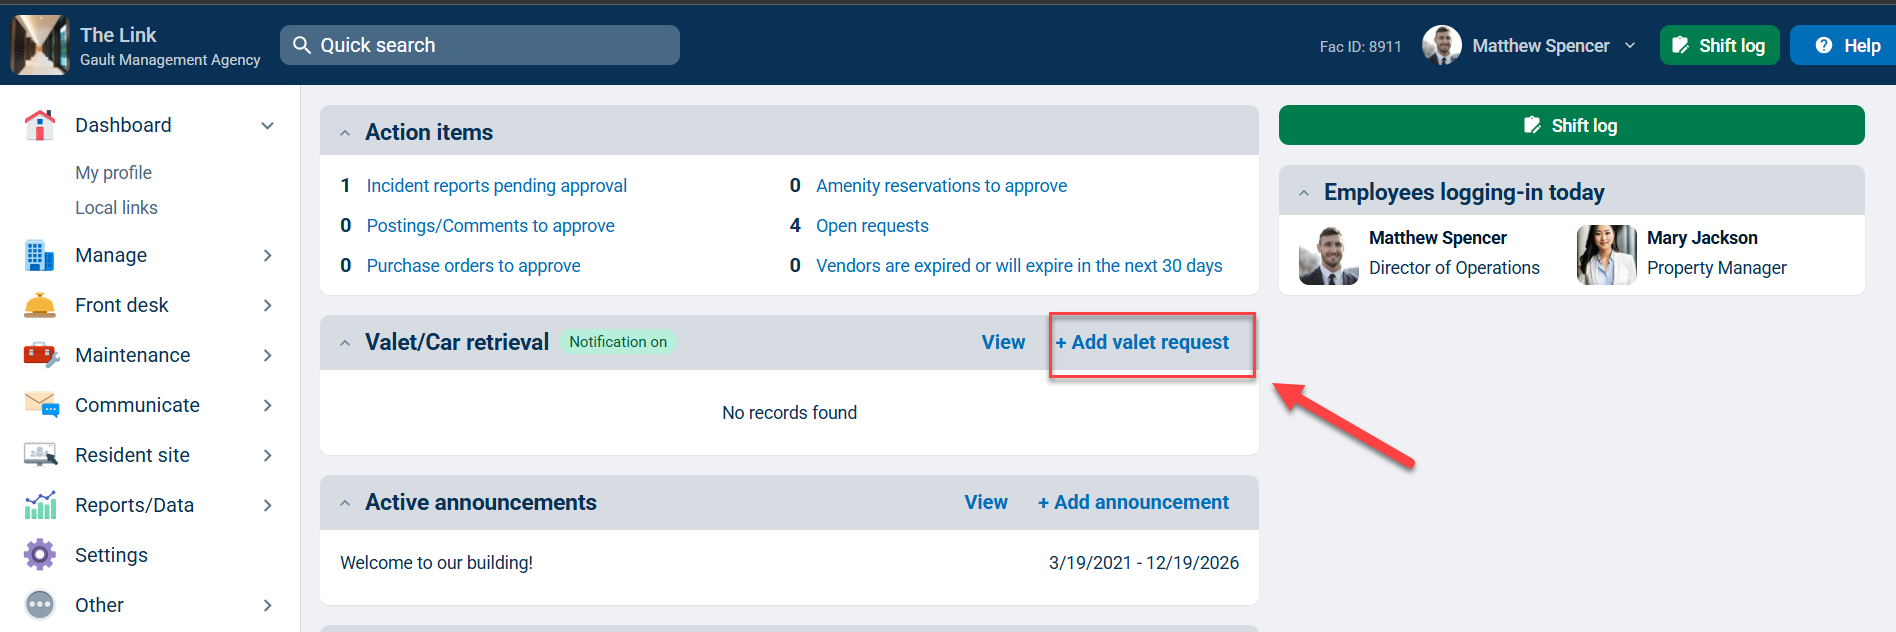
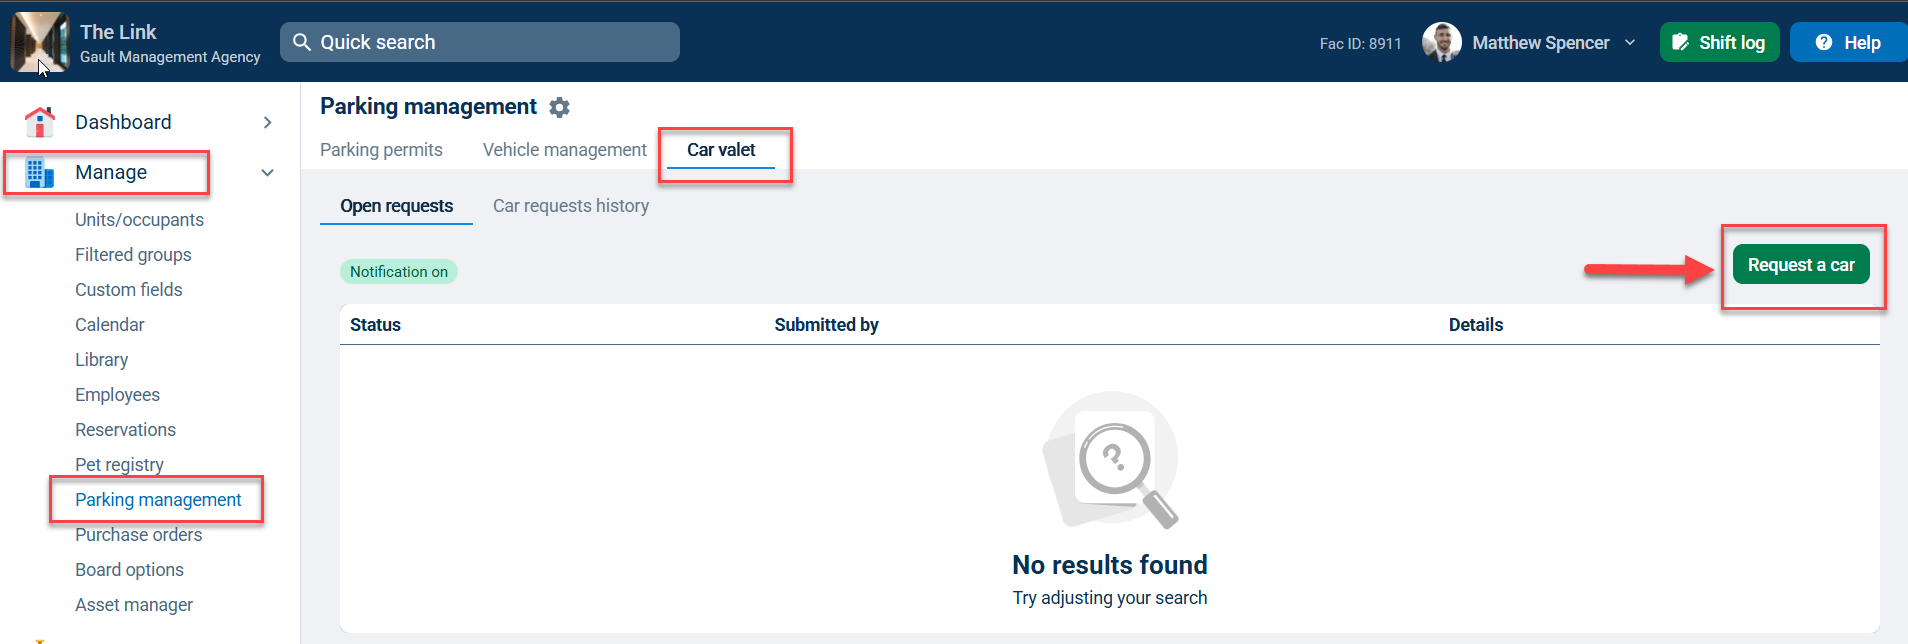
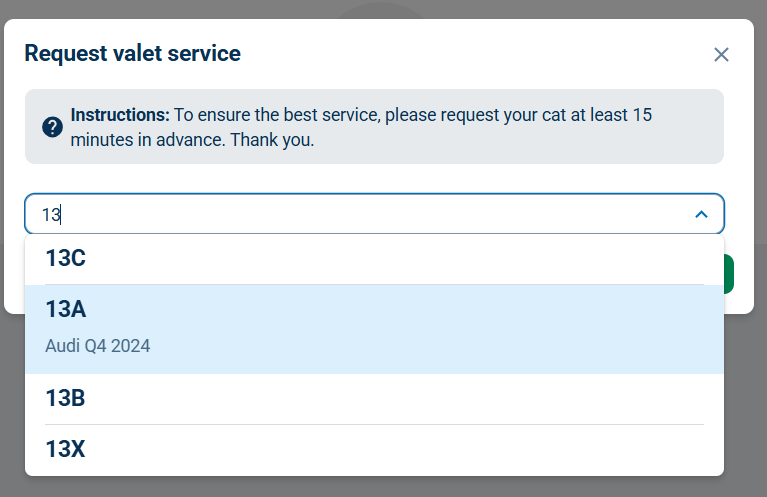
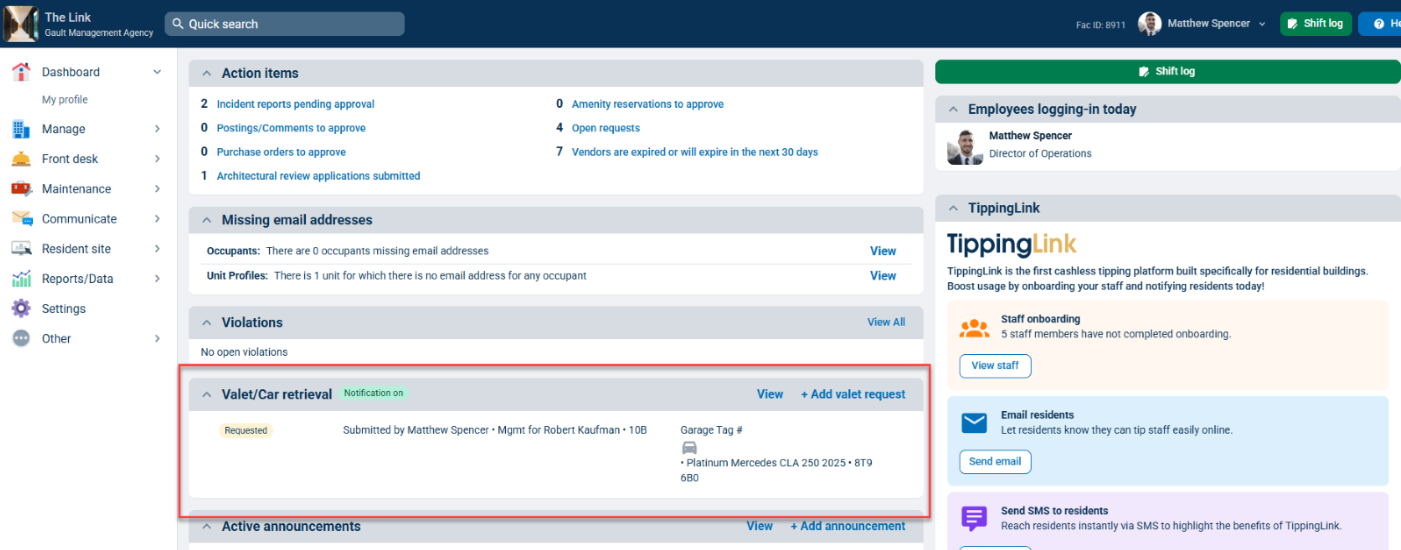
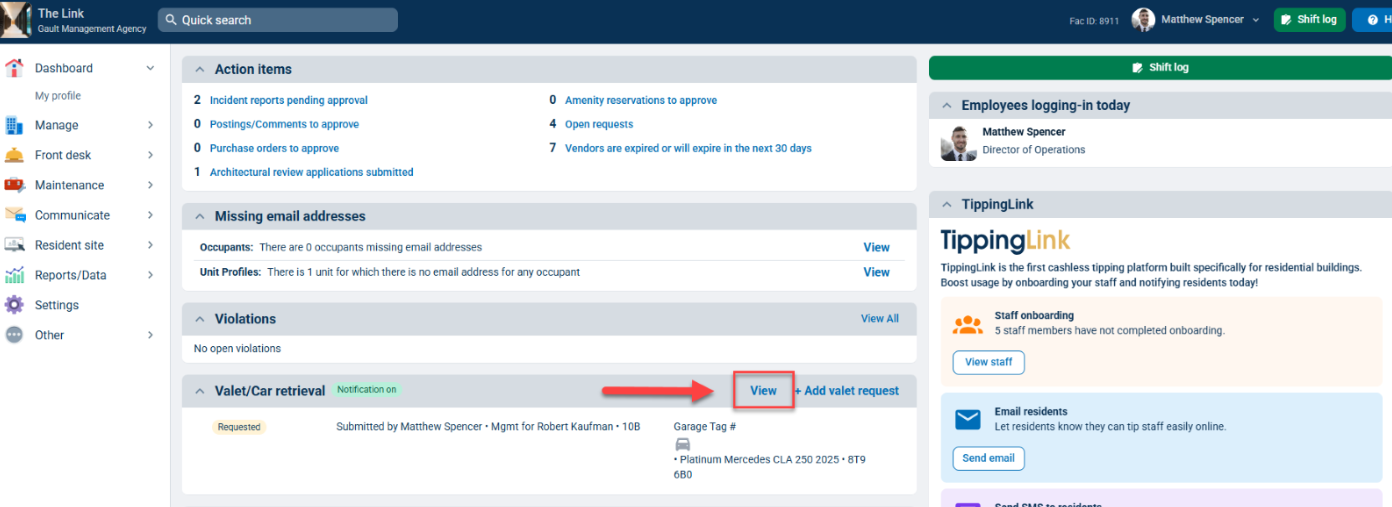
To do so, click +Add valet request on the dashboard, or click the Manage tab, select Parking management, then Car valet, and click the Request a car button. Enter the unit number or ticket number of the car you want to request.
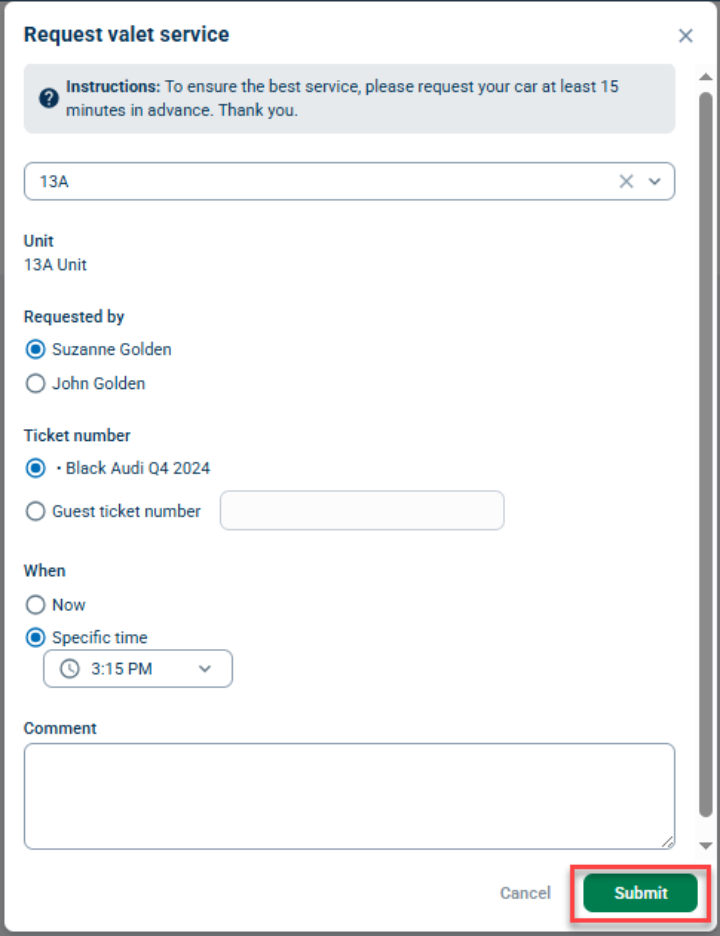
In the resulting pop-up window, select who the car was requested by, specify which vehicle was requested (if the unit has multiple vehicles assigned to it or if the vehicle is for a guest), when the vehicle is needed, and any special comments/instructions. Click Submit.
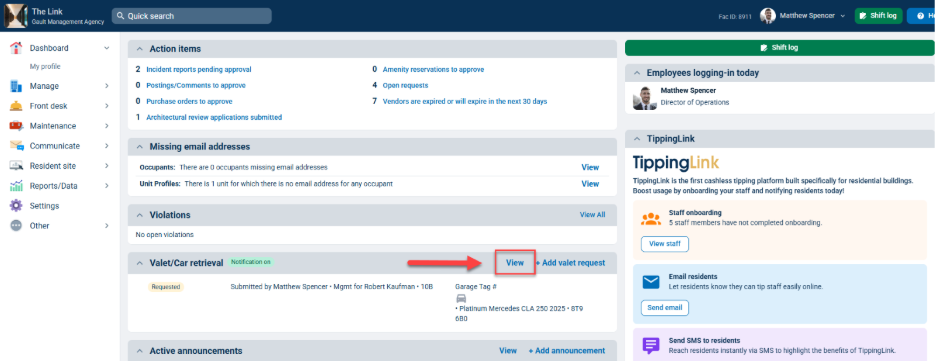
From the Dashboard, you can also see all vehicle requests that have been accepted or are still pending. If a request is still pending, it will be labeled as "Requested" instead of "Accepted."
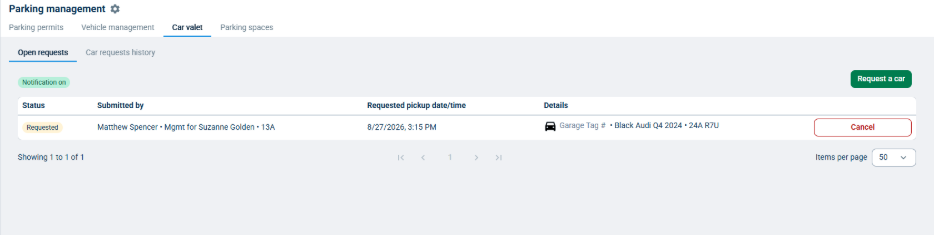
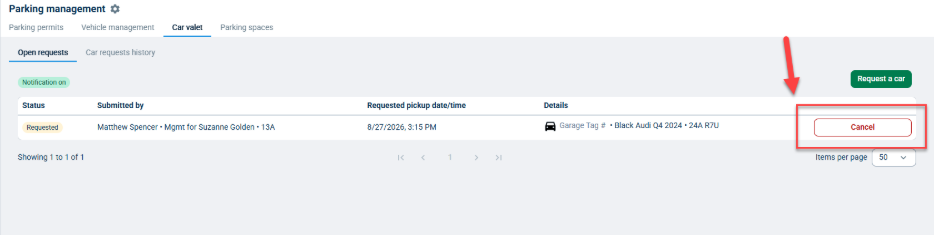
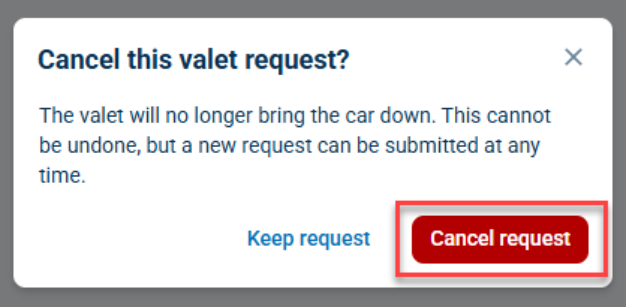
To cancel a request, click View on the Valet Dashboard Widget, then find the open request and click Cancel. In the following confirmation window, click Cancel request. You will receive an on- screen confirmation and can view a record of the canceled request in Car requests history.
Note: Only Security Officer or Management level users will have the option to cancel requests. Residents can also cancel their own car requests.
Receiving and Accepting Vehicle Requests
Log in with your valet username and password (see Adding a Valet User above). You’ll see all the requests that haven't been closed out yet. If your computer is turned on, you should hear a beeping noise if any requests haven't been accepted.
You can use the Sound drop-down menus to choose a different alert sound and interval, or you can turn the alert sound on or off by clicking the sound radio buttons at the top of the list. You can also use the View radio buttons to see open requests in a list or as cards.
To accept a request, click the Accept request button. If your property has enabled resident notifications, they will receive notifications automatically when you accept requests. Once you complete a request, click the Close request button.
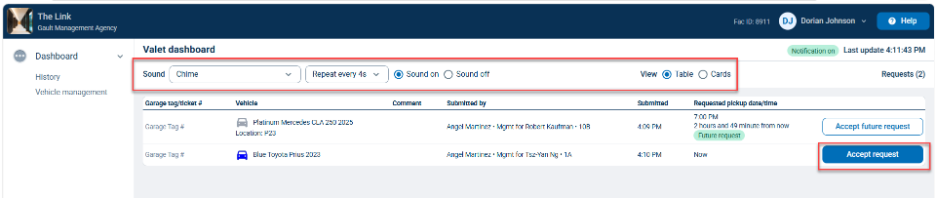

If a car request is submitted for a future pickup date/time, it will be labeled as a "Future request." You can accept it early by clicking Accept future request. Accepting the future request stops the alert sound and gives you the option to close the request closer to the requested pickup time.

Viewing Car Request History
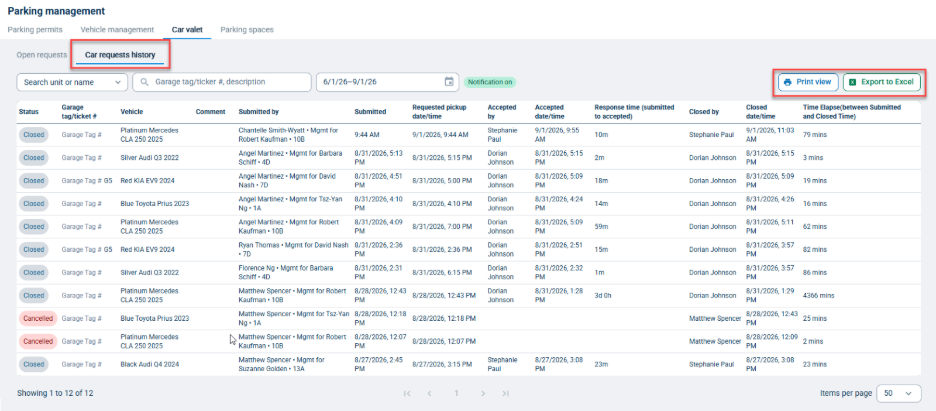
All non-valet staff can view closed requests by clicking View on the Valet Dashboard Widget and clicking Car request history. You can search for closed requests by unit number, garage tag, ticket number, vehicle description, and date range; you can print the results and export them to Excel.
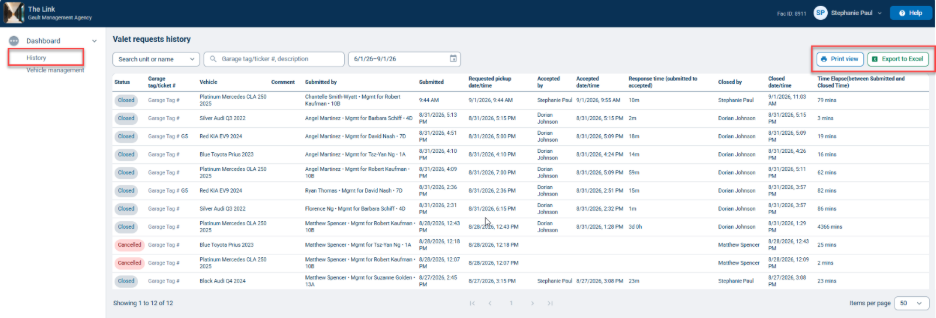
Valet users can click on the Dashboard tab, then click History.
Note: Residents can view their own valet request history on their website.
Editing Vehicle Information
Note: You can only edit vehicle information from a Valet Console login if that setting is chosen when the Valet Module is activated for your property.
If you do have the option to add or edit vehicle information for your residents, see our Parking Management help topic for more details.
Using the Valet App
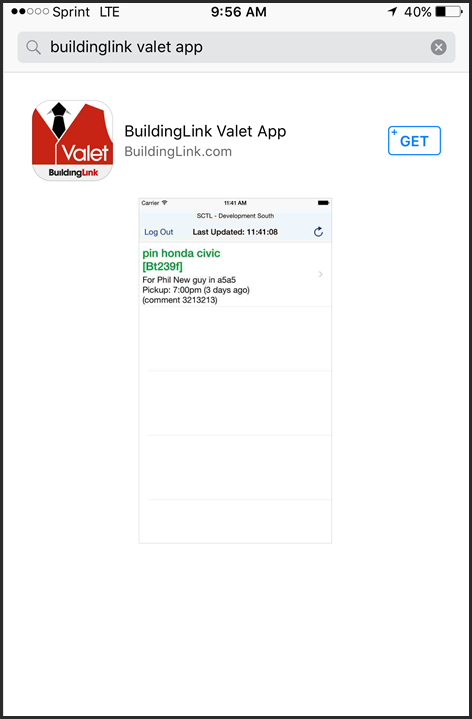
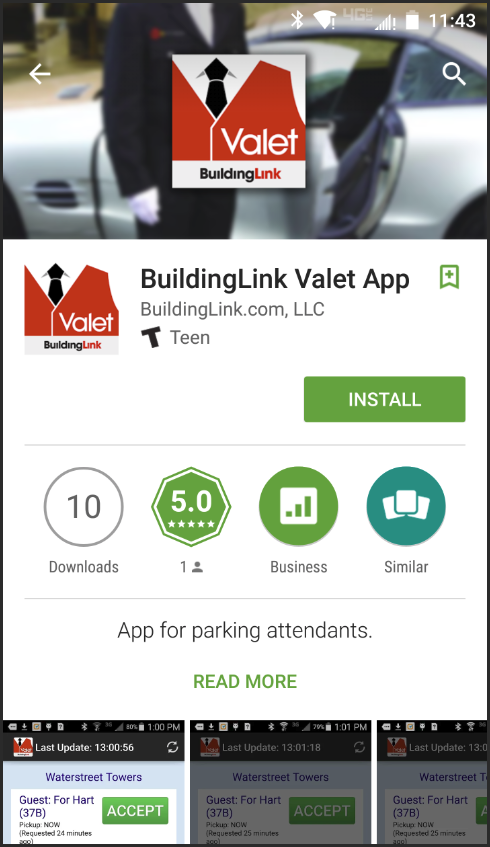
You can also receive and accept requests through our free Valet App. Search for "BuildingLink Valet App" in the Google Play Store or Apple Store and select Install.
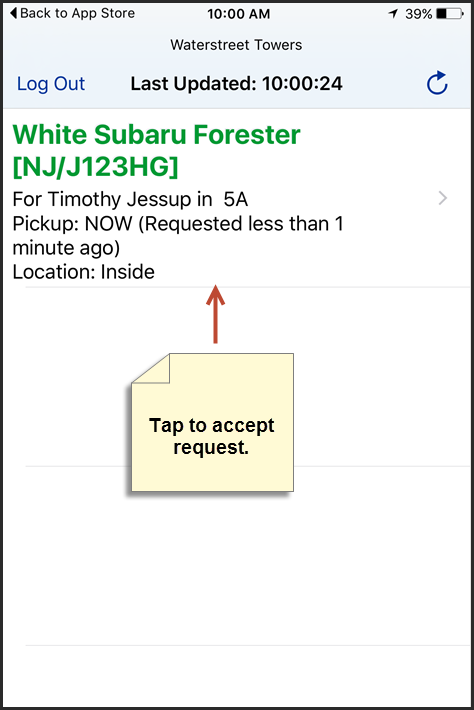
Open the Valet App, and log in with your valet username and password or the Valet Console username and password for your building. Provided the sound on your phone is turned on, you will hear a beeping sound when a new request comes in.
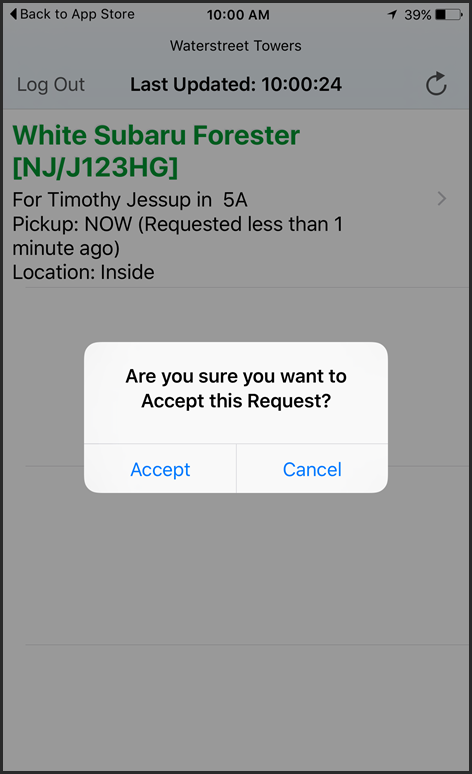
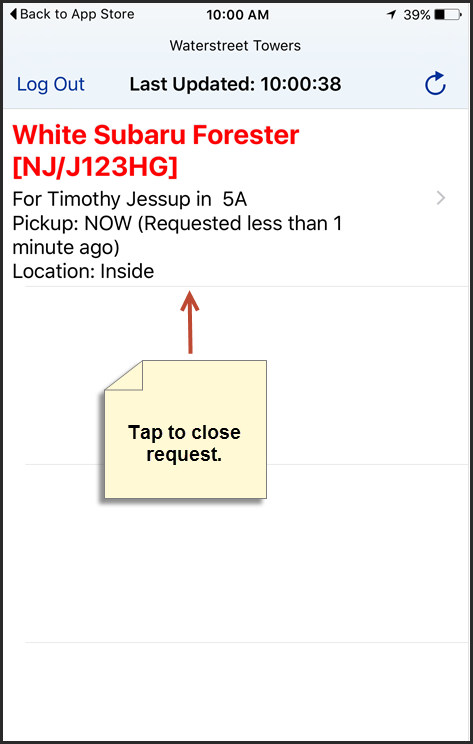
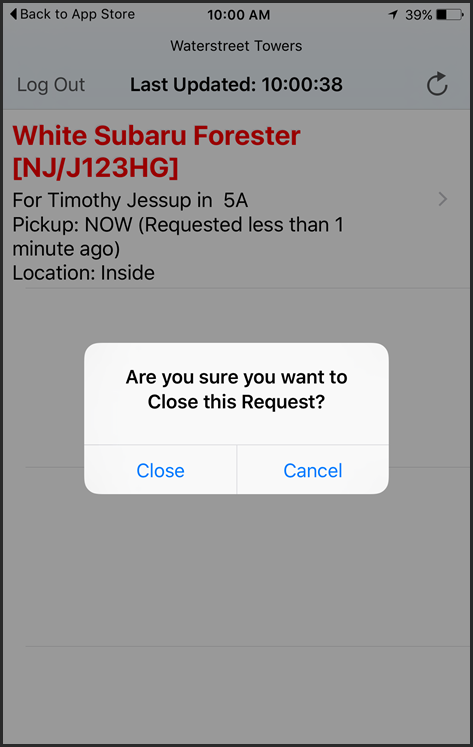
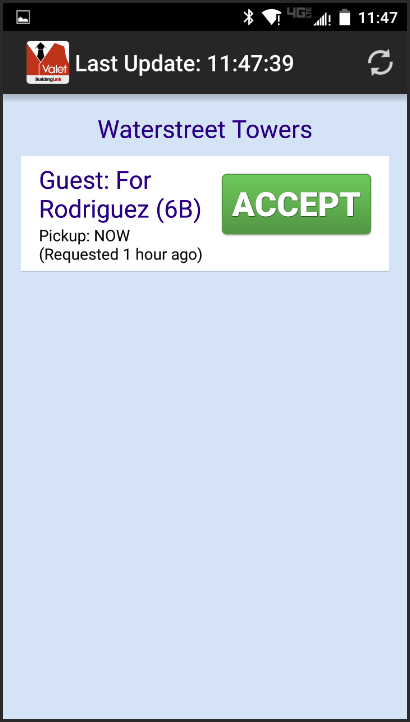
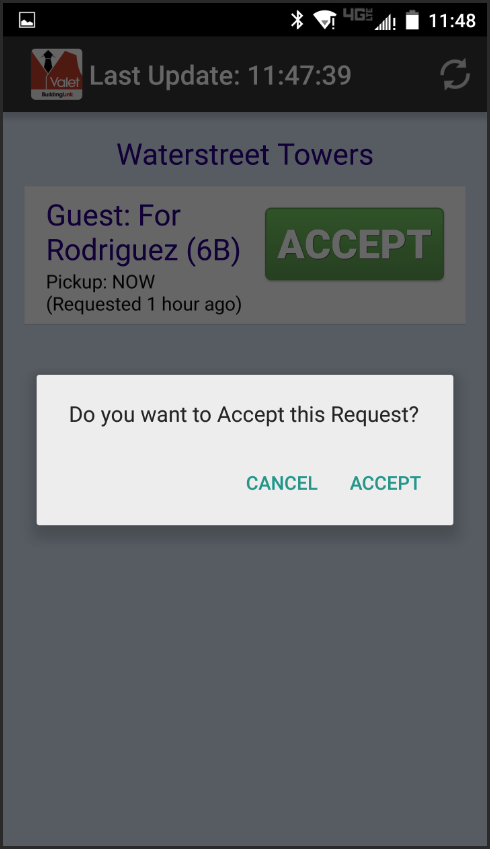
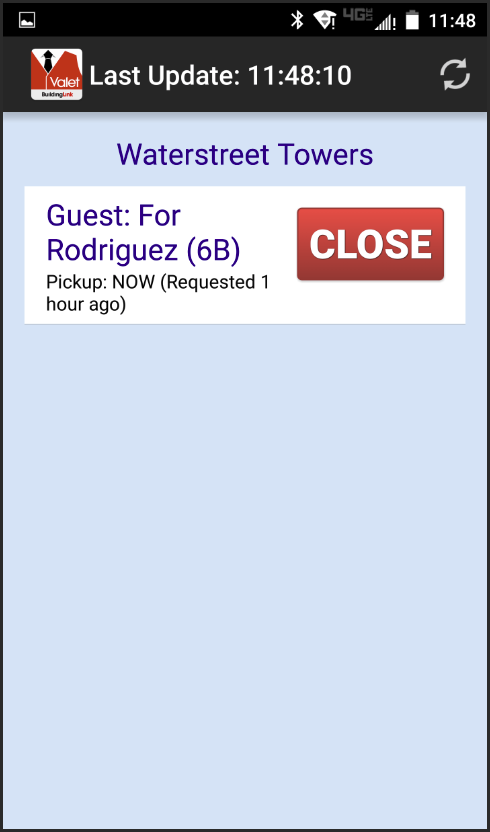
If you have an iPhone, simply tap on new requests (displayed in green) to accept them, and tap on completed requests (displayed in red) to close them. If you have an Android, select Accept to accept new requests and Close to close out completed requests.
Screenshots of both iPhone and Android are below.