Note: This article is for the newly re-designed module. This updated module is in the process of being rolled out and may only be available to some users.
Overview
The Reservations module allows you to track and coordinate amenity reservations at your building. You can allow your residents to submit reservation requests for physical amenities (theater, club room, etc.), appointment times, elevator reservations, or even massages and restaurant tables. You can also choose to use this module entirely internally, and still reap the benefits of easy scheduling and tracking!
For information on how to add or edit the amenities available for your property and their constraints, please see our Amenity Reservations Settings article.
Note: Click on the images to enlarge them.
Table of Contents
- Viewing Amenity Reservations
- Adding a New Reservation Request
- Approving/Declining/Canceling or Editing Amenity Reservations
Viewing Amenity Reservations
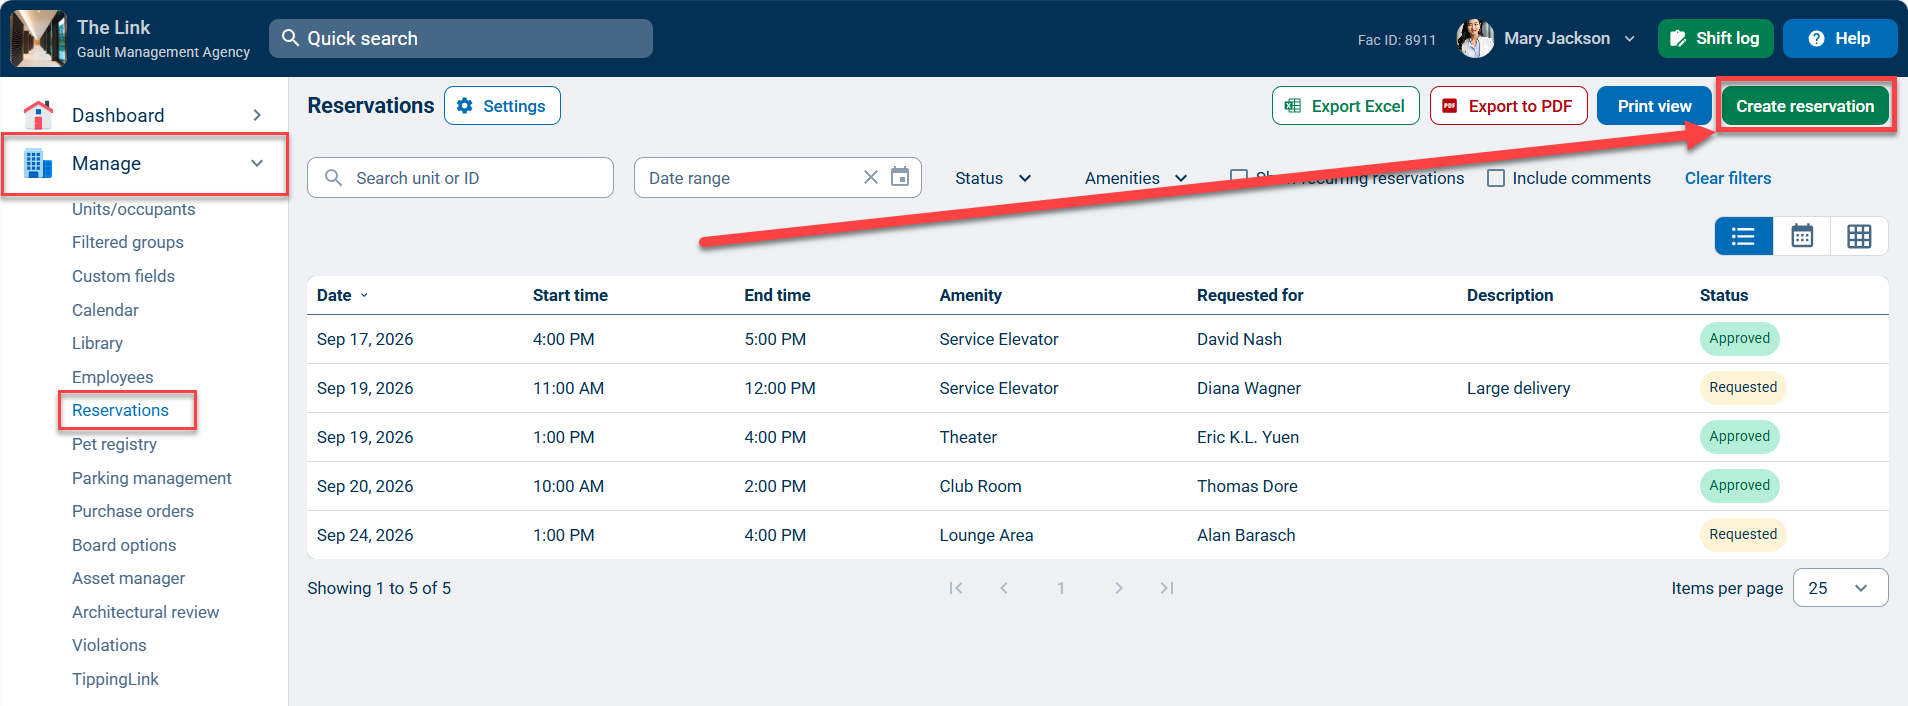
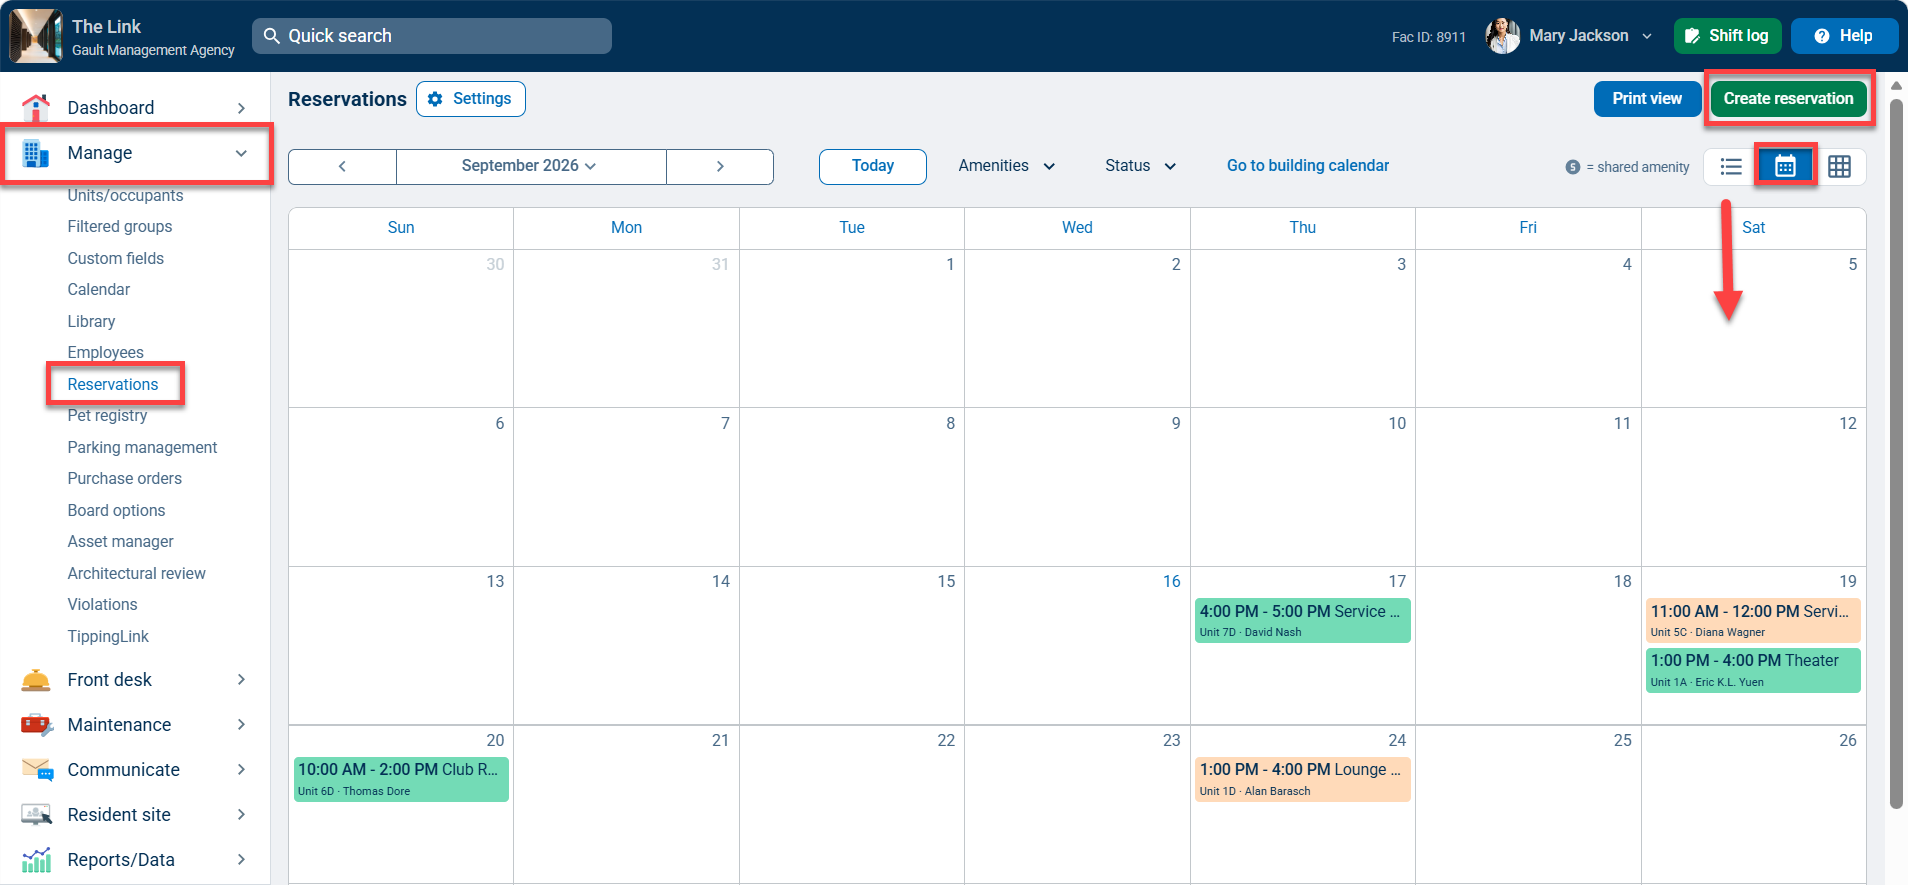
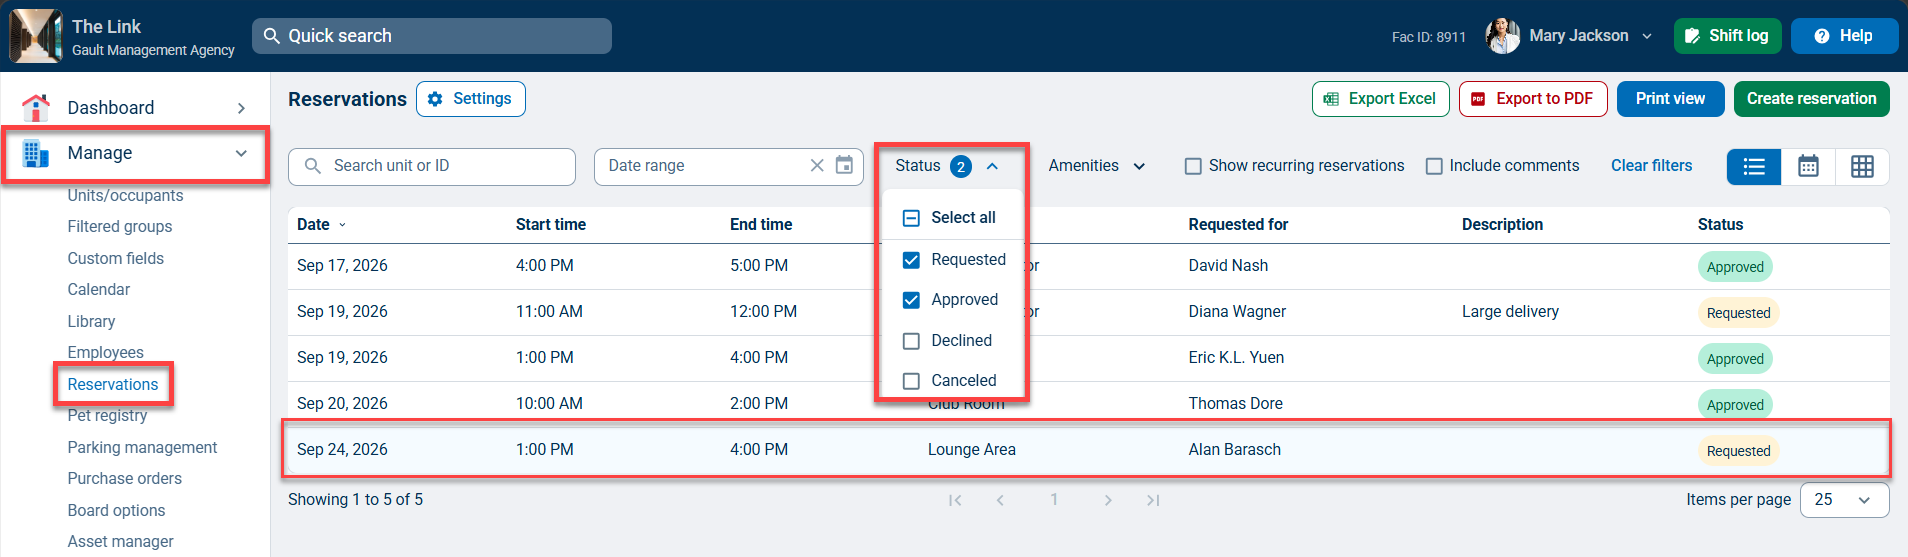
To view existing amenity reservations, go to the Manage tab and select Reservations. By default, you’ll see a list of all your reservations.
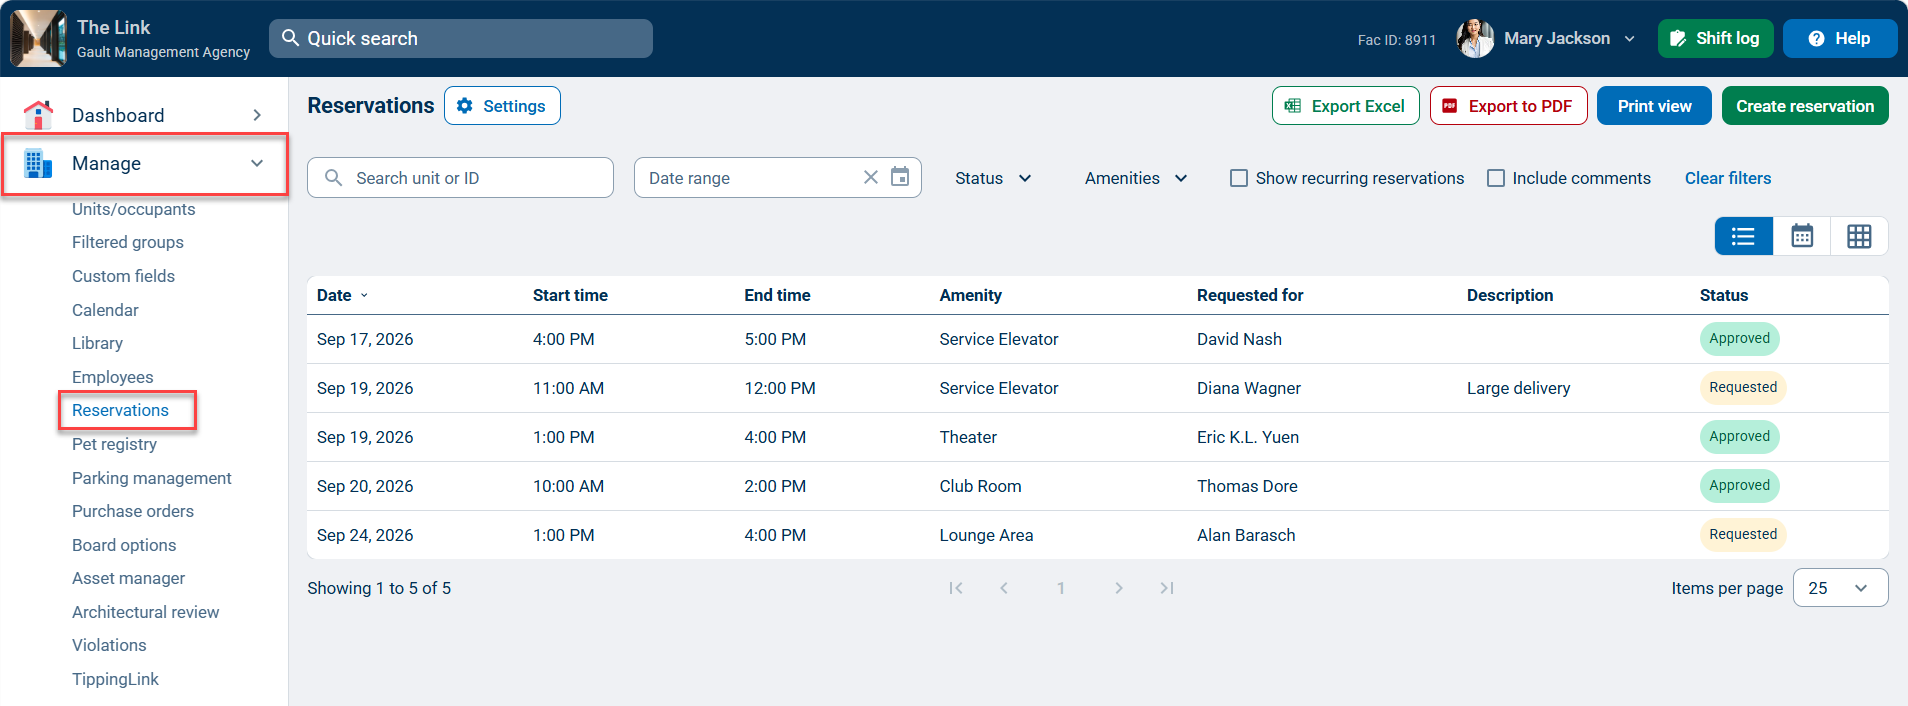
At the top of the Reservations page, you can sort your reservations by unit, date range, status, or amenity type. The list view will update automatically after you select your filters.
To view the details for a specific reservation, click the reservation in the list.
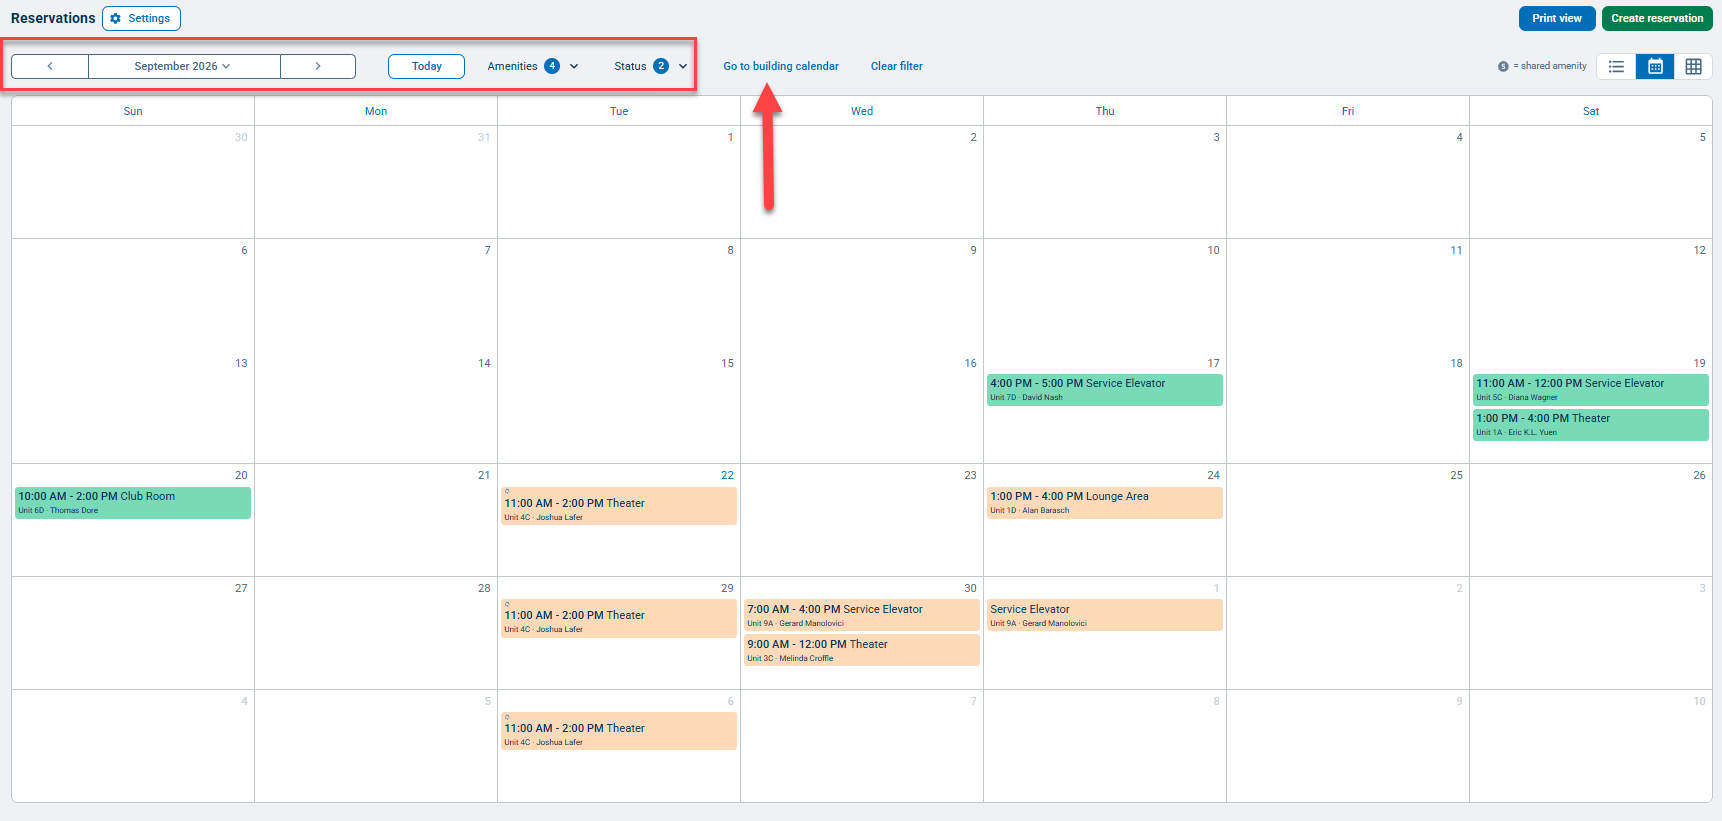
You can also view reservations in a calendar format by clicking the  at the top of the Reservations page.
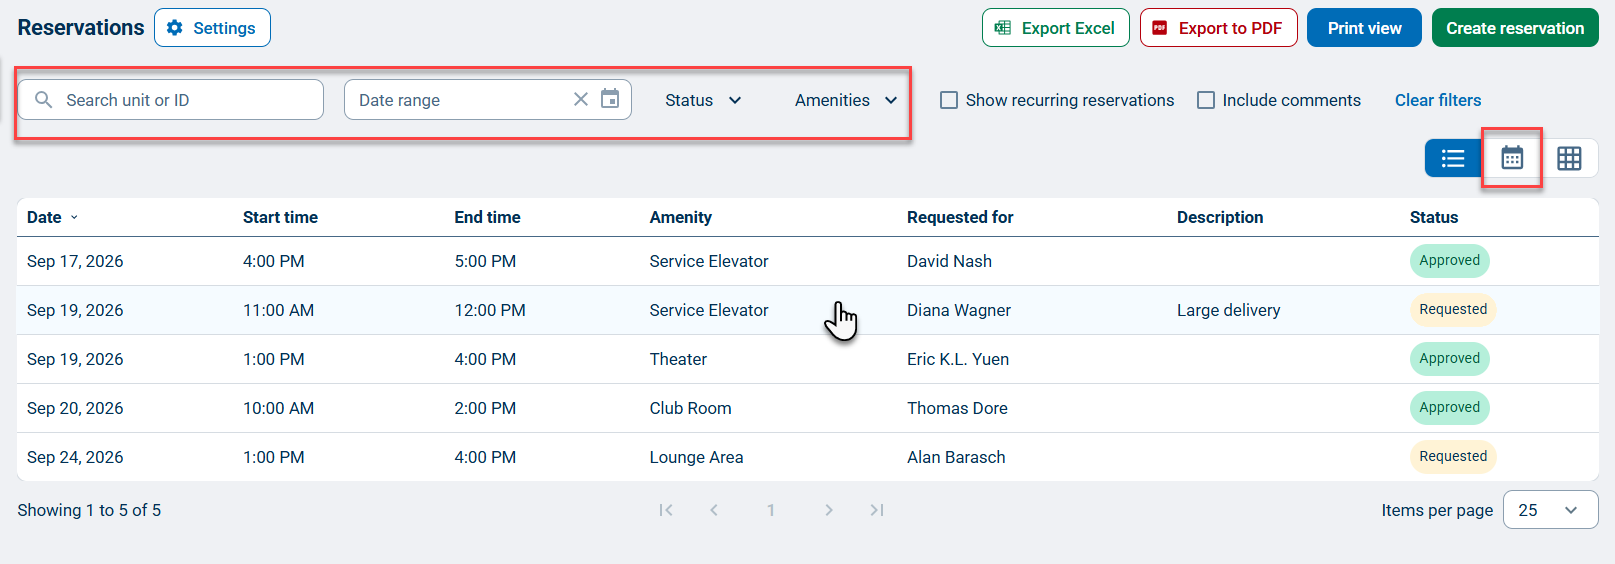
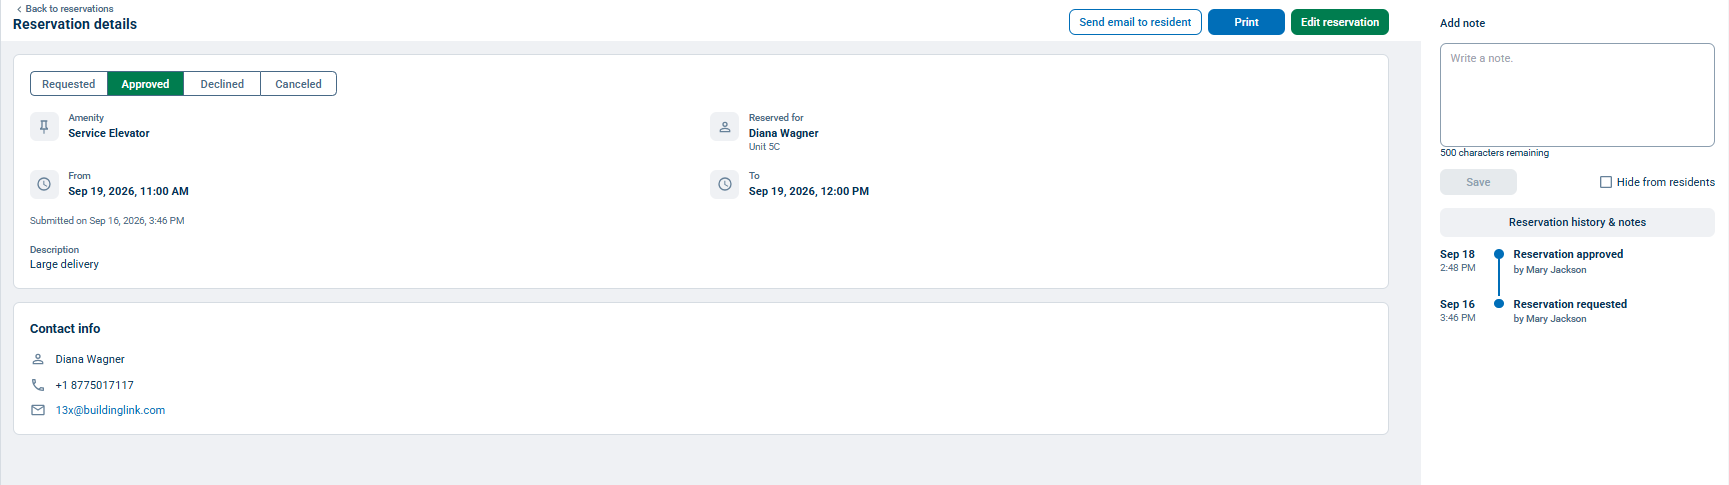
The Calendar View is a great way to check the availability of a specific amenity before putting in a new request. You can sort your reservations using the filters at the top of the screen, and you can also view the details for a specific reservation by clicking it on the calendar.
Note: For amenity availability, you can also set your amenities to prohibit overlapping reservations, meaning you will get an error message if you try to submit a request for a time that has already been requested. To do so, please visit our Amenity Reservations Settings Article.
Please keep in mind that the reservations calendar is separate from your Building Calendar. To view your Building Calendar, you’ll see a shortcut in the top right corner to click Go to building calendar.
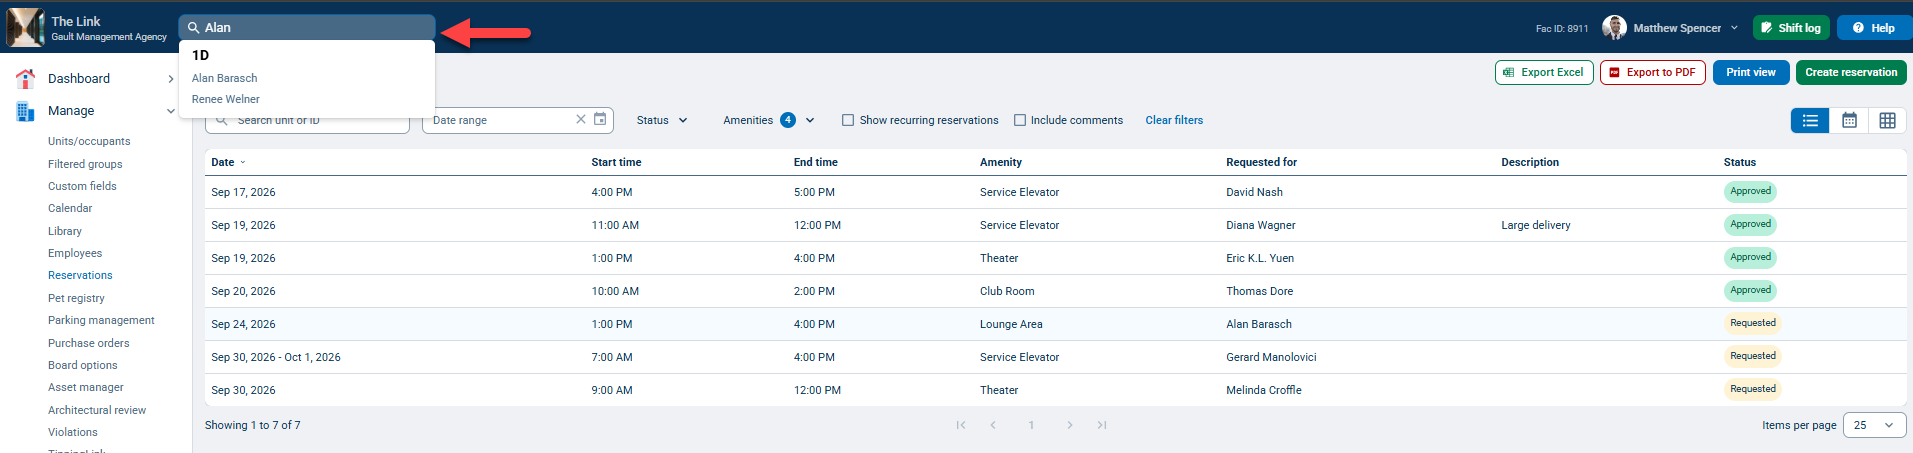
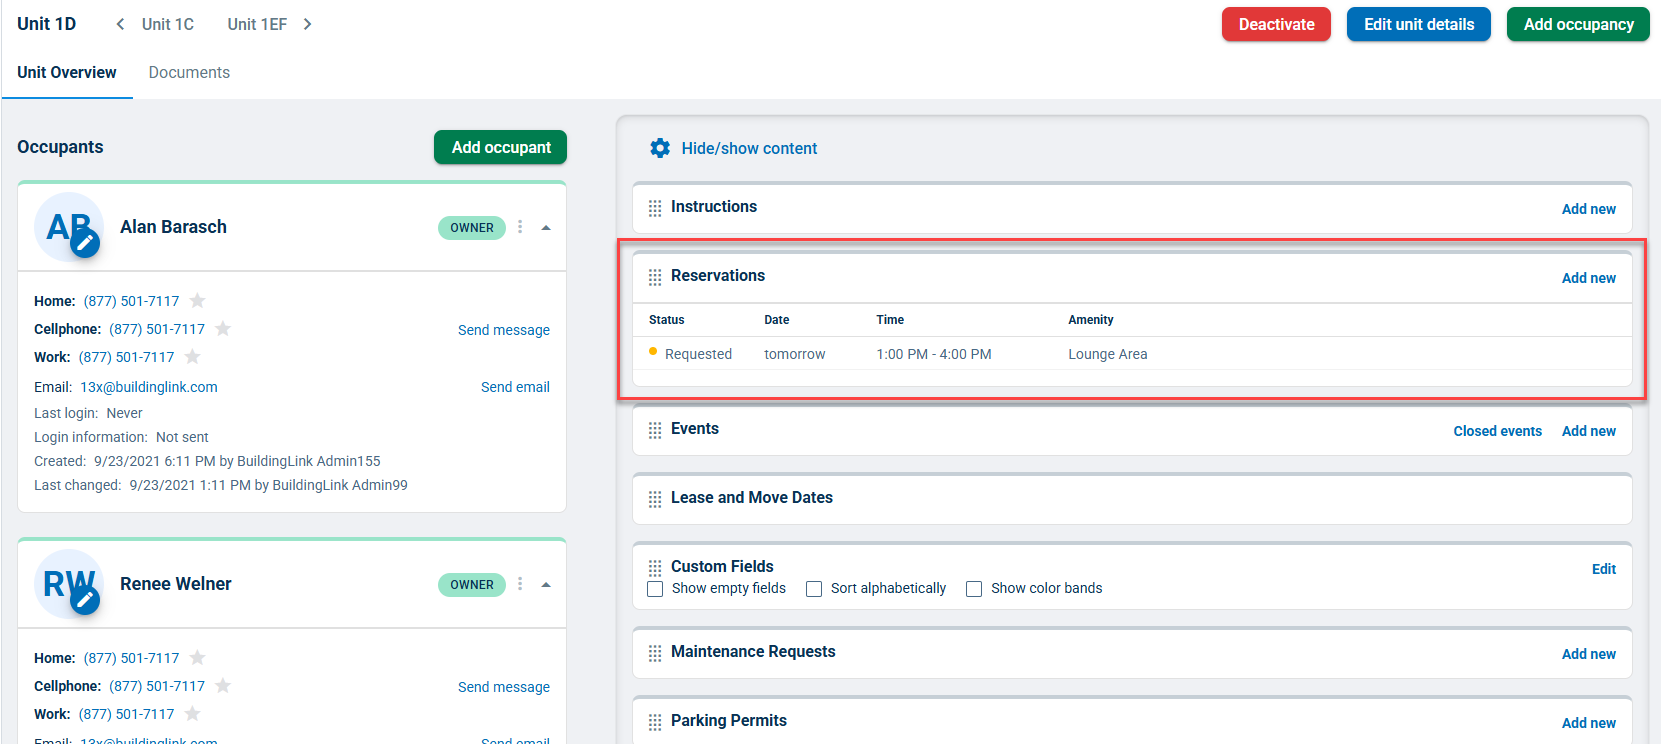
Staff can also view upcoming reservations for a unit in the Unit Overview by using the Quick Search.
Adding a New Reservation Request
You can also add a new reservation request in the Calendar View by clicking on the  at the top of the Reservations page.
You can either click the Date you want to add the reservation request, or click on the green Create Reservation button in the top right corner.
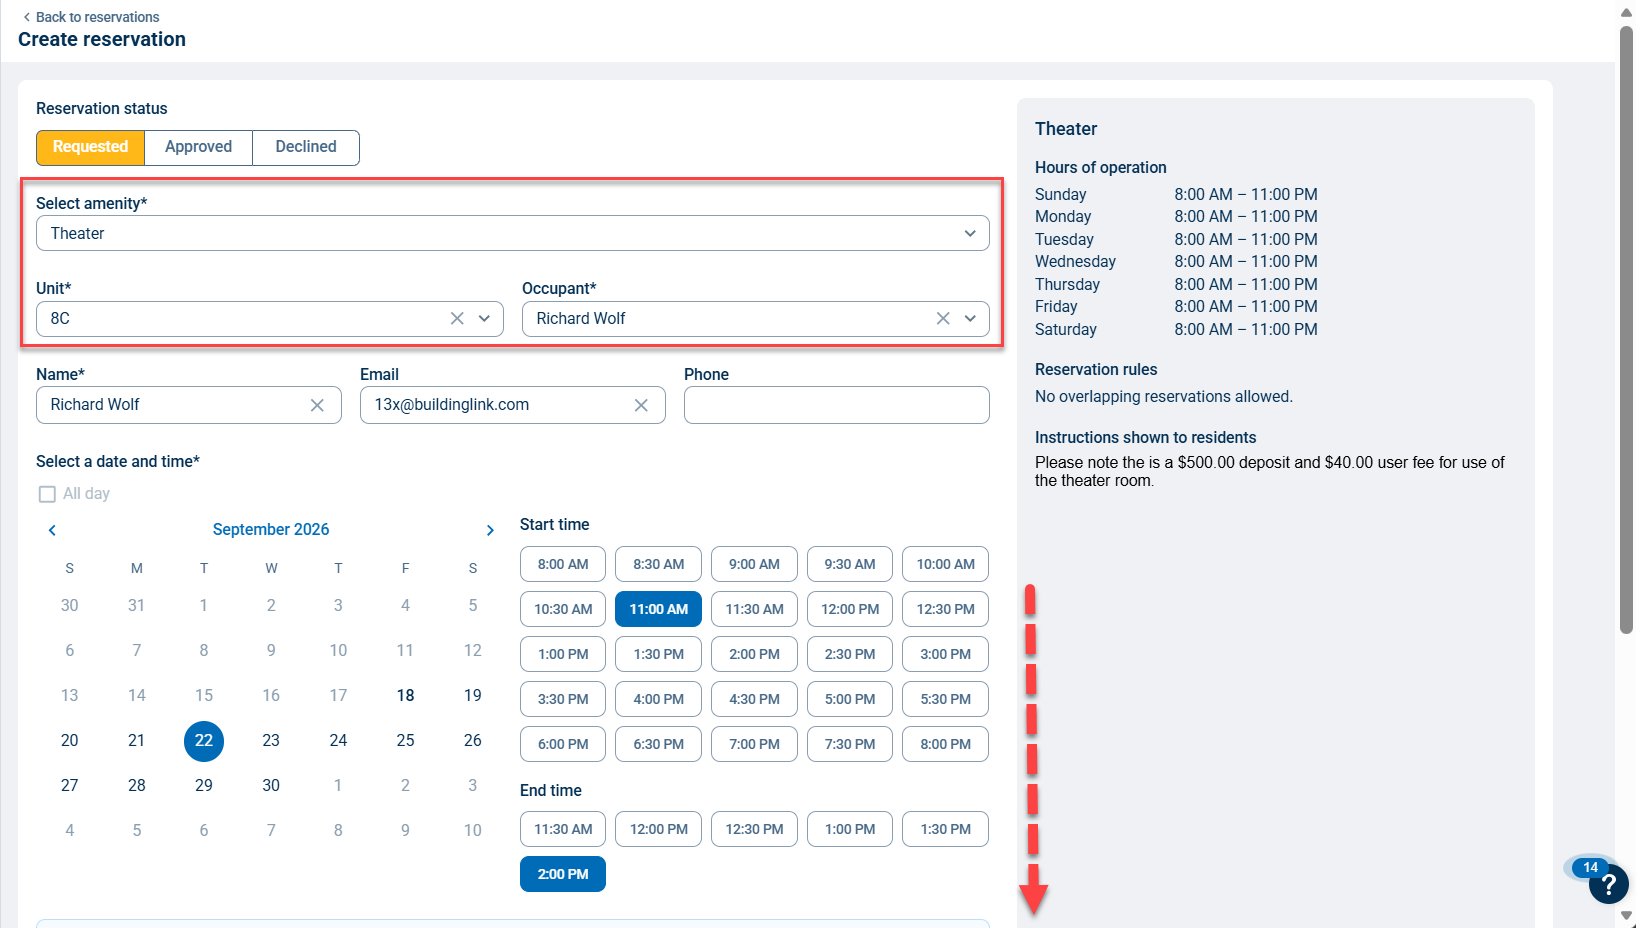
A form will appear where you can enter all the relevant reservation information. If you are a non-management level BuildingLink user, the Status will automatically be set to Requested, and you will not see the Approve or Decline options. If you are a management-level BuildingLink user and you want to automatically approve the reservation request you are entering, you can change the Status from Requested to Approved.
Next, select which amenity is being reserved. If you notice an amenity is missing from your amenities list, please refer to our Amenity Reservations Settings article for information about adding or changing amenity types.
After selecting the amenity, if only one occupant is in the unit, the system will automatically add them as the contact. If more than one occupant is in the unit, you'll be prompted to select a contact person for the reservation.
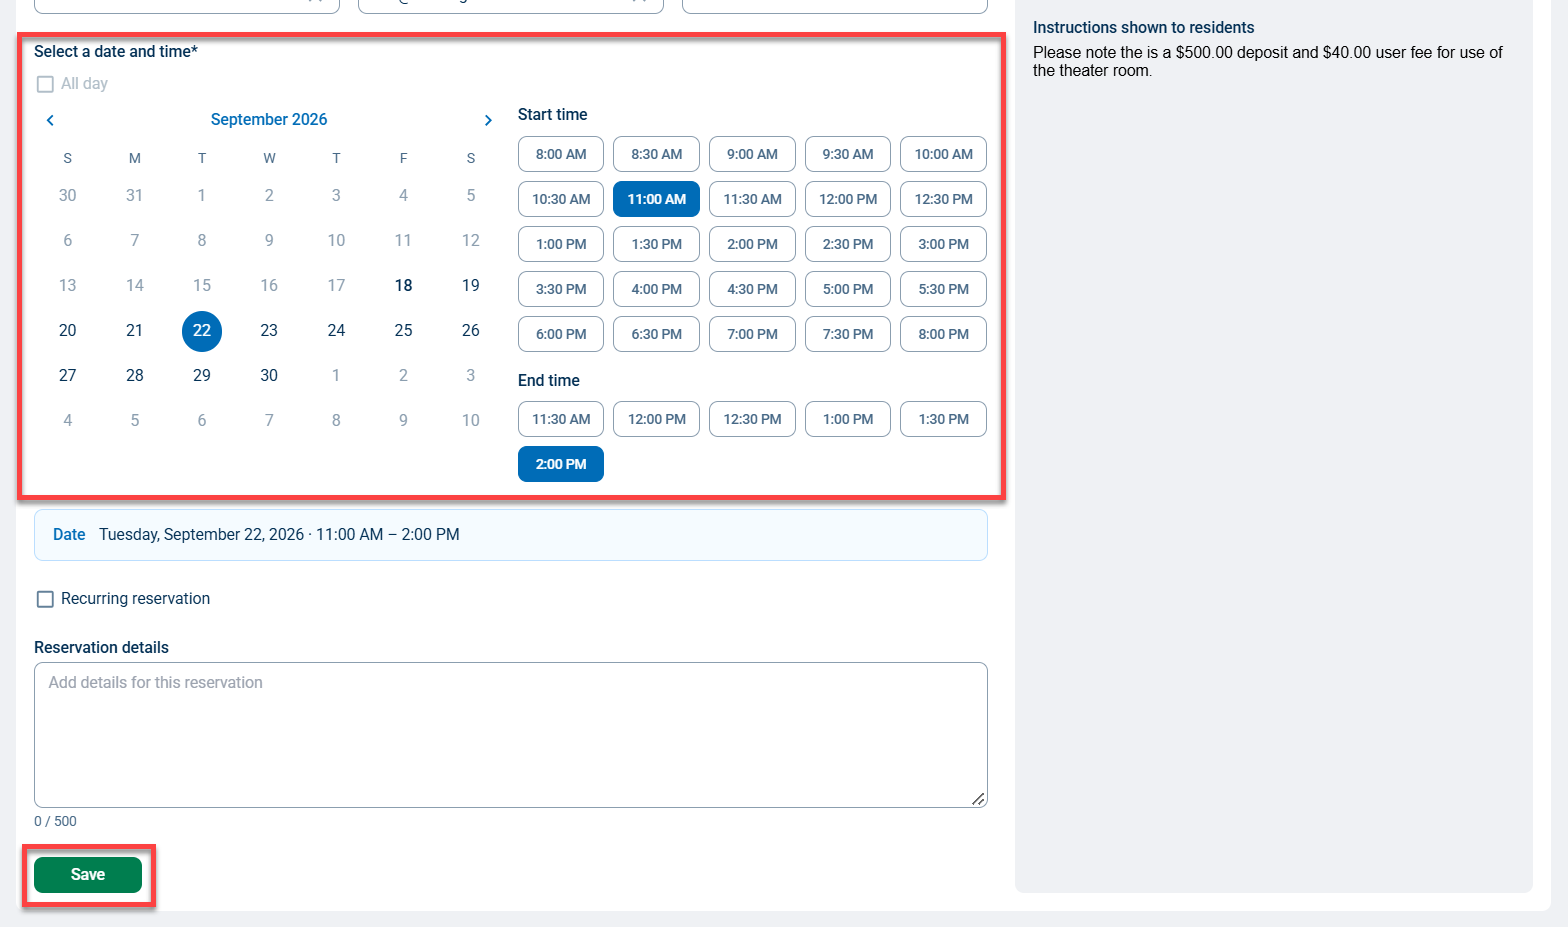
Next, set the reservation date and time. You can also choose to enter All Day reservations - ex. you might enter an All Day reservation for the Mgmt unit if a particular amenity will be closed for an entire day.
Lastly, enter any relevant reservation details and click Save.
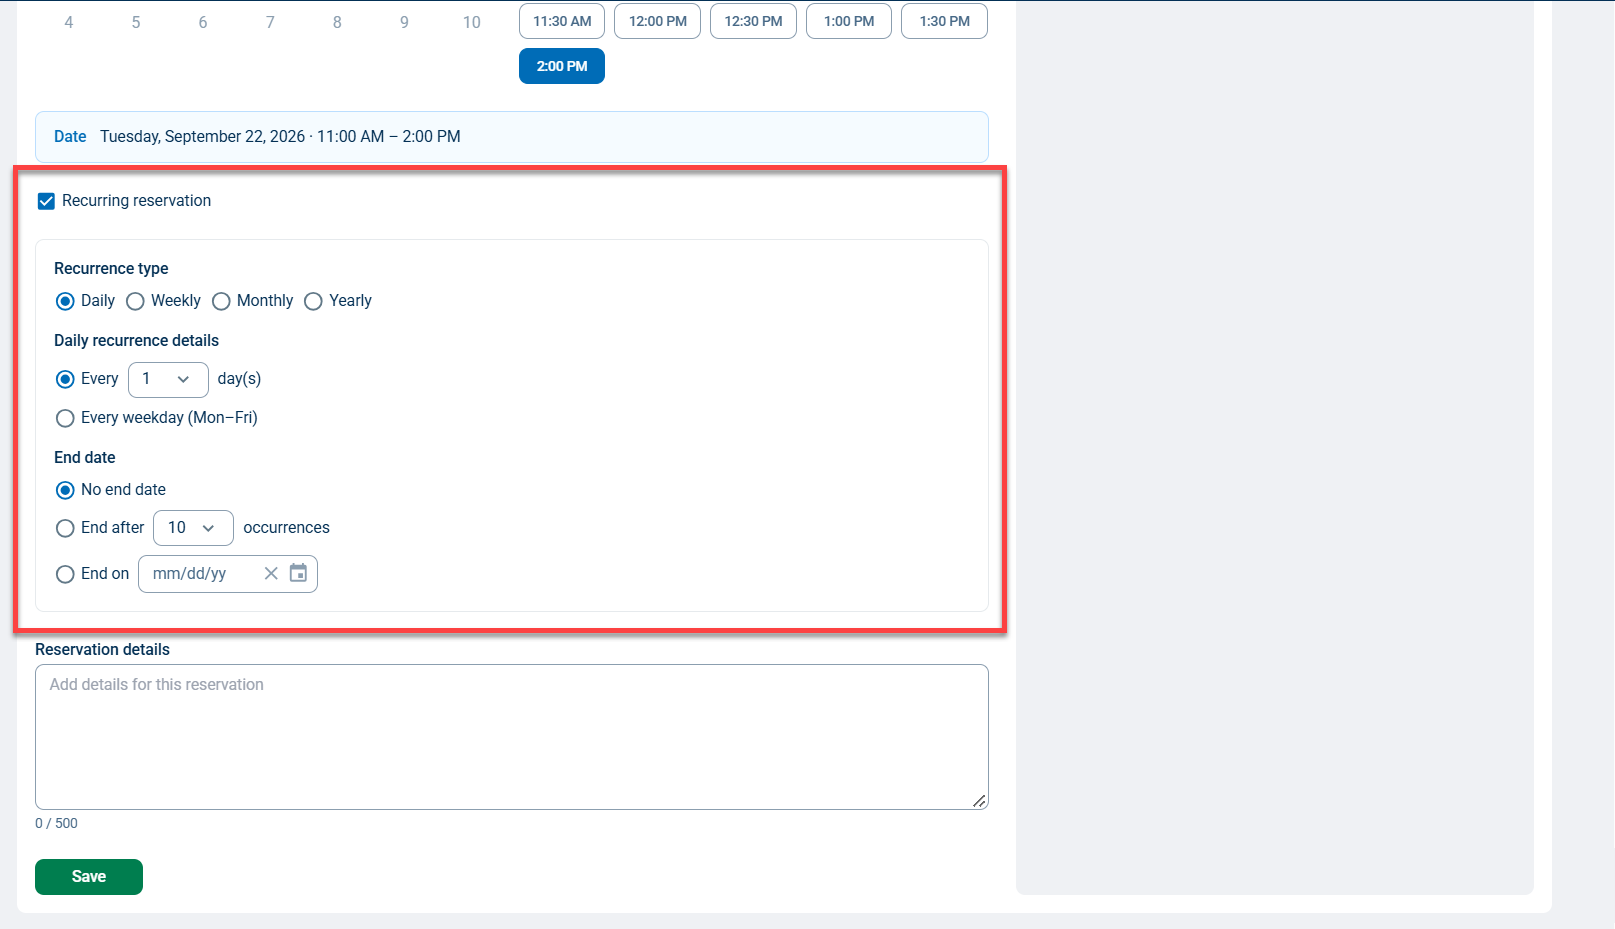
To enter a Recurring Reservation, click the checkbox next to Recurring Reservation. The recurrence settings will appear, allowing you to schedule the reservation on a recurring basis.
You can use the recurring reservation tool to reserve the Club Room for a book group every Monday, for example, or for Board meetings that require Board Room reservations every second Tuesday of the month.
Approving/Declining/Canceling or Editing Amenity Reservations
To change the status of a reservation, you must be a Management or Security Officer BuildingLink user or have a Special Permission. If a reservation type that should not require approval, please see our Amenity Reservations Settings section for information about setting a specific amenity type to approve automatically.
To change the status of a reservation, click the Manage tab and select Reservations. By default, you’ll see all Requested and Approved reservations. To view only requested reservations, click the Status filter at the top, and check the box next to Requested to filter the list of reservations.
Click on the reservation you’d like to approve, decline, or cancel.
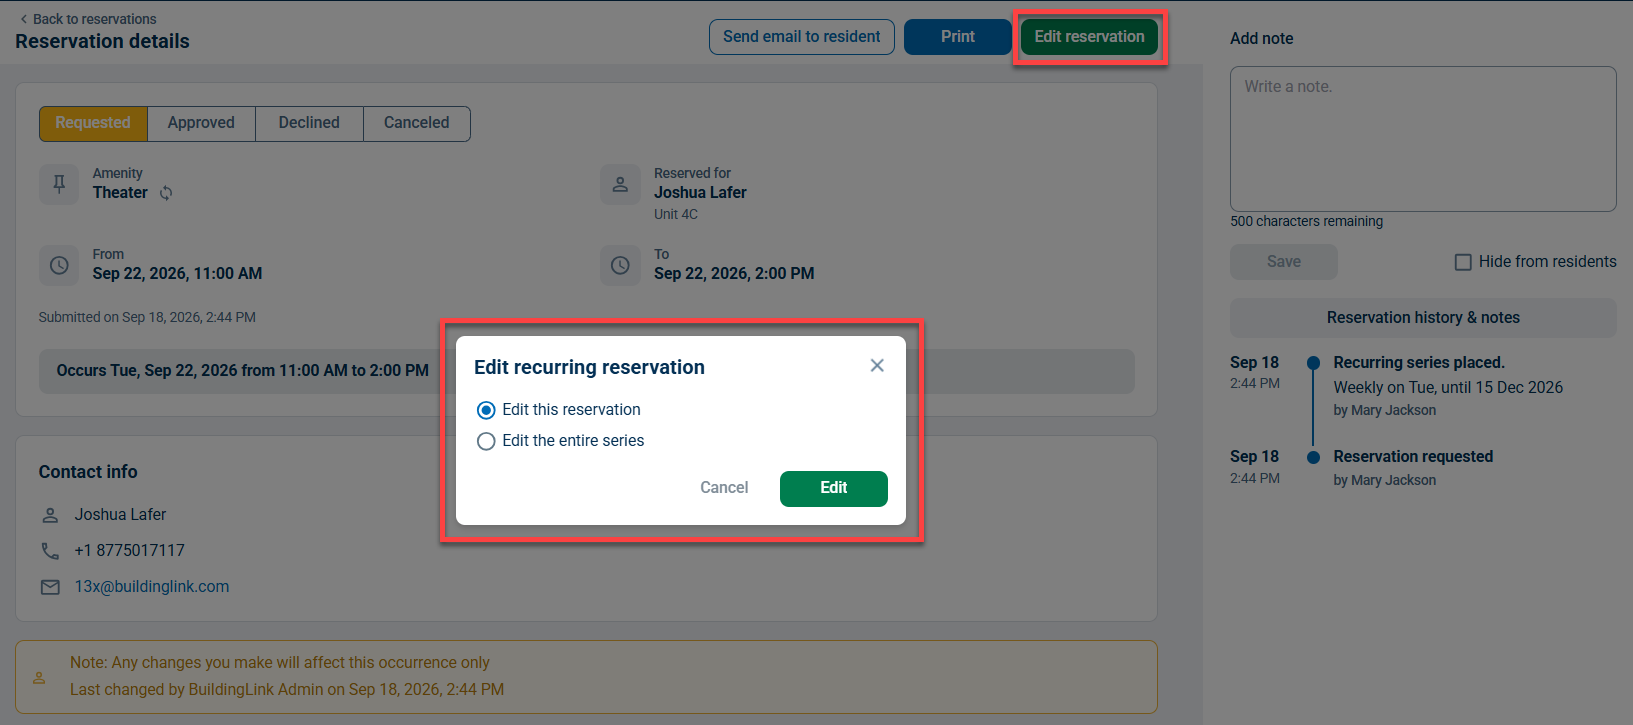
If you’re changing the status of a Recurring Reservation, you can edit the specific occurrence you clicked on, or edit the entire series.
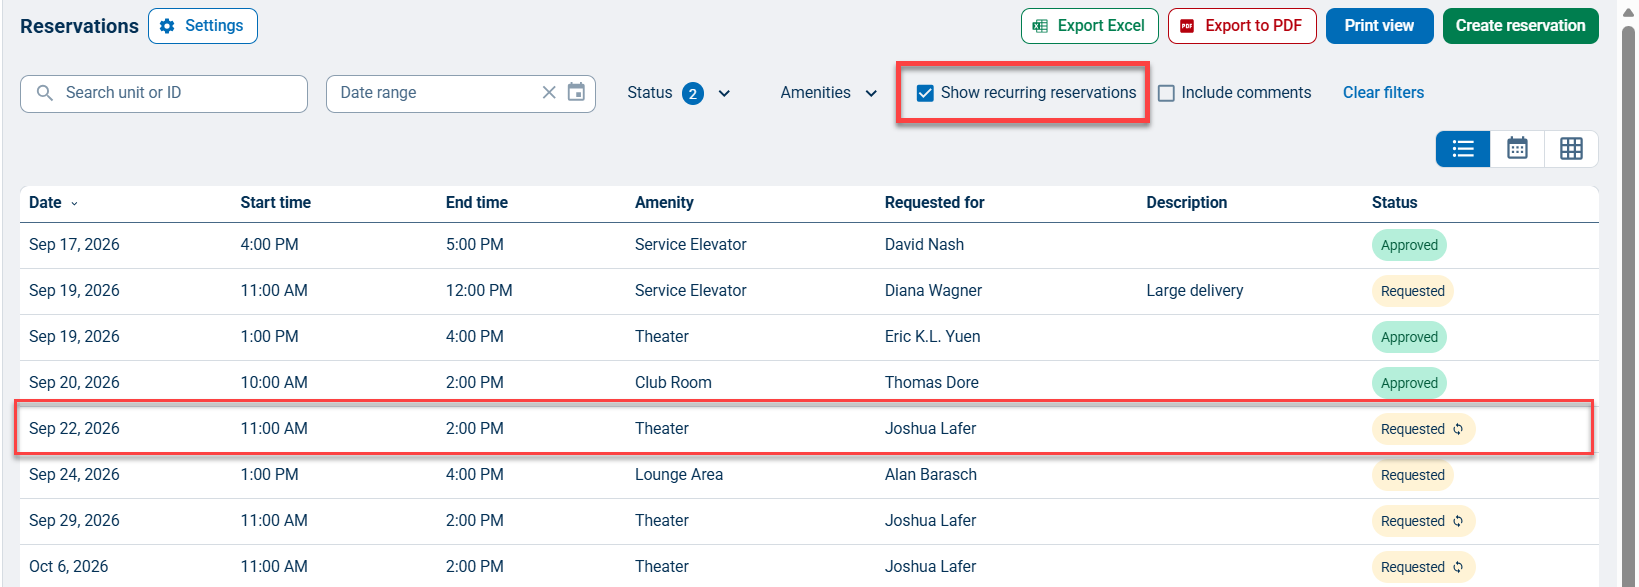
To view Recurring Reservations, you must check the box next to Show Recurring Reservations.
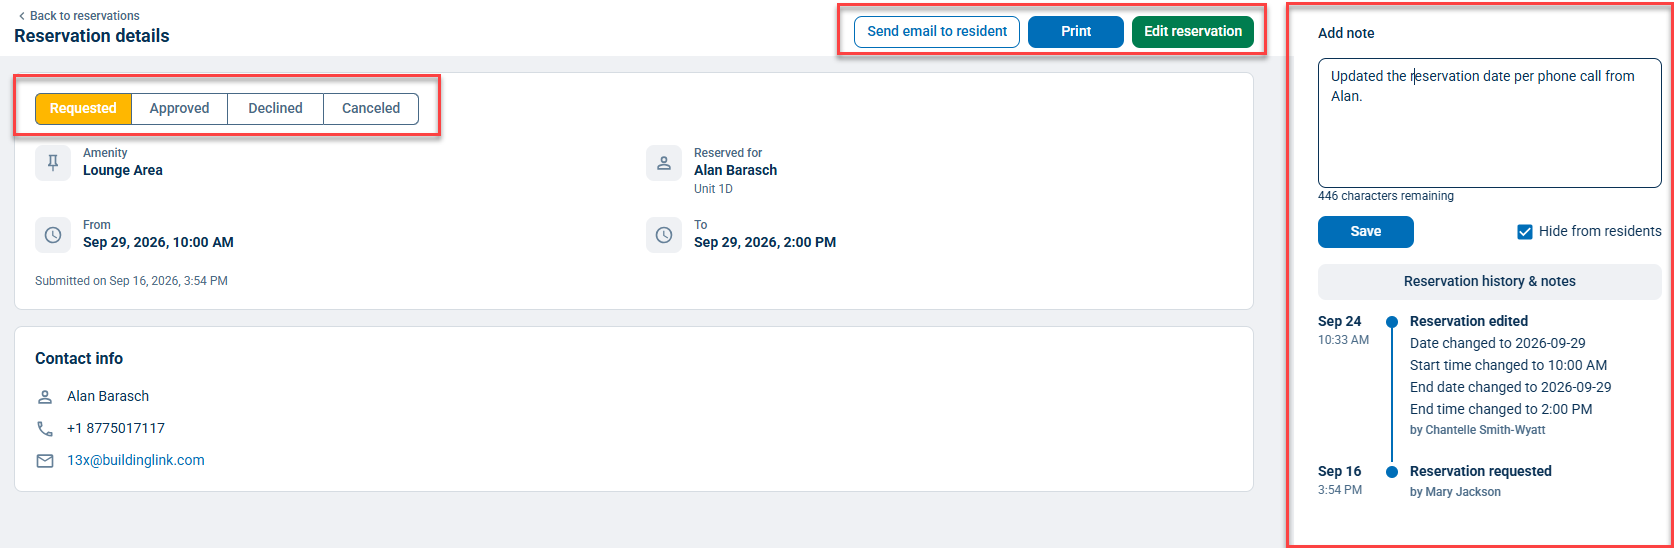
At the top of the Reservation Details page, you can change the reservation status by clicking the appropriate status option. Depending on your property settings, this may automatically email the resident to let them know that their reservation has been changed.
You can also Add Notes to the Reservation history and notes section to the right of the reservation details if you’d like to add a note about the reservation (ex., “Payment Received” or, for an elevator reservation, “Certificate of Insurance Received”). When adding notes, check the box next to Hide from residents if you do not want the resident to be able to view it. Click Save to add the note.
You can also communicate with the resident about the reservation by clicking the Send Email to Resident button at the top of the page. Use this tool to send email reminders if, for example, the resident still needs to turn in paperwork or payment before the reservation is approved. The email you send will be saved in your Reservation History and Notes section as a permanent record.
If you need to edit the reservation information - such as the date or time - click the green Edit reservation and remember to click Save when you're done making changes.