
Overview
TippingLink allows property staff to receive secure, cashless tips from residents anywhere, at any time. Also, information about your tips stays between you and the resident who tipped you, and you keep 100% of your tips.
Resident tips appear instantly in TippingLink. Transfers into TippingLink and out to your bank accounts can each take up to 1-3 business days to process. Push to card" funds typically land within minutes, rather than the 1–3 business days of a standard bank transfer.
This article covers how tipped staff can access and use TippingLink. If you'd like to learn how to enable TippingLink for your property and view TippingLink FAQ's, see our TippingLink Setup article. If you'd like to learn more about the TippingLink resident experience, see our TippingLink For Residents article.
Note: Click on the images to enlarge them.
Table of Contents
- Quick Overview Video
- Enablement and Overview Webinar
- Accessing TippingLink
- Viewing and Withdrawing Tips
- Sending a Thank You Message to Residents
- Managing Your Profile
Quick Overview Video
Enablement and Overview Webinar
Accessing TippingLink
You can access your TippingLink profile by clicking the Get started button in your invite email or by logging in to BuildingLink and selecting TippingLink to begin setting up your profile. Once you've created your profile, you can also log in by going to TippingLink.com.


You will be prompted to create your profile by providing your email address and customizing a password for the profile. Click Sign up to move to the next step of setting up your profile.

Click Begin verifying to start the verification process.

Click the dropdown menu to select the country of your government-issued ID, and then click Select.

Add your basic information (Name, Birthdate, Address) and click Continue.

Once the verification process is complete, you can click Done to move to the final step of adding your banking information.

Add your banking information (Account holder name, Account type, Account number, Routing number) and click Add my bank to complete your profile setup. You may also skip this step and add your banking information later.

Viewing and Withdrawing Tips
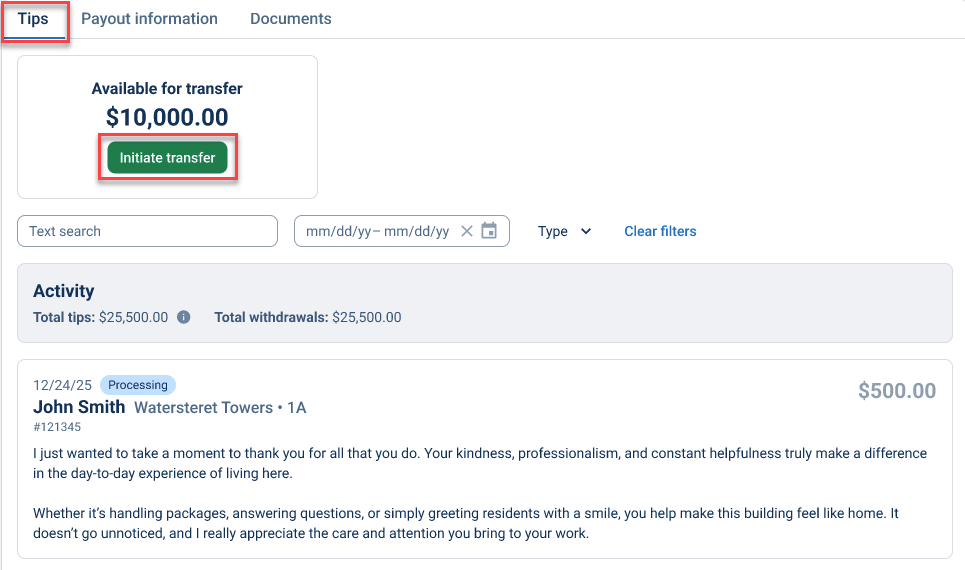
When logging into TippingLink, your tips and activity will be visible on the initial dashboard screen. You can view them by clicking Tips at the top of the dashboard page.
The total tips available for transfer will be shown at the top of the list, and you can click Initiate transfer to withdraw the money to your account.
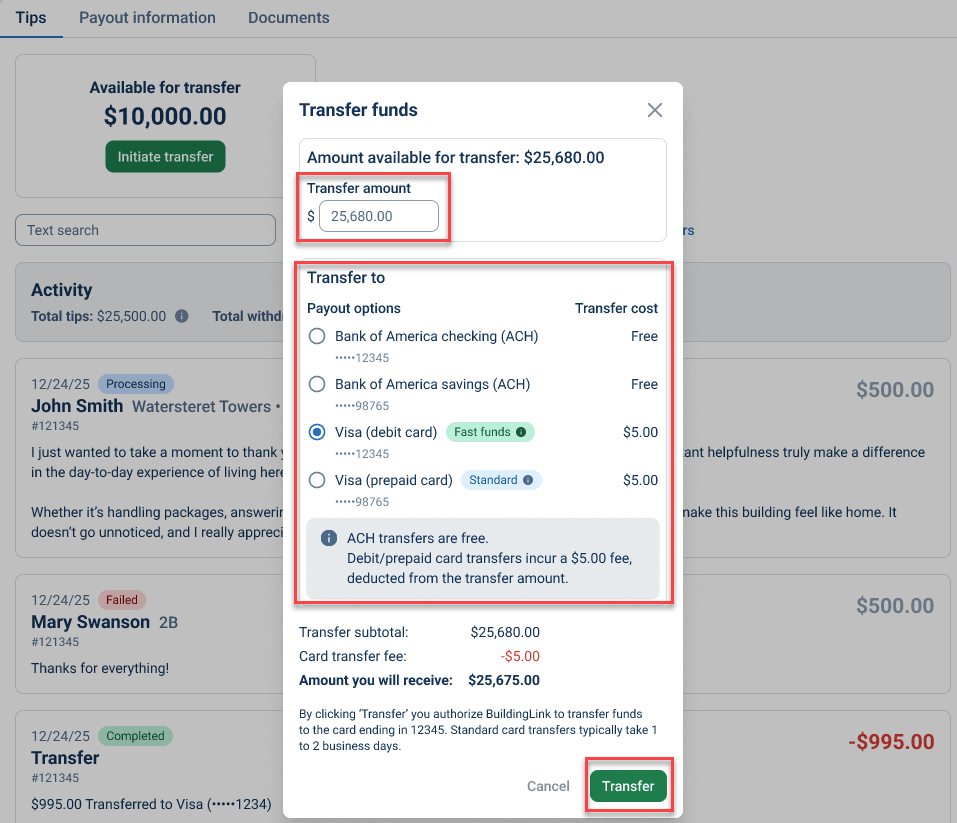
After clicking Initiate transfer, you may specify the amount to withdraw and which bank account or eligible debit card account to transfer the funds to. Click Transfer to complete the withdrawal.
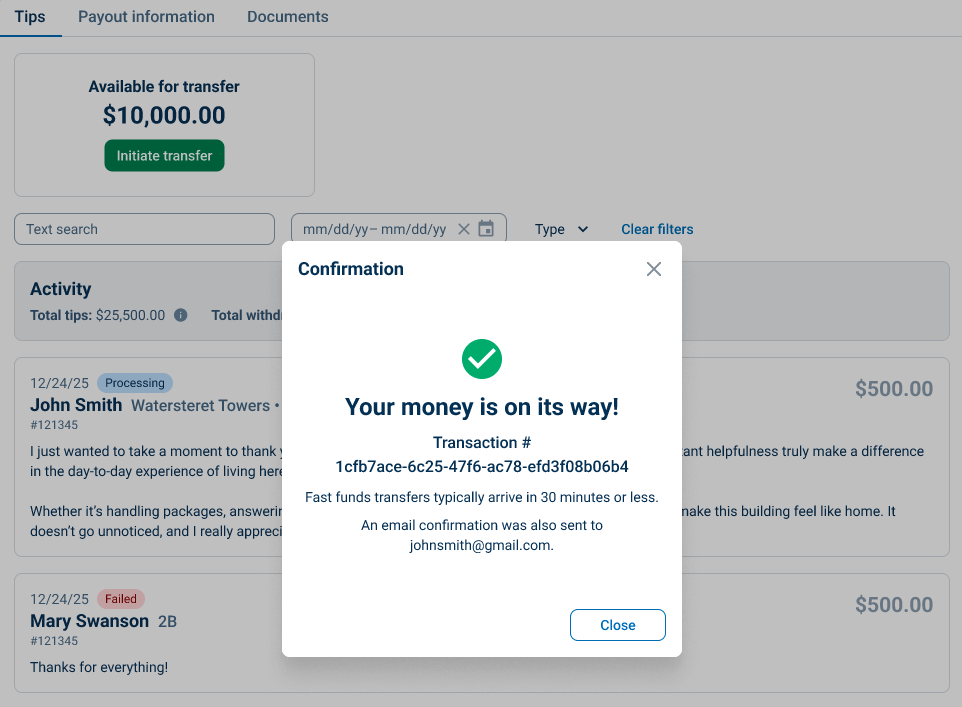
You will receive a confirmation message on-screen as well as an email confirmation for the successful transfer.
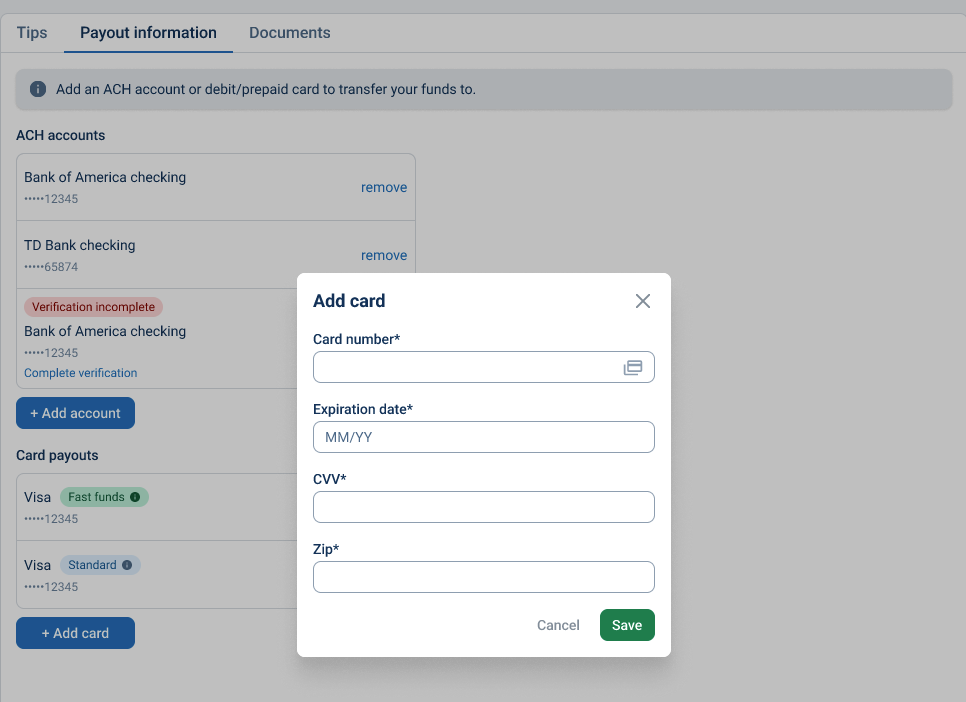
Click Payout Information at the top of the dashboard to view/update your linked accounts.
Click Add account to link a preferred Bank account, and/or click Add card to link a preferred debit card account. Fill in the information, and click Save to add a new account to your payout information.
Click Documents at the top of the dashboard to view your Monthly and Tax Statements.


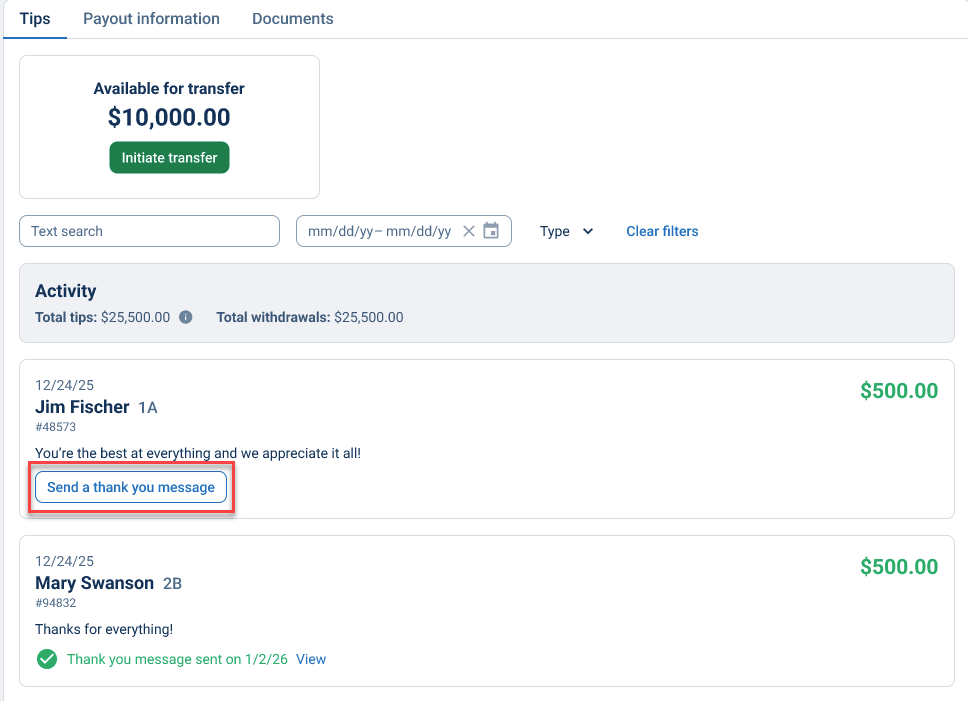
Sending a Thank You Message to Residents
You can write personalized thank-you messages to residents after receiving their tips. Residents will receive these notes via email, but their personal email addresses are not shared with staff; the notes are sent through the TippingLink application.
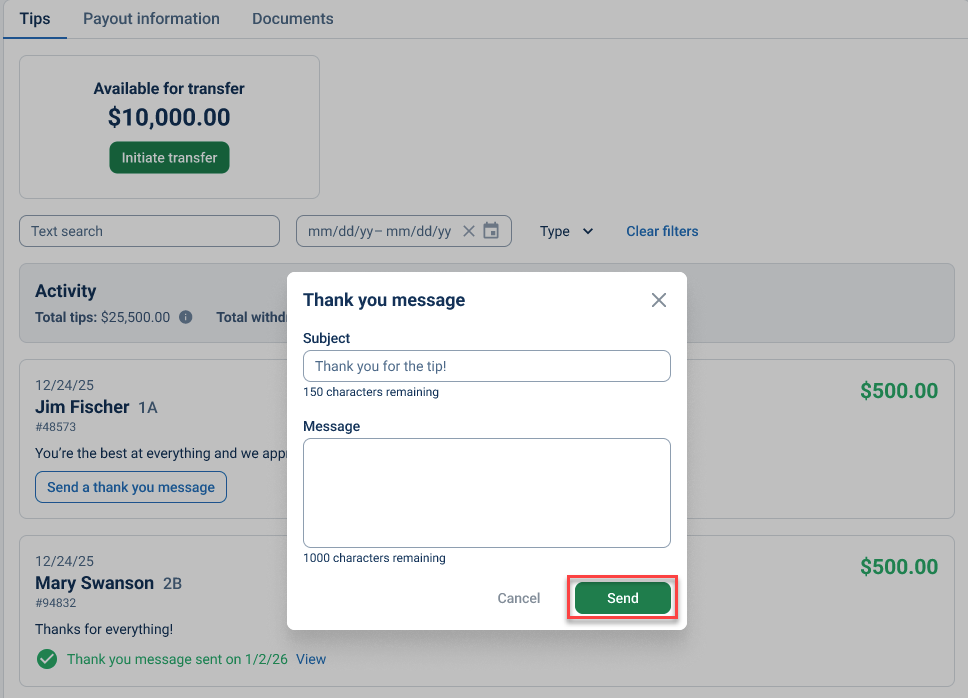
On the Tips page, you can view your tip activity. Click Send a thank you message, fill out the message details, and click Send.
Managing Your Profile
You can update your profile by clicking your name at the top-right corner, then clicking Profile settings. You may update your Display Name, Email Address, Cell Phone Number, and Photo.
