Note: This article is for the newly redesigned module. This updated module is in the process of being rolled out and may only be available to some users.
Overview
The Management Company Dashboard provides managers with centralized access to their entire property portfolio, providing unified administration, data, and operational oversight. Key data points displayed include: Manage employees, Manage buildings, Address book, Maintenance, Vendor directory, and more.
Note: Click on the images to enlarge them.
Table of Contents
- Accessing the Management Company Dashboard
- Manage Employees
- Manage Buildings
- Address Book
- Maintenance and Maintenance by Category
- Download Data
- Vendors Directory
- Data Analytics
Accessing the Management Company Dashboard
To access the management company dashboard, you must be added as a "Management Company User," which assumes that you have access to all buildings within a specific management company's portfolio. If this describes you, please contact support@buildinglink.com for access.
For information on the Properties tab and employee Superuser accounts, refer to Employee Superusers.
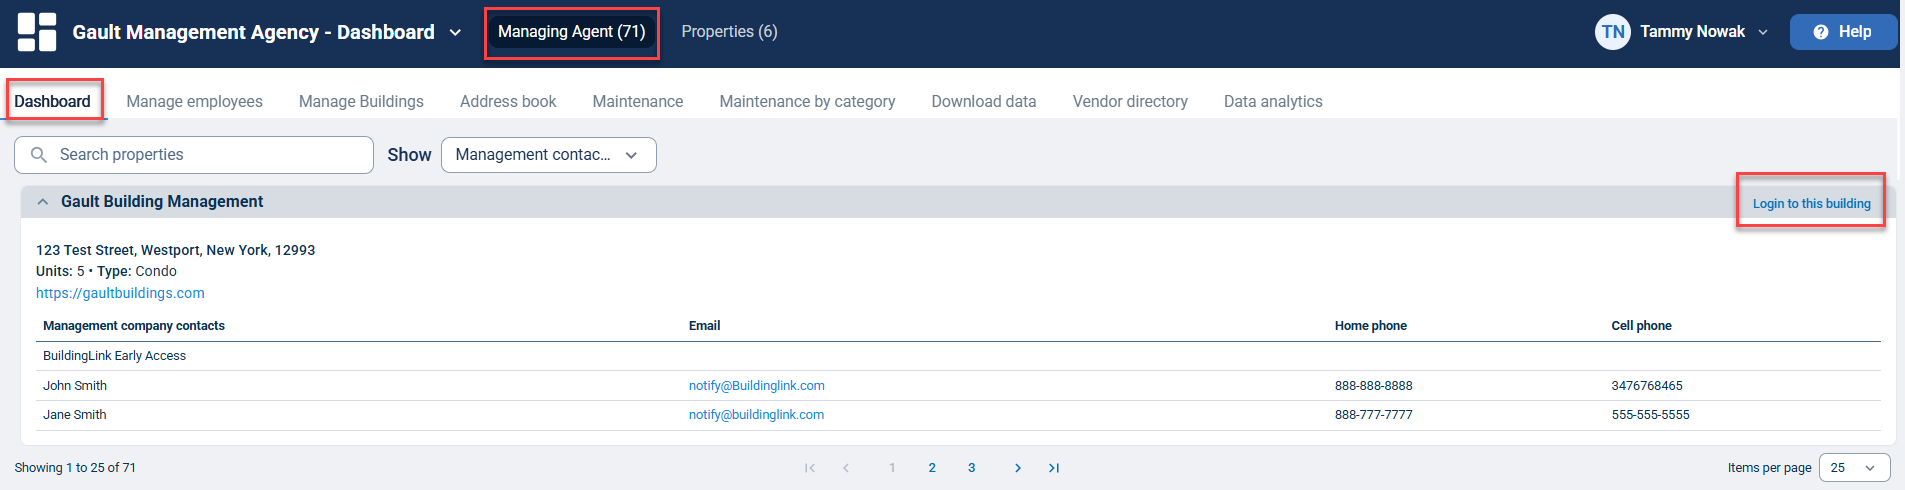
Once logged in to the Management Company Dashboard, you will see the total count of managed properties beside Managing Agent. You can also log into accessible properties from the Dashboard tab by selecting Login to this building beside the building record.
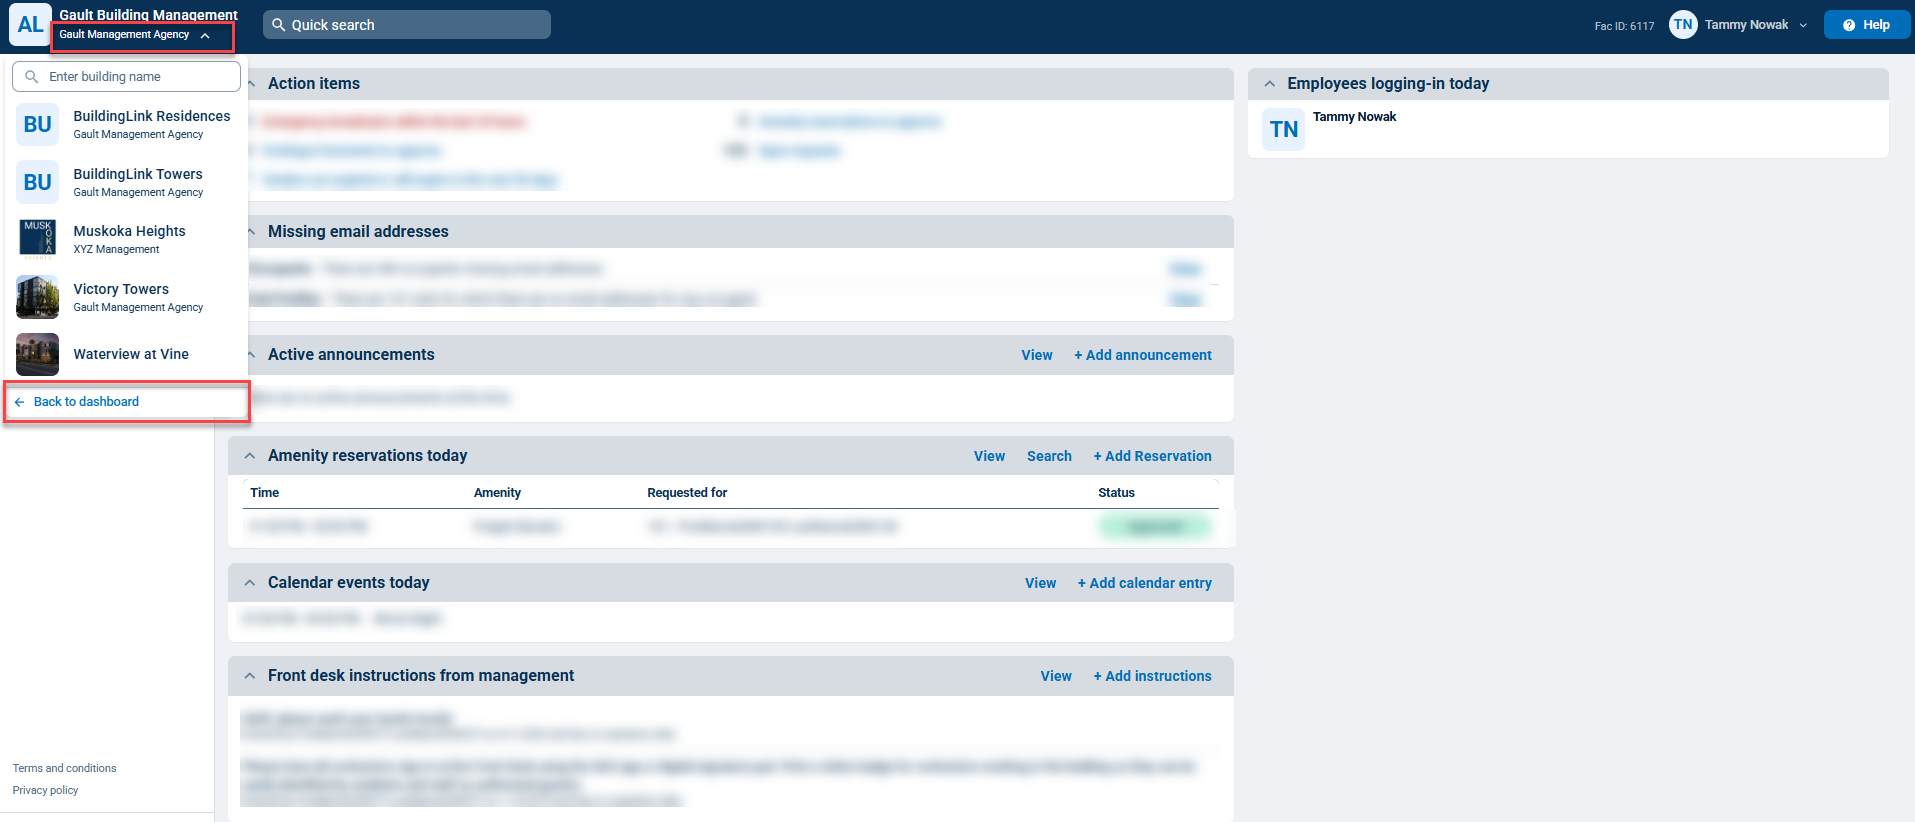
To exit a building and return to the dashboard, click on the dropdown under the building name, then click Back to dashboard. Alternatively, you can enter another building by clicking on it within the dropdown.
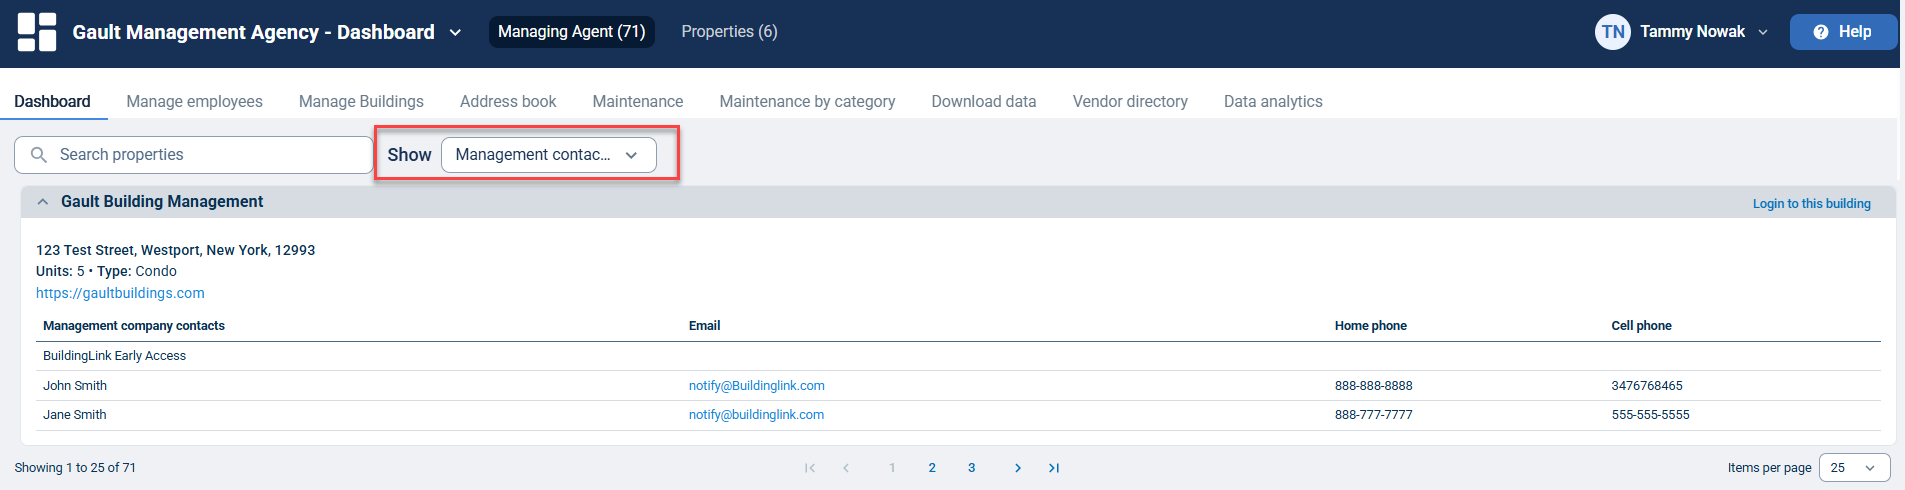
You can also filter for the following building details on your dashboard by clicking the dropdown selector beside Show:
- Management contacts
- Public displays
- Employee birthdays (next 3 days)
- Open maintenance request counts
- Calendar events
- Management and board contacts
- Move in/Lease begin
- Move out/Lease end
Manage Employees
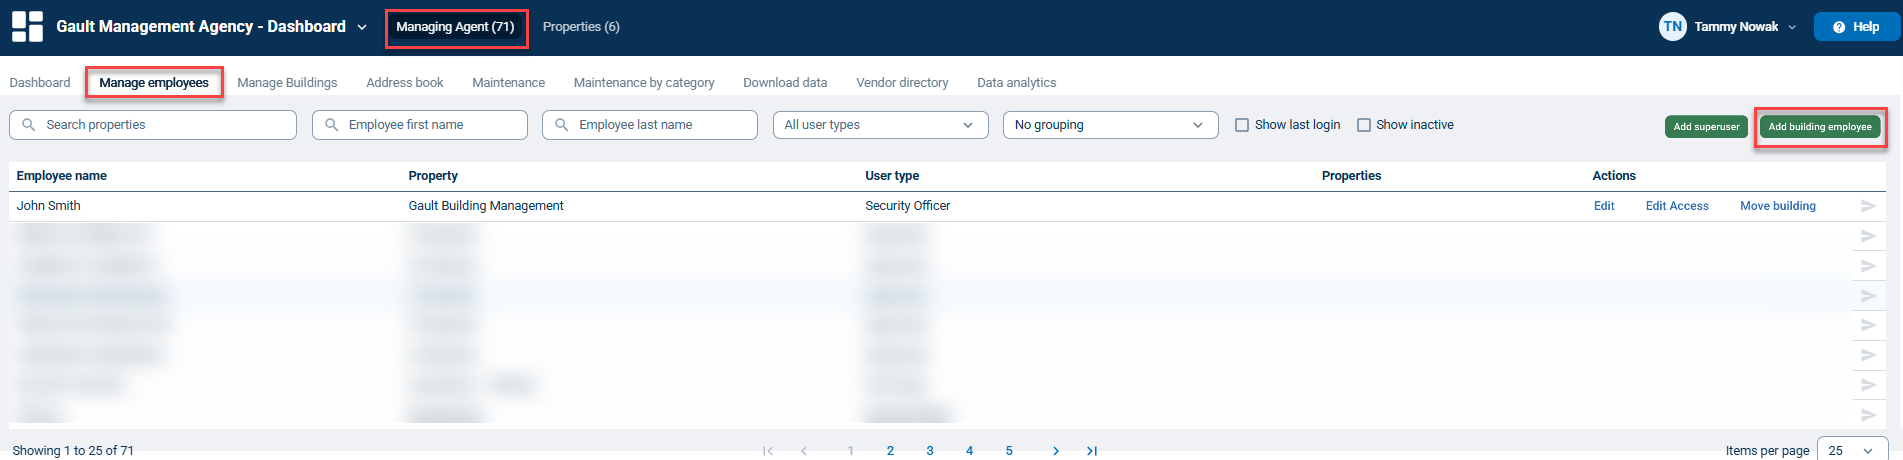
While on the Managing Agent tab, select Manage employees from the navigation bar. The records on this tab will be ungrouped by default. You can apply filters to better group the records.
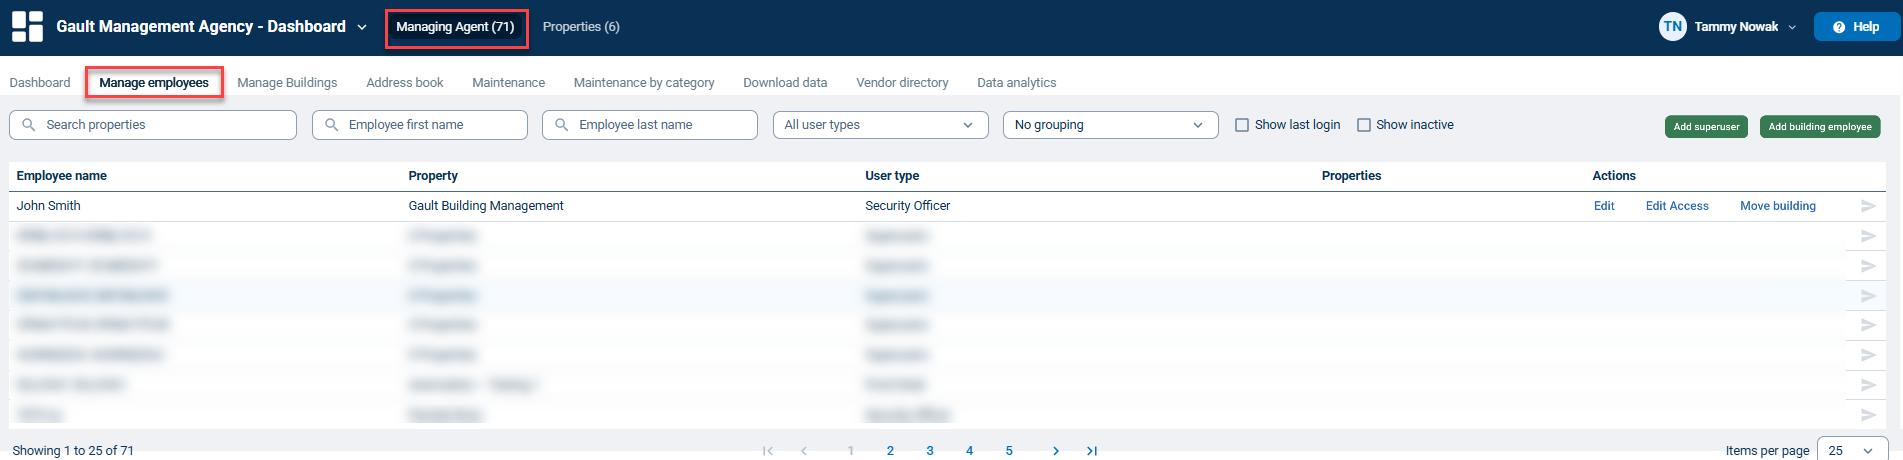
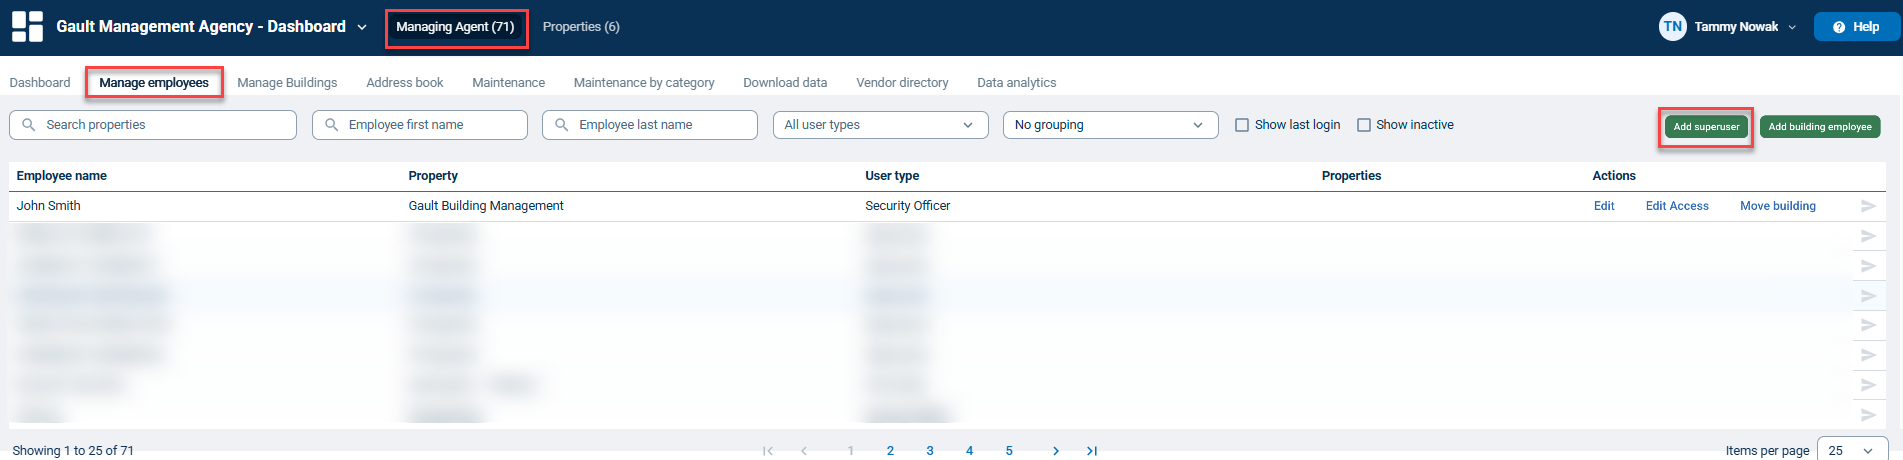
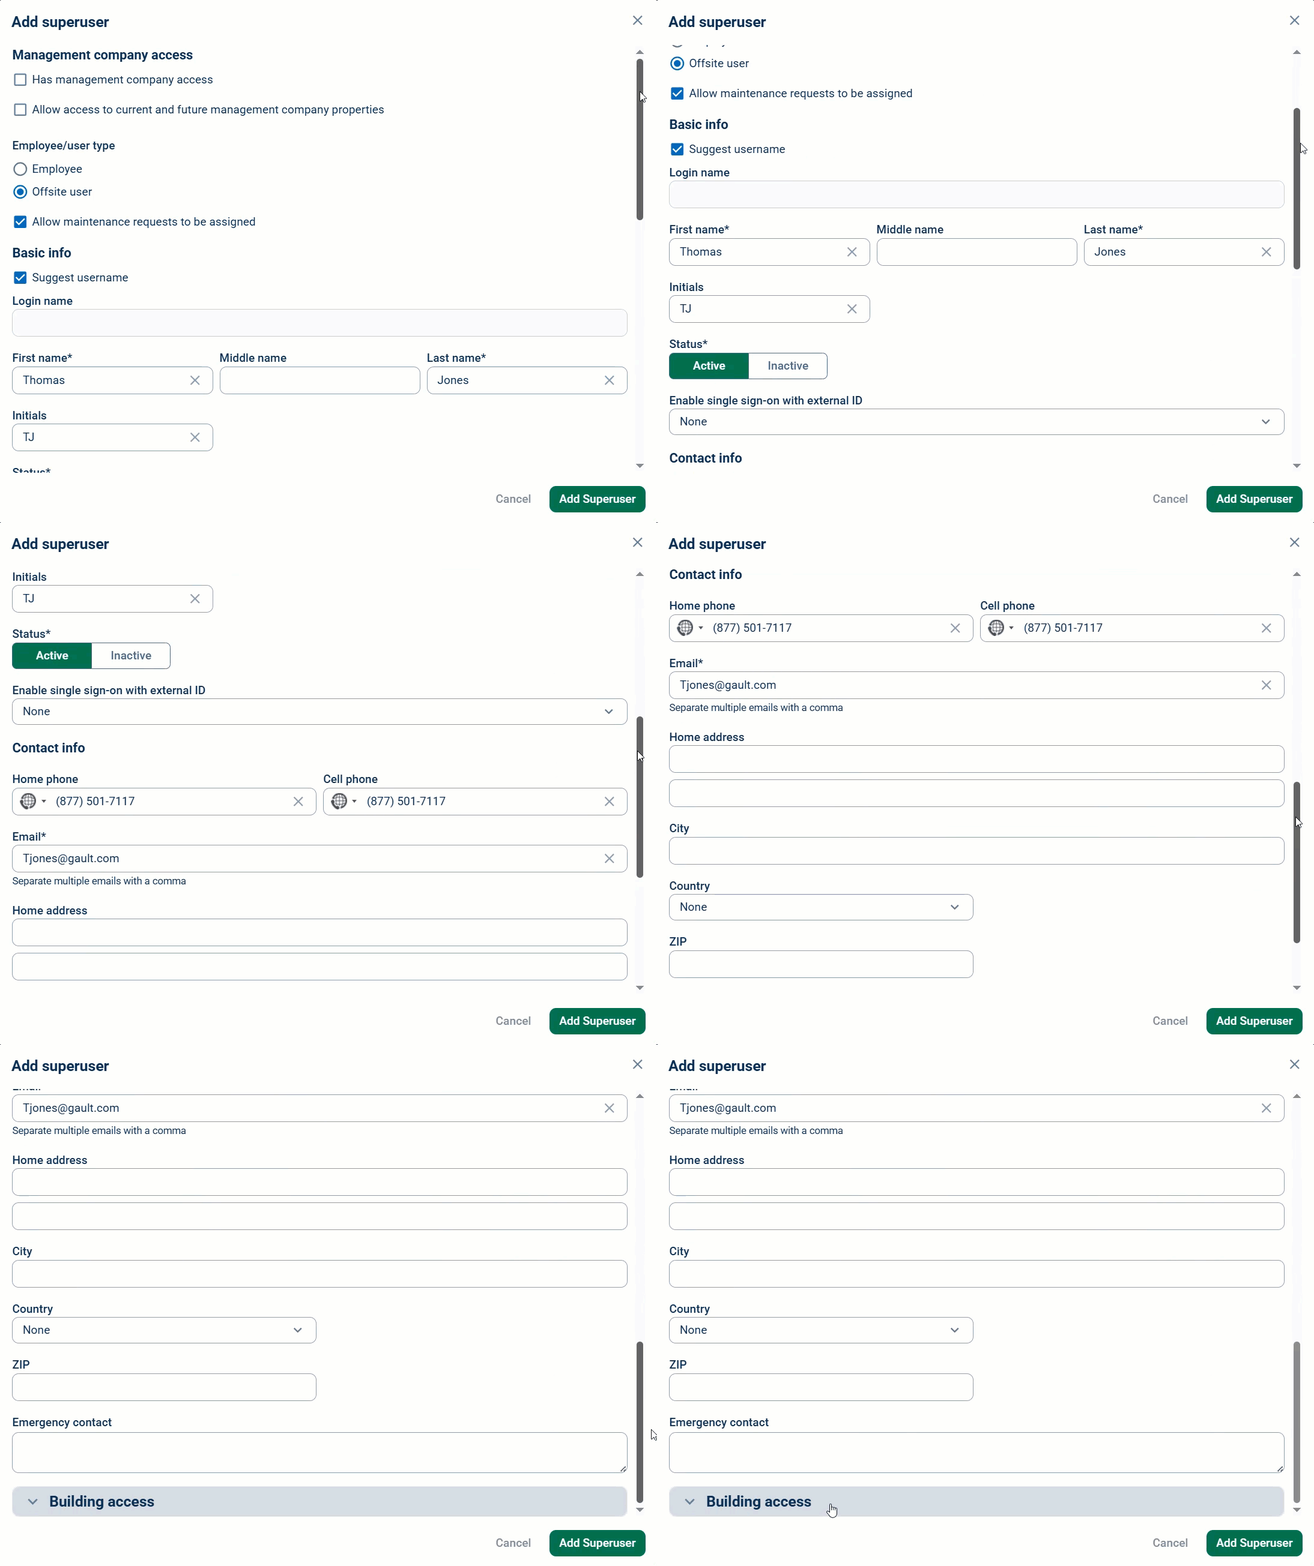
To add a new Superuser (an employee who will have access to more than one building within the management company's portfolio), click the Add superuser button.
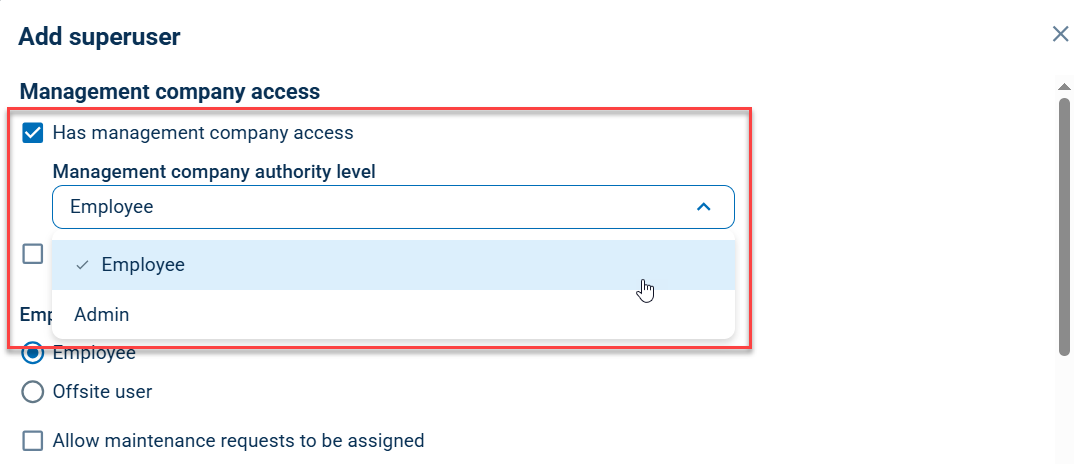
First, specify whether the superuser will have access to the Management Company Dashboard.
- Admin: can add other management company users.
- Employee: can manage employees across buildings and perform other functions from the Management Company Dashboard. Employees cannot create new management company users.
Note: Leave the setting unchecked if the Superuser should not have access to the Management Company Dashboard.
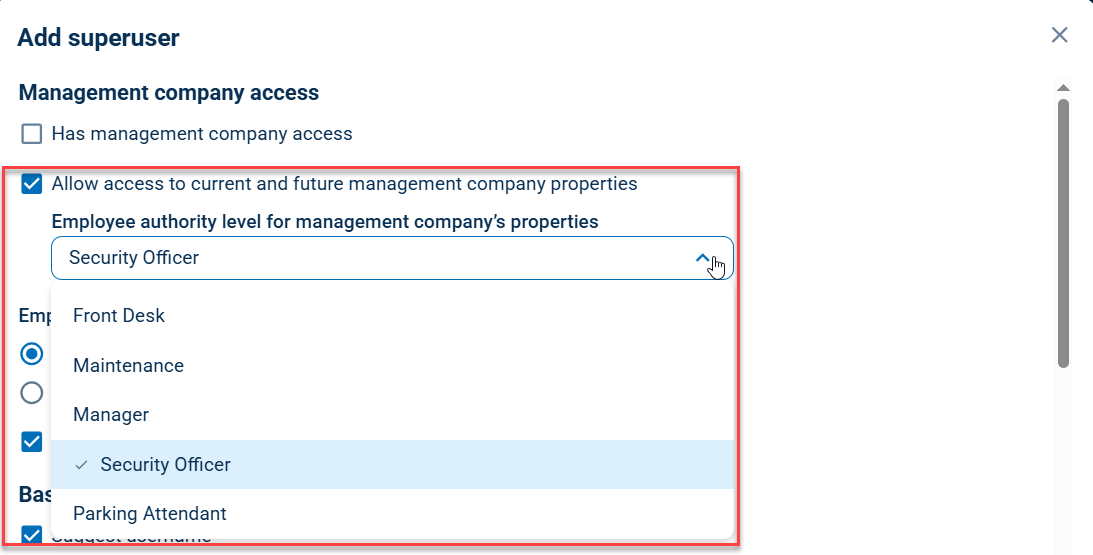
Next, check whether the superuser should be added to all current and future properties for this management company and, if applicable, select the appropriate Employee Authority Level.
Note: Leave the setting unchecked if the Superuser should not have access to all management company properties. You can give them access to specific properties further down the form in the "Building access" section.
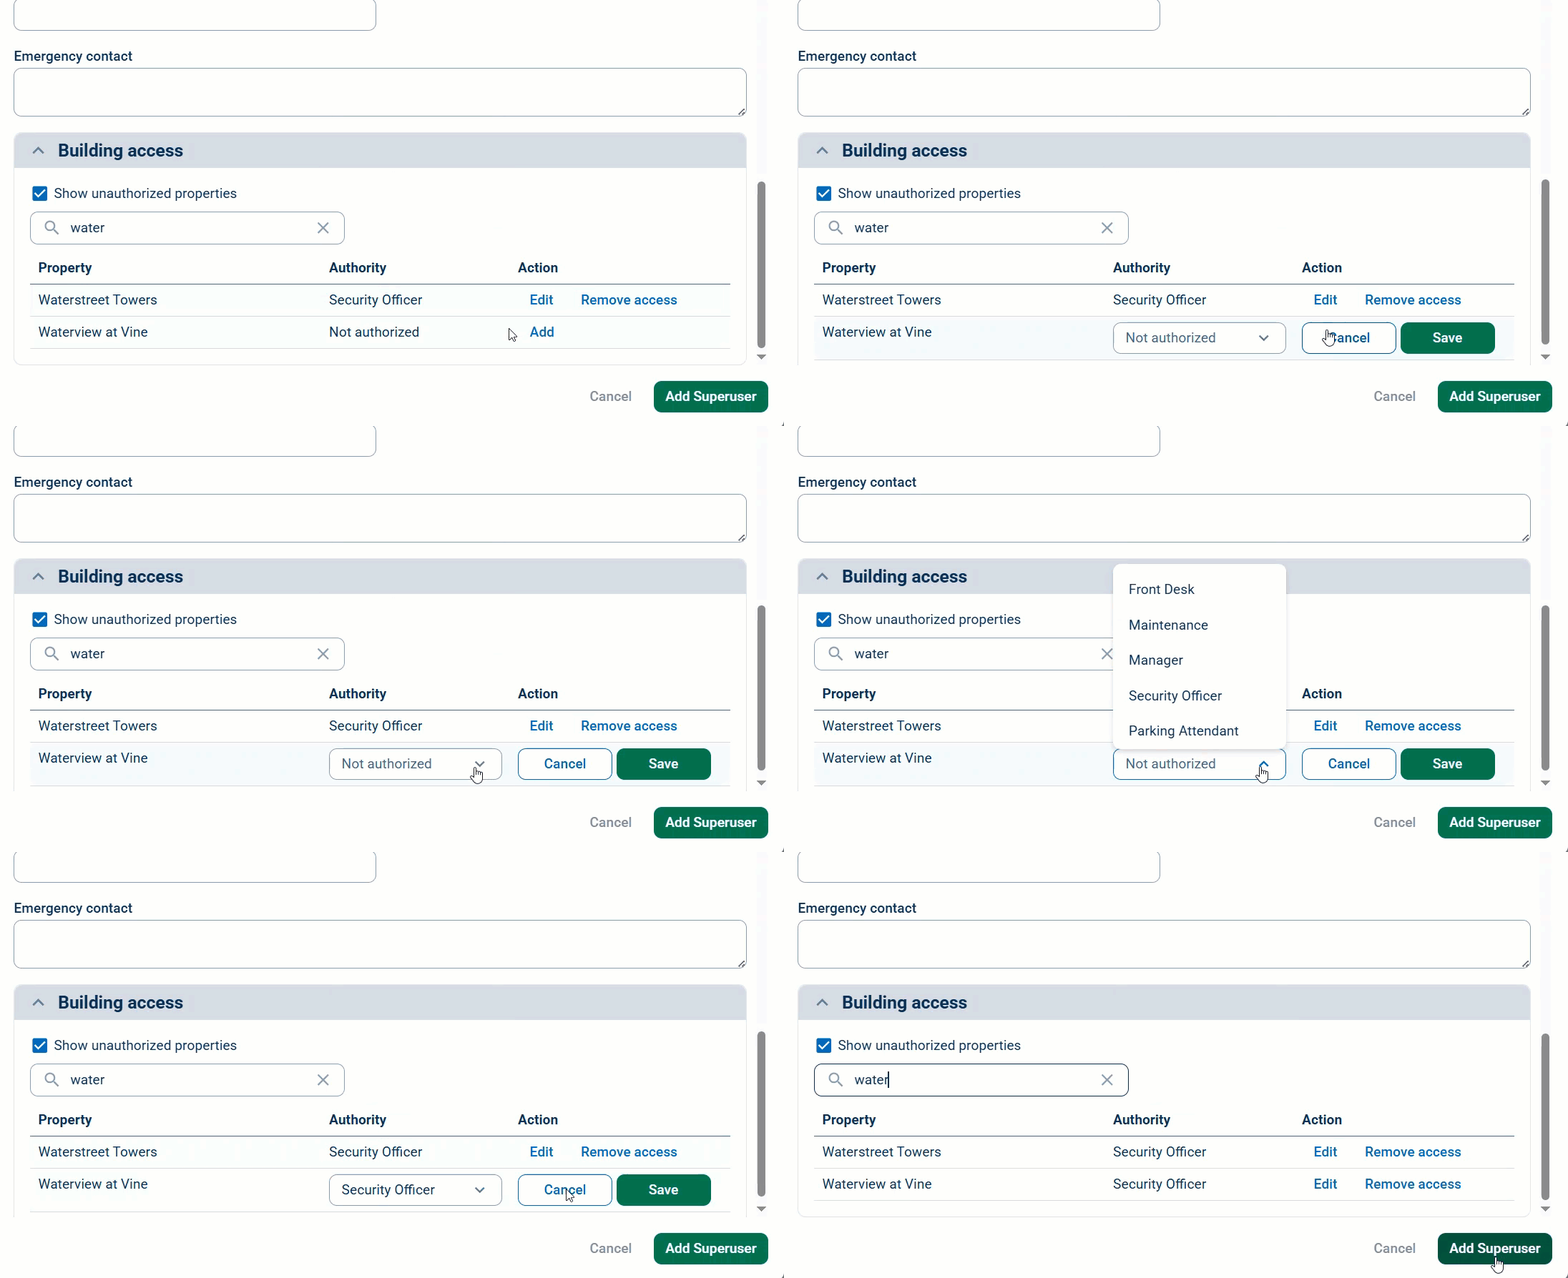
Fill out the rest of the form, and click the Building access header. Here, you can select properties for your superuser to access and set the appropriate Employee Authority Level at each one. When you're done adding properties, click Add Superuser.
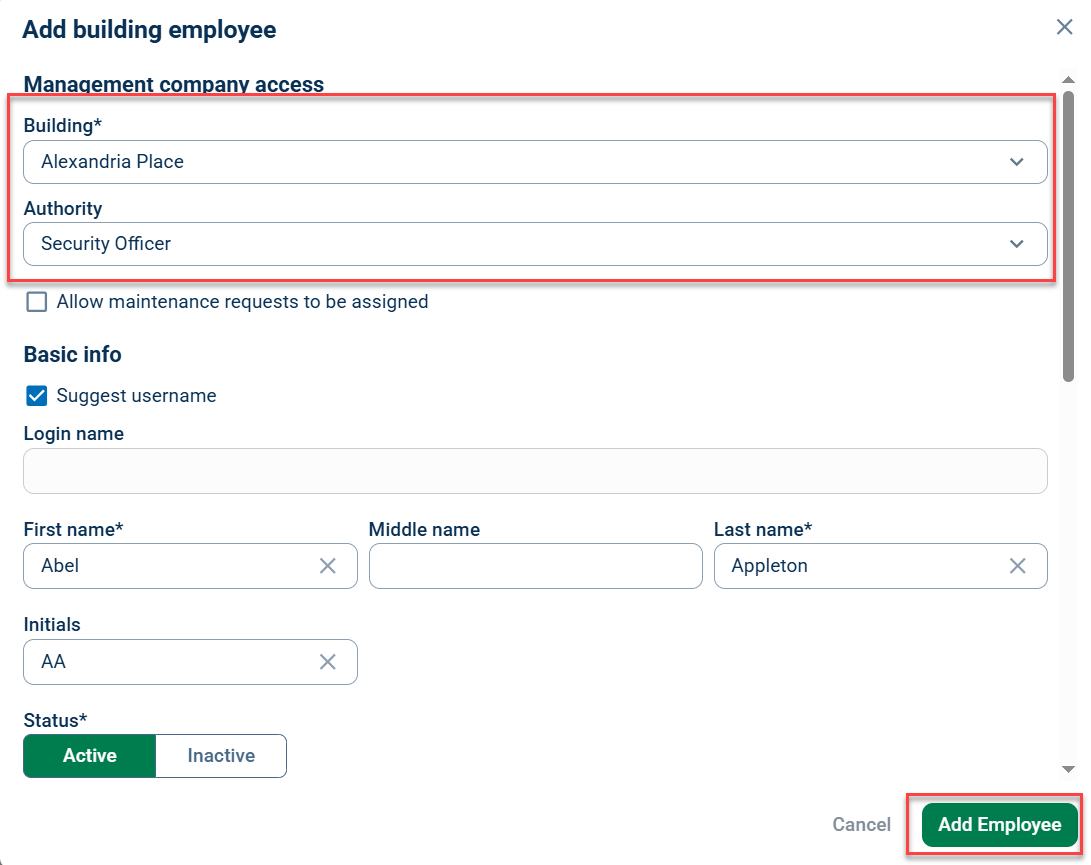
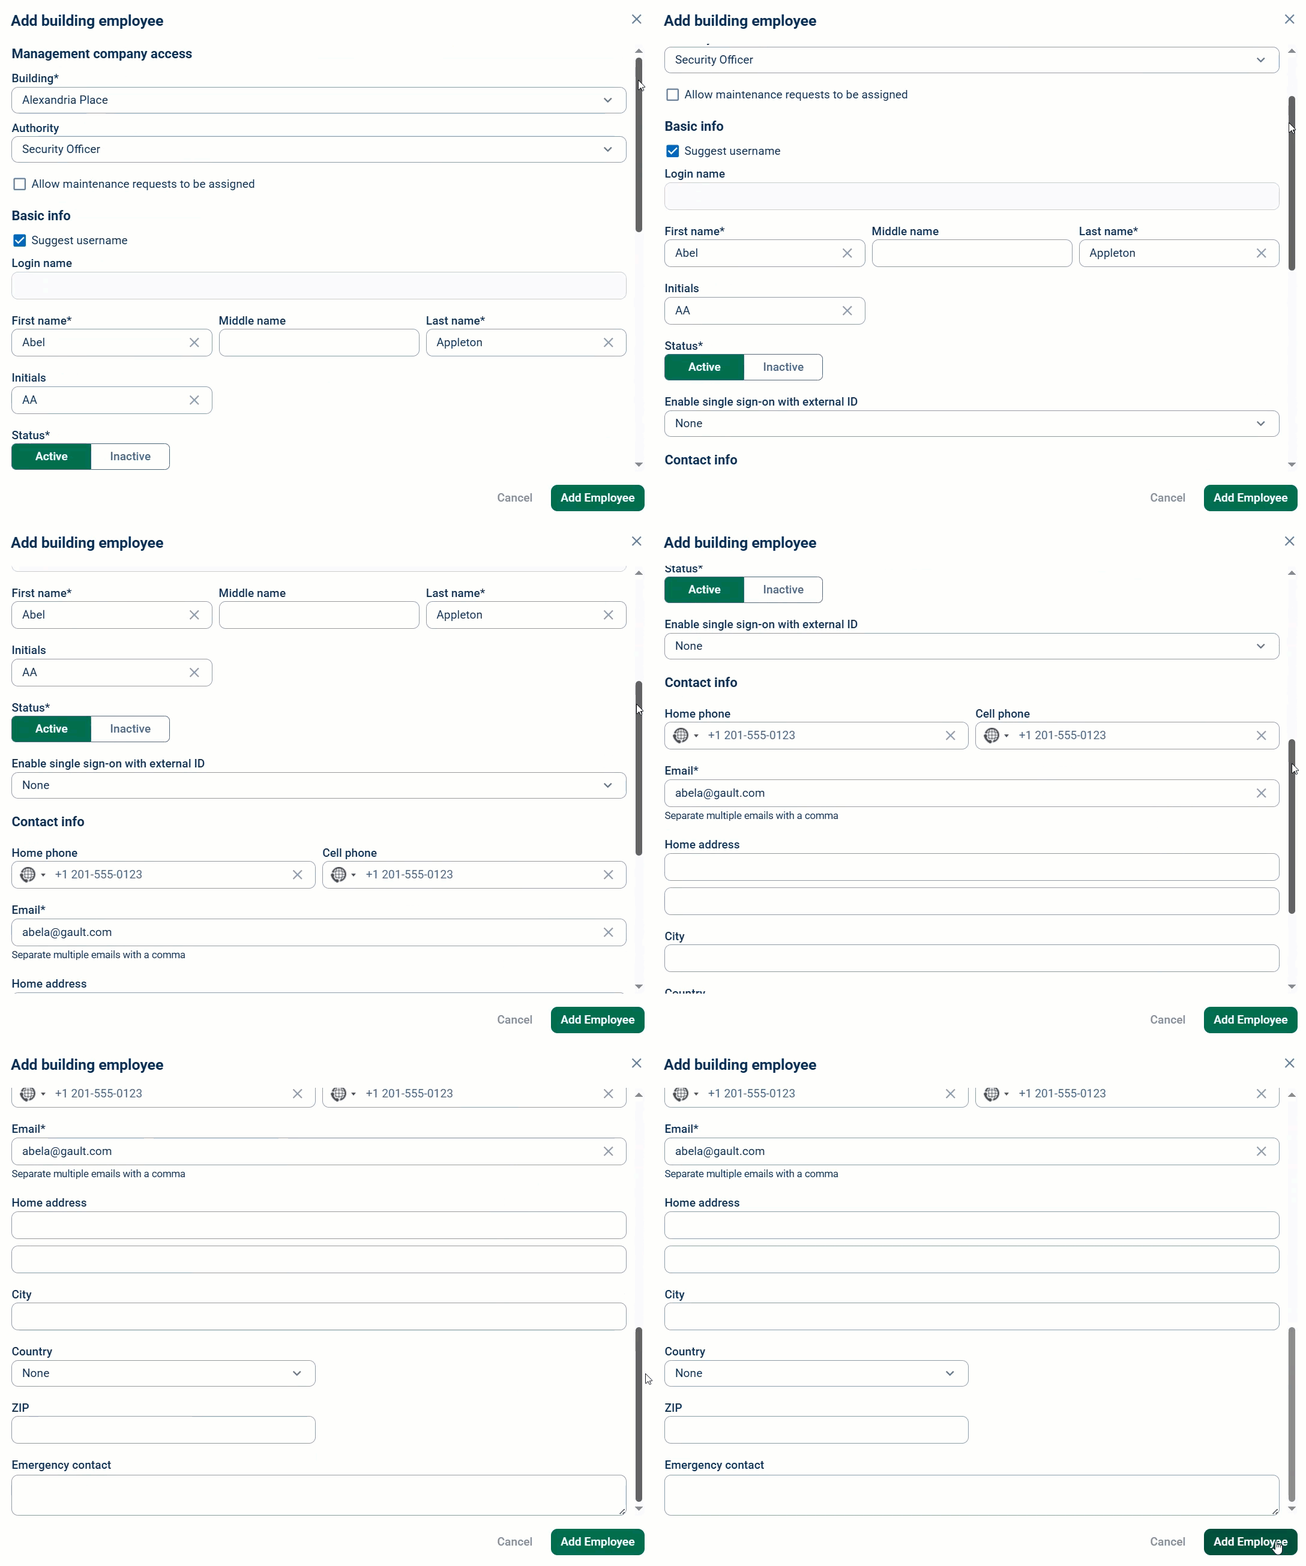
To add a new employee to a single building, click the Add building employee button. First, select the building you want to add the employee to, then select the appropriate Employee Authority Level.
Next, fill out the rest of the new employee's information and click Add Employee.
After adding an employee or a superuser, you will be taken back to the Manage employees page under the Managing Agent tab.
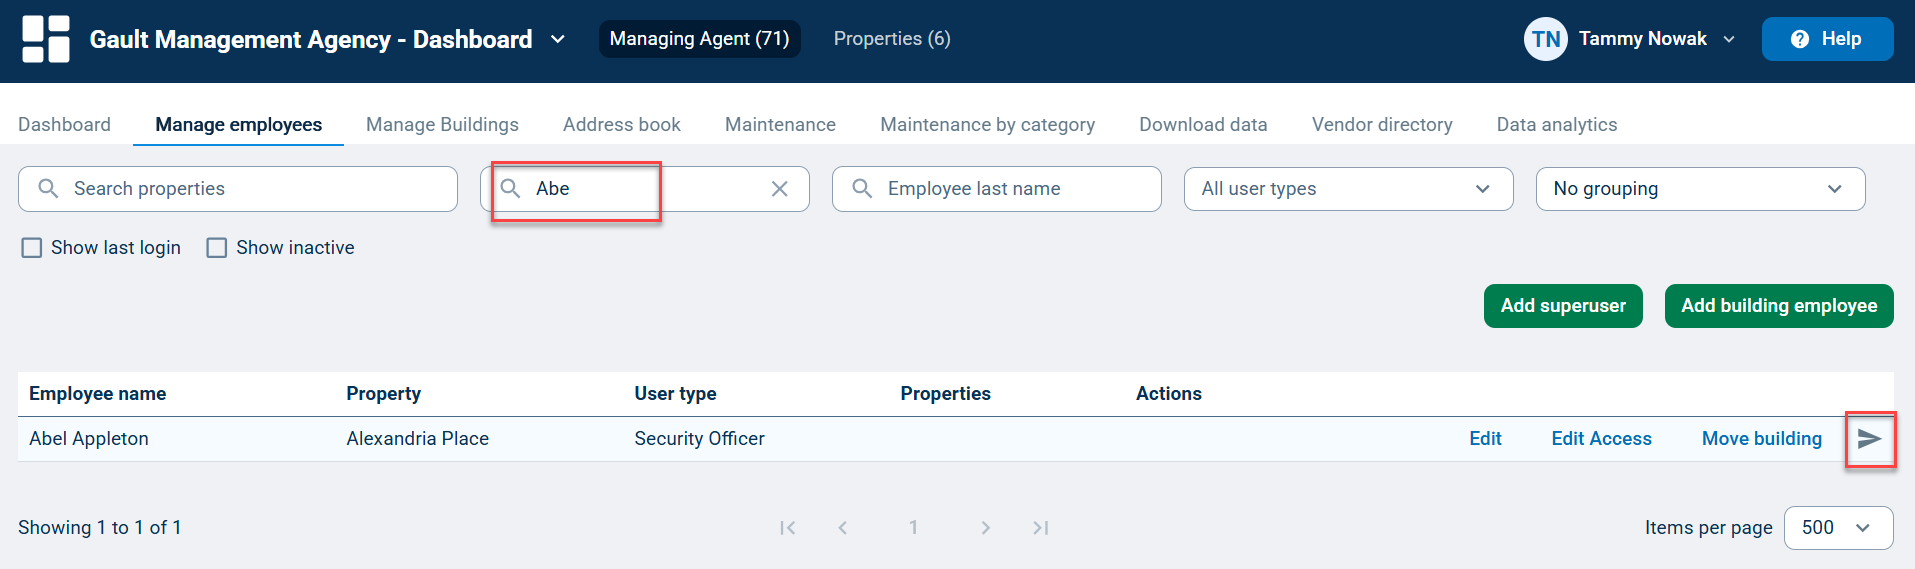
To send the new employee or superuser their login credentials, click on the employee record and select the arrow icon under Actions.
To edit user details, click Edit.
To edit your Superuser access to appropriate buildings, click Edit access beside the employee record. Then, scroll down the property list and click Add next to each building the employee should access. Select the appropriate authority level and click Save. When you're done editing the access list, click Save all changes.
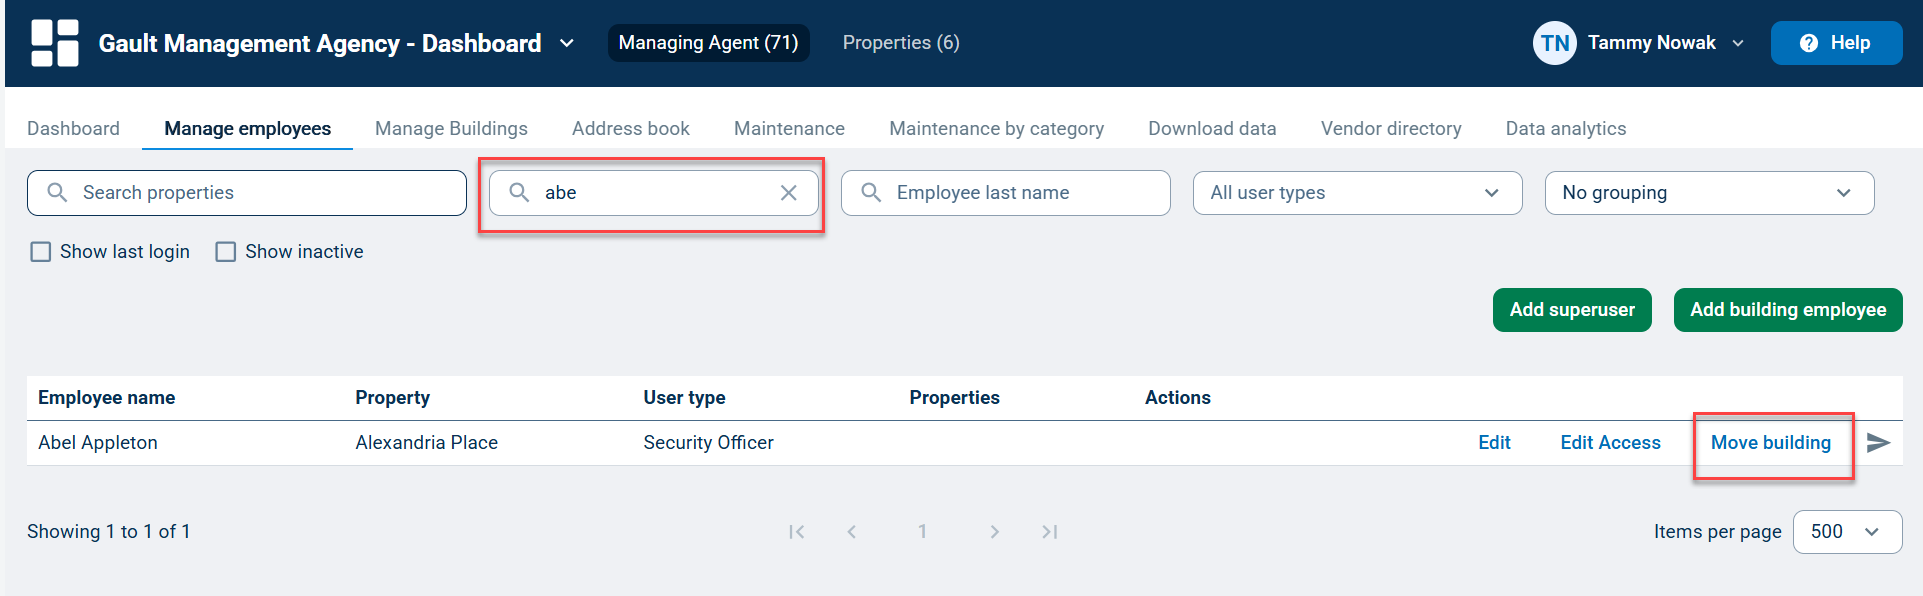
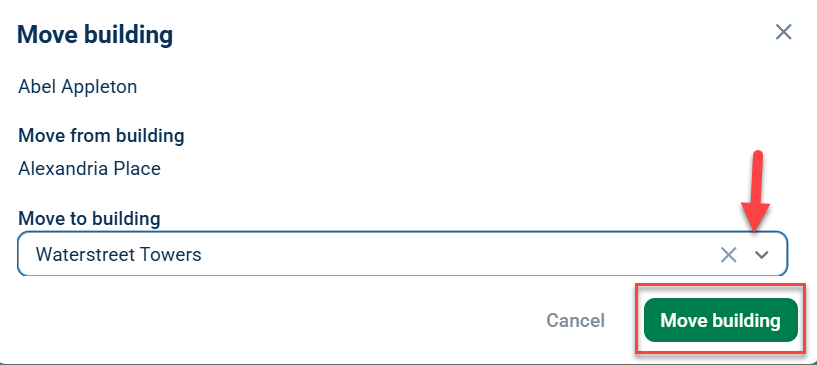
If employees need to be moved across buildings, click Move building beside the employee record and select the property from the Move to building dropdown menu. Click Move building to confirm the change.
Manage Buildings
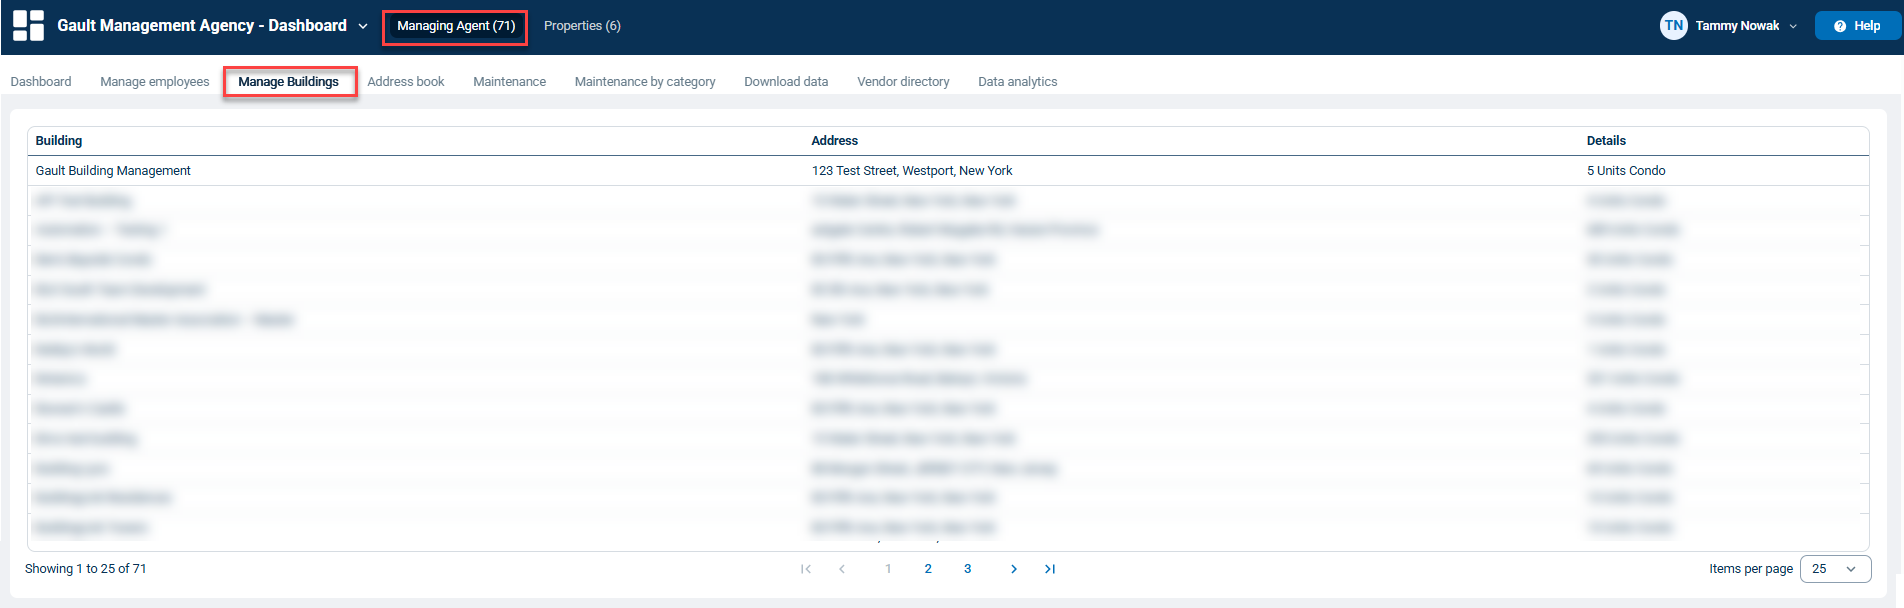
While on the Managing Agent tab, select Manage Buildings from the navigation bar.
You can view all available management company buildings with their associated address and unit count within the Manage Buildings tab.
Address Book
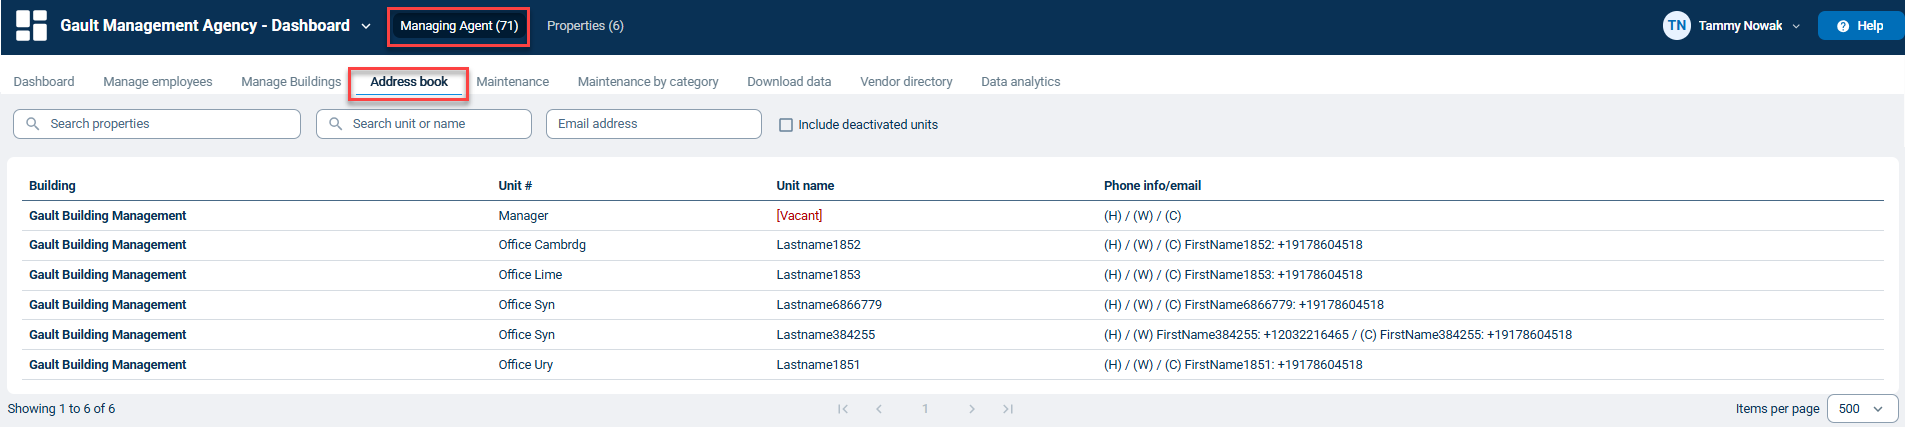
While on the Managing Agent tab, select Address book from the navigation bar.
You can view the address info of specific buildings and unit numbers within this tab.
Note: Values added to any of the search fields immediately filter for matching records. If no records are returned, please check whether the current search values are correct.
Maintenance and Maintenance by Category
While on the Managing Agent tab, select Maintenance from the navigation bar.
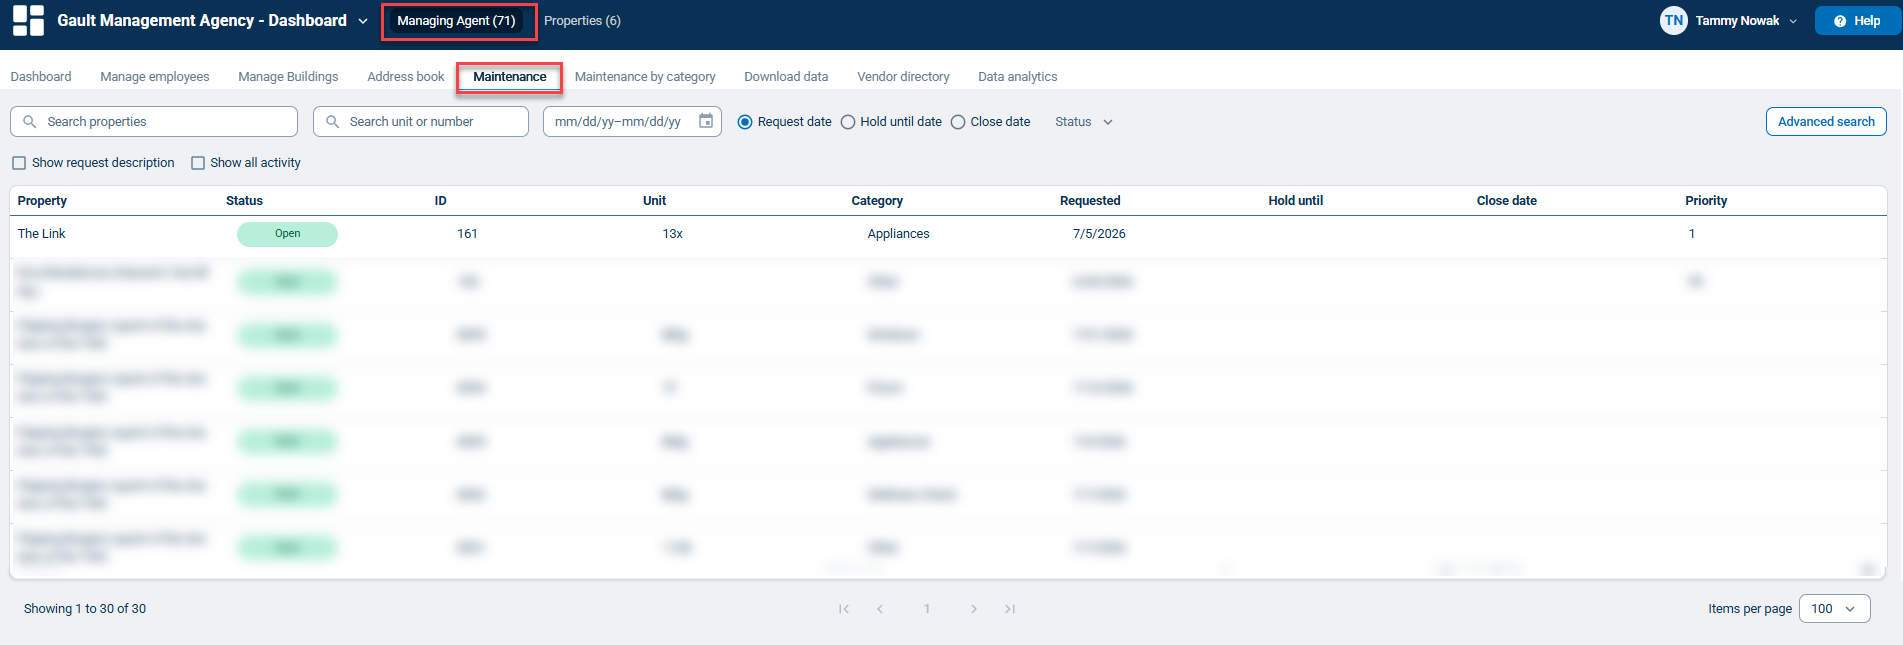
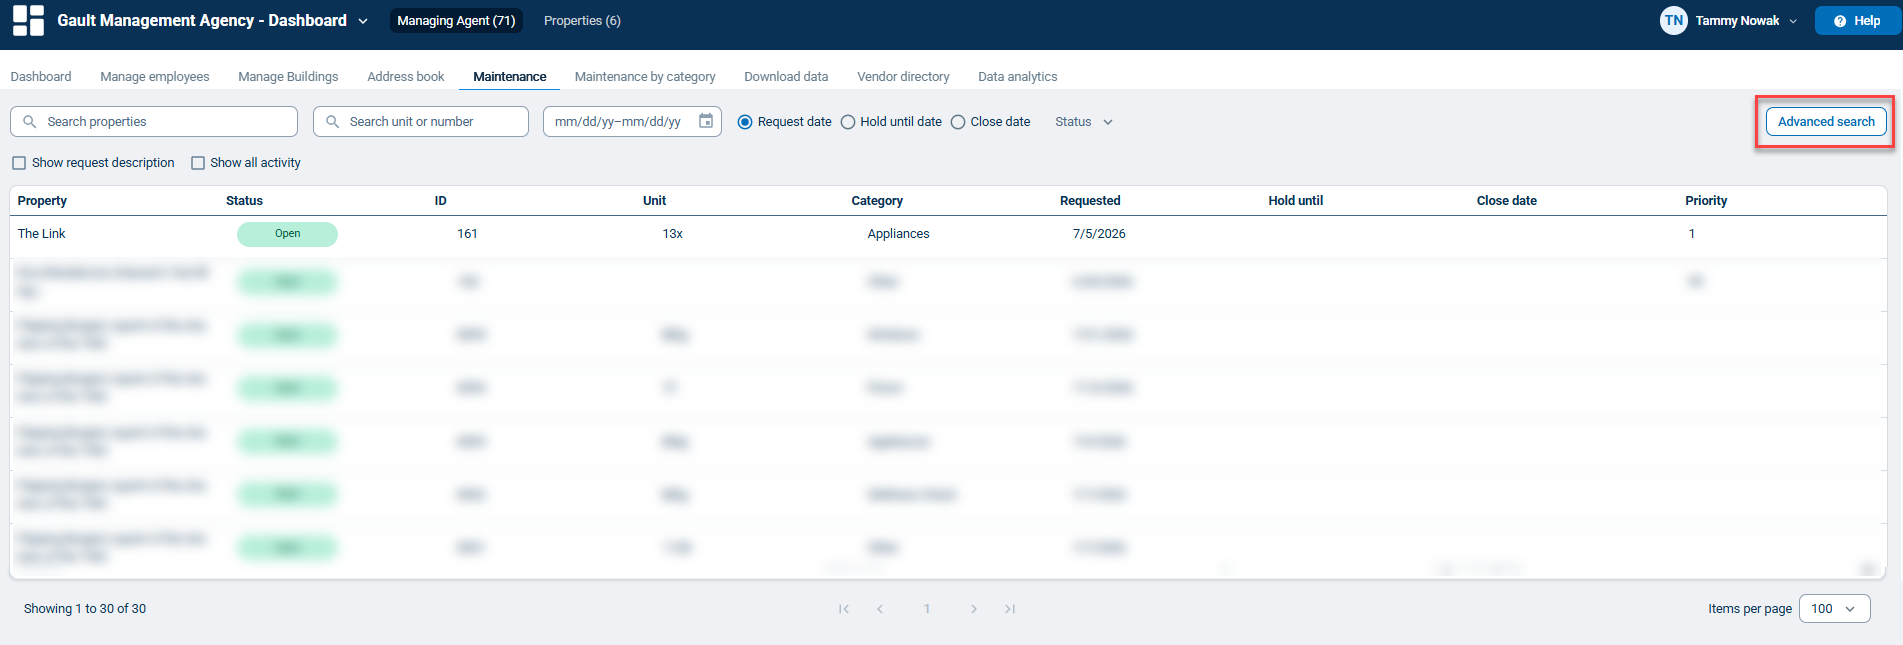
You can view and search for maintenance requests within this tab. For additional search options, click Advanced search. To revert to standard search options, click Basic search.
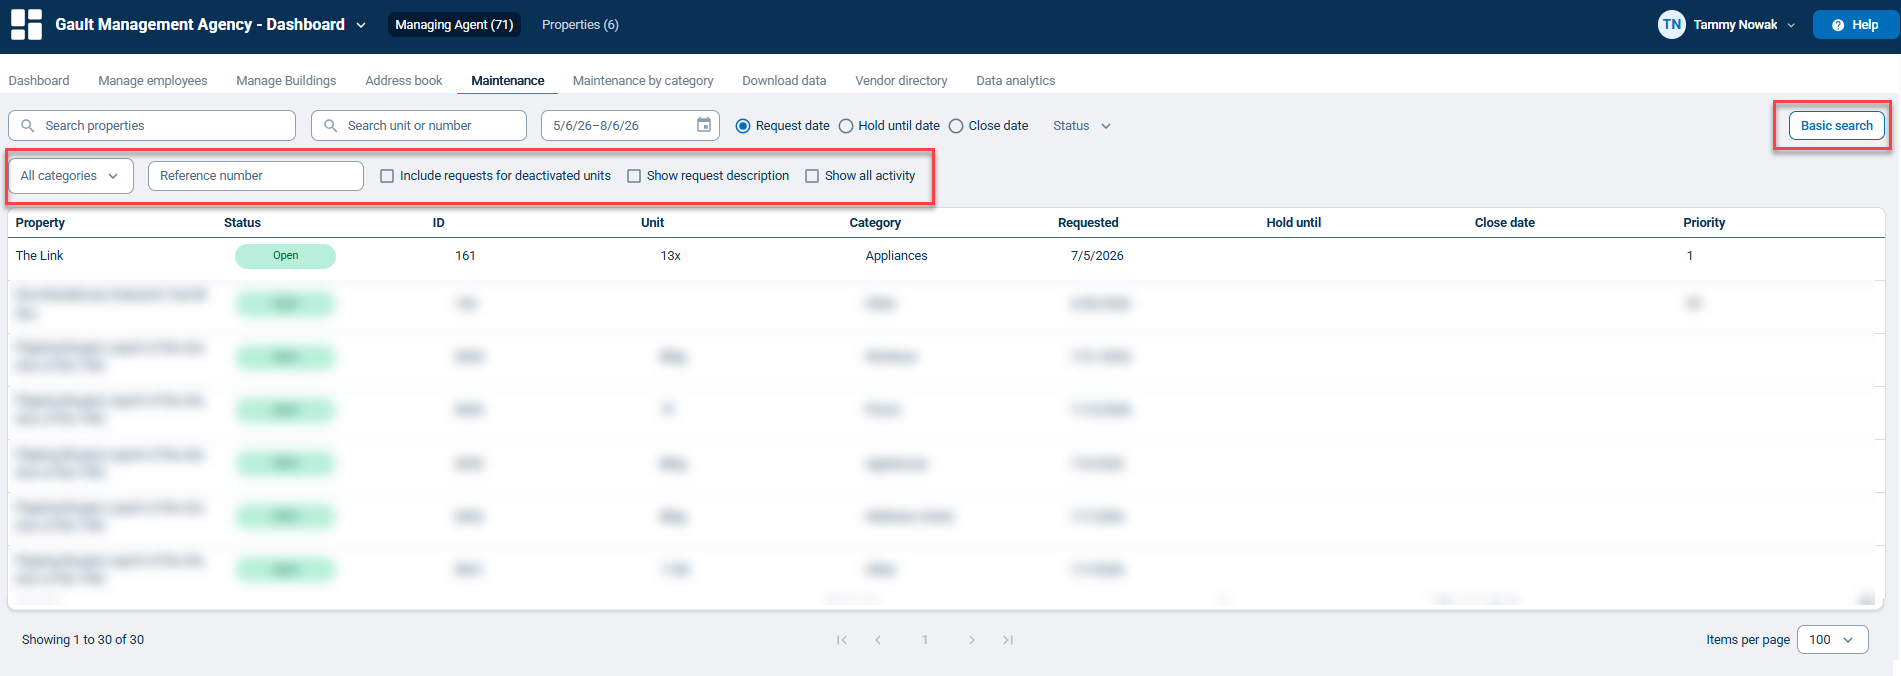
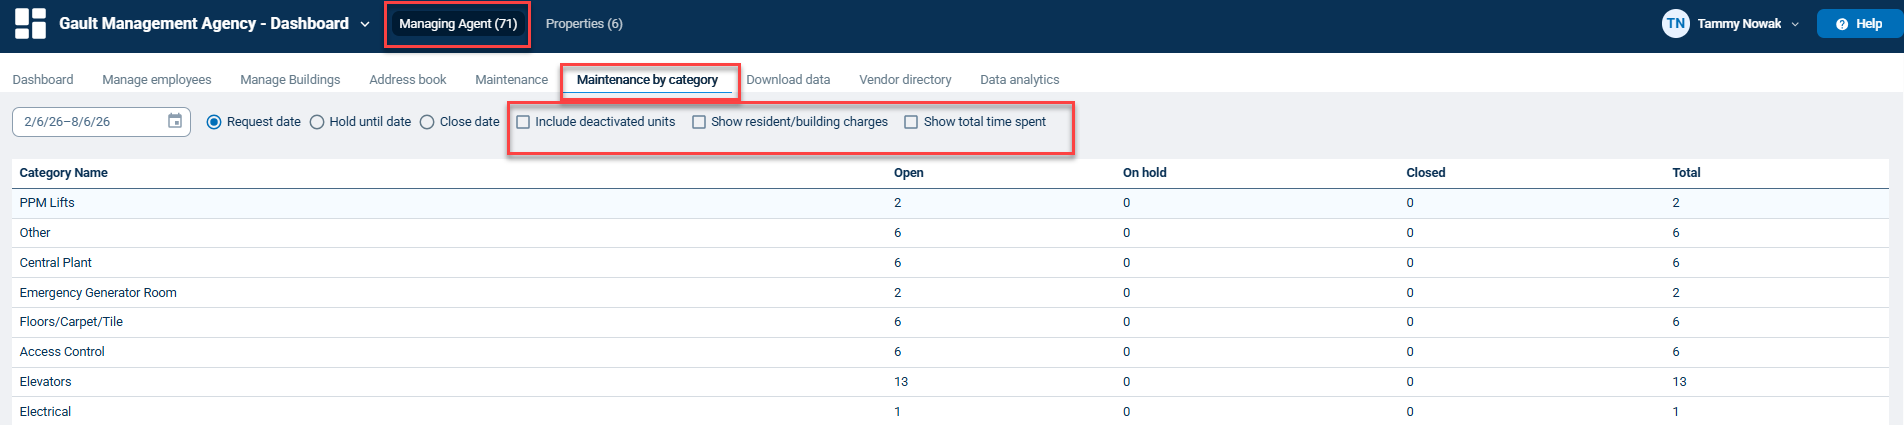
To view maintenance categories across the management company, click Maintenance by category in the navigation bar.
The following additional columns can be enabled/disabled for Maintenance by category:
- Include deactivated units
- Show resident/building charges
- Show total time spent
Download Data
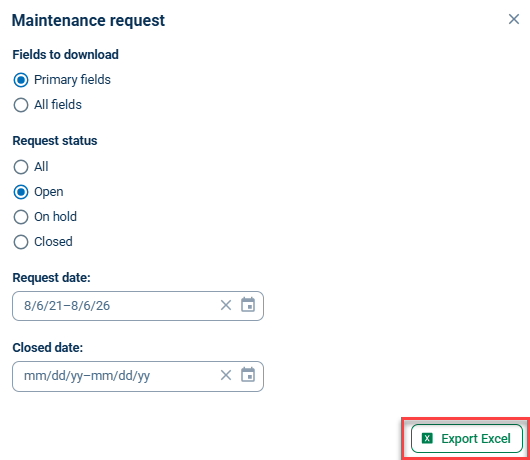
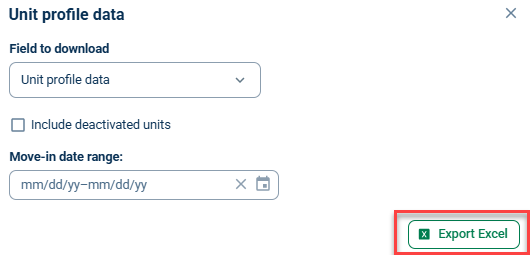
To download maintenance request and unit profile data, click Download data, then select either Maintenance requests or Unit profile data.
A Maintenance request and Unit profile data window will appear for each, allowing you to specify fields, statuses, and date ranges that should be included in the export file. Click Export Excel to generate the file.
Note: Exports are provided as an XLSX file type. Please ensure that you have an application compatible with this format to open it on your devices, such as Microsoft Excel, Google Sheets, or Apple Numbers.

Vendors Directory
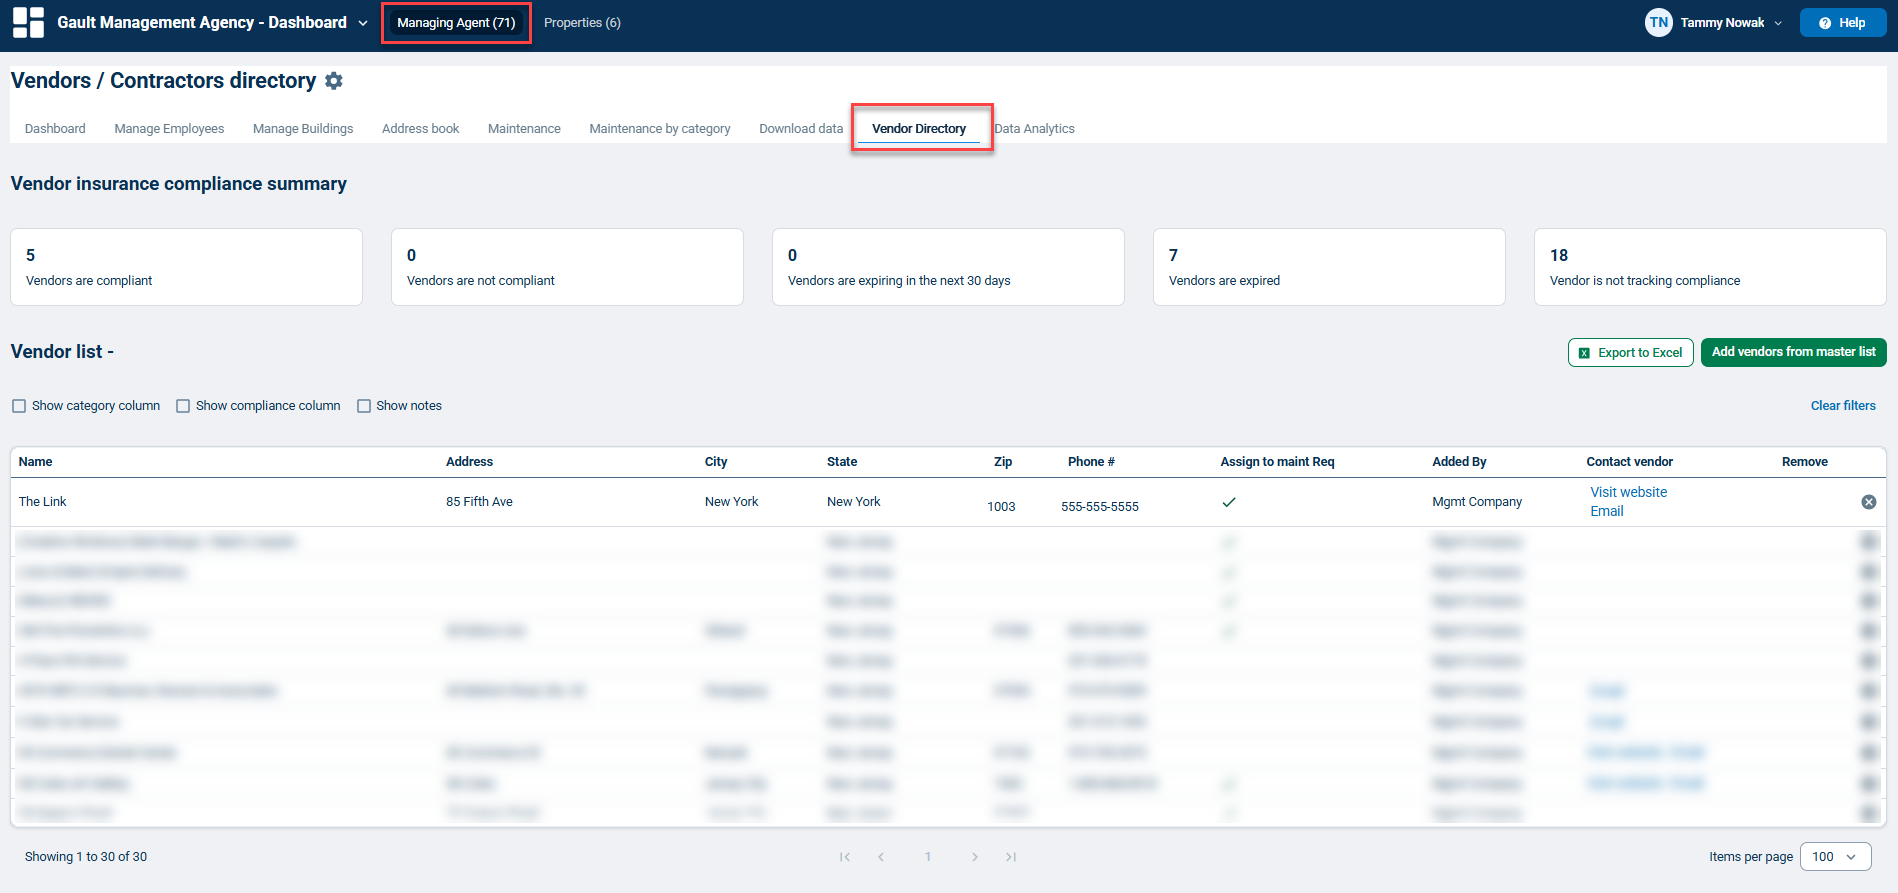
While on the Managing Agent tab, select Vendor directory from the navigation bar. Vendor directory enables you to view all existing management company vendors.
The following sections will be listed:
- Vendor insurance compliance summary: provides an analytics summary of vendor insurance compliance across all listed vendors on the Vendor list.
- Vendor list: provides a record of all existing vendors.
Note: The following additional filters can be enabled/disabled for Vendor list:
- Show category column: displays the category group for the vendor record.
- Show compliance column: displays the current compliance status for the vendor record.
- Show notes: displays any appended notes to the vendor record.
Filters can either be individually disabled by re-clicking the filter icons or bulk disabled by clicking Clear filters.
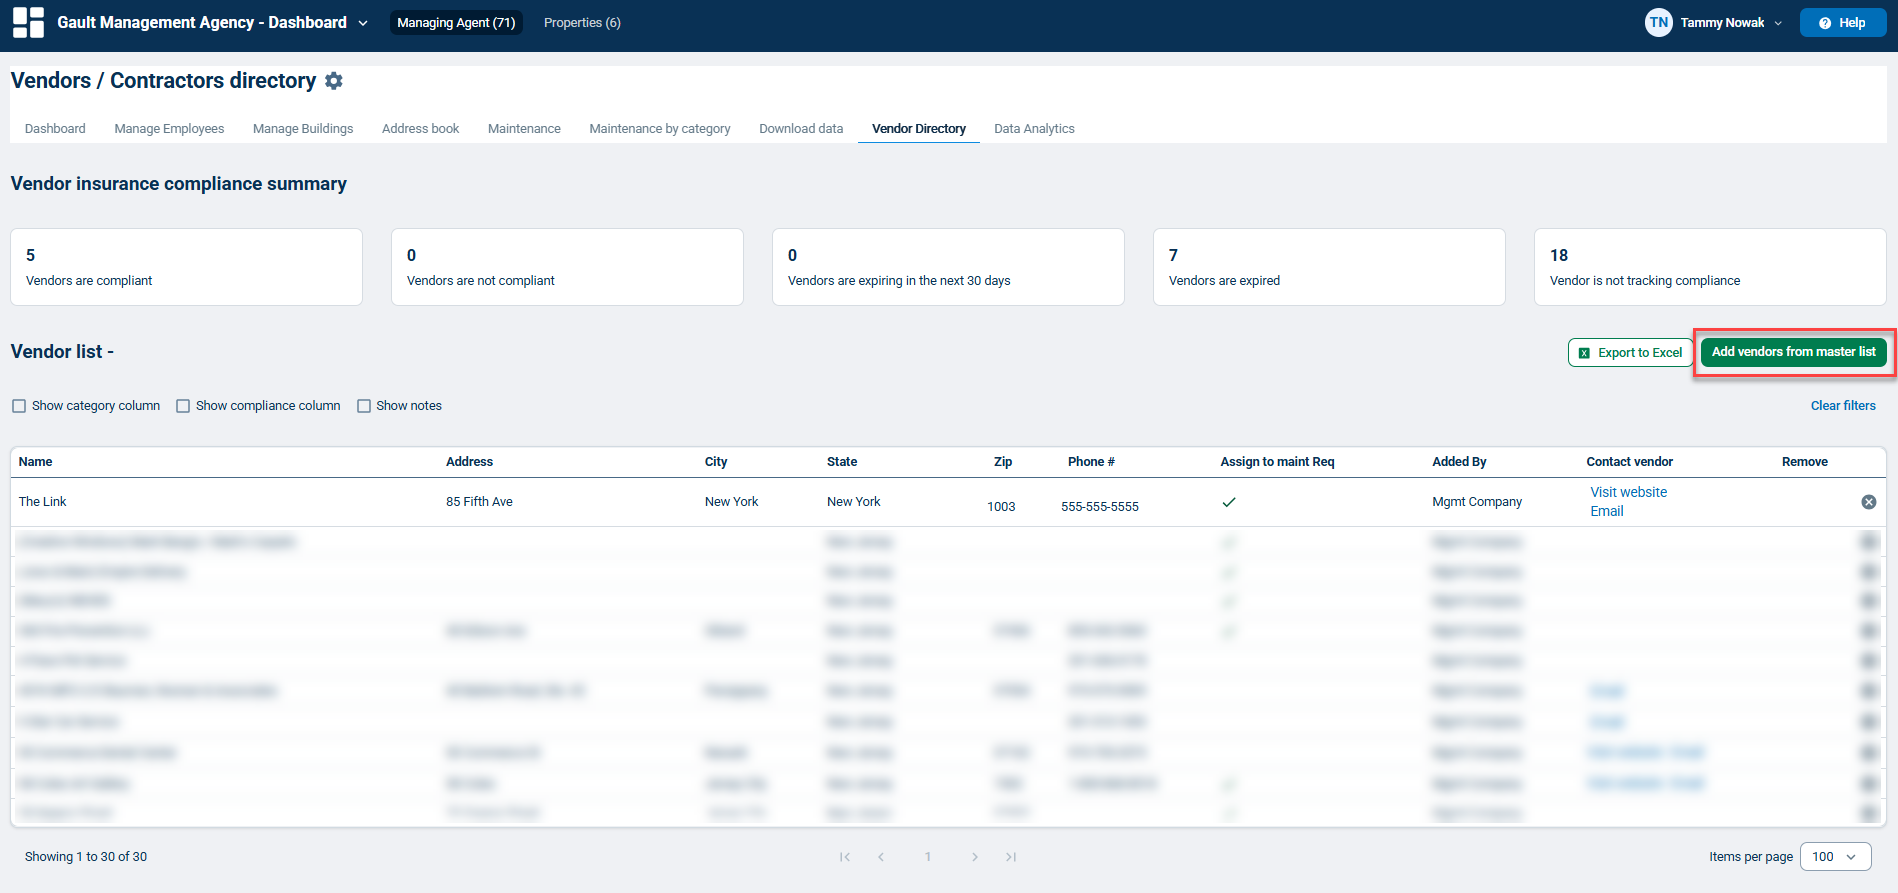
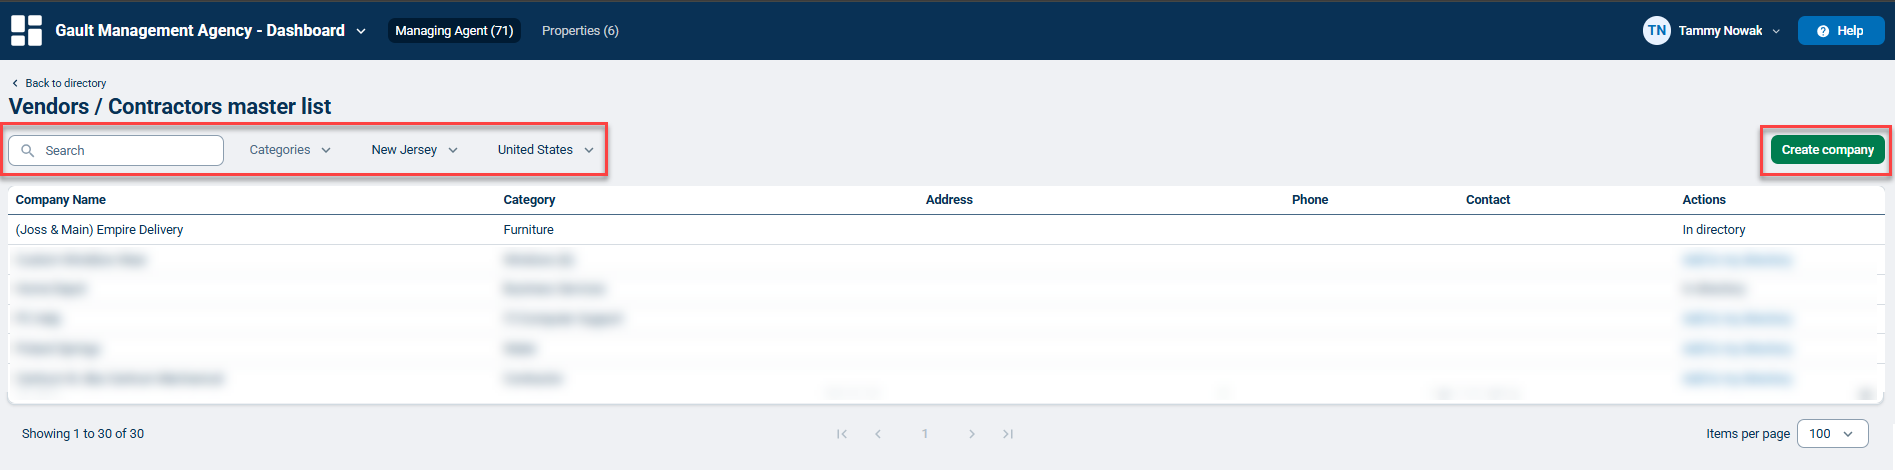
To add additional vendors, click Add vendors from master list, then click Create company.
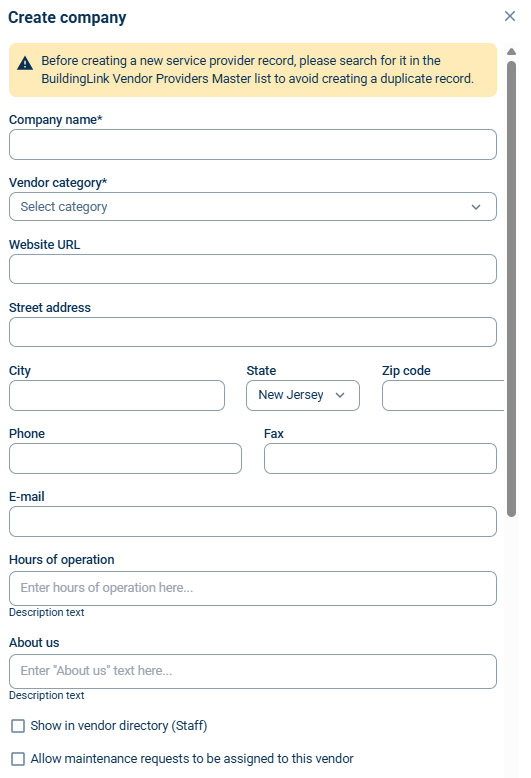
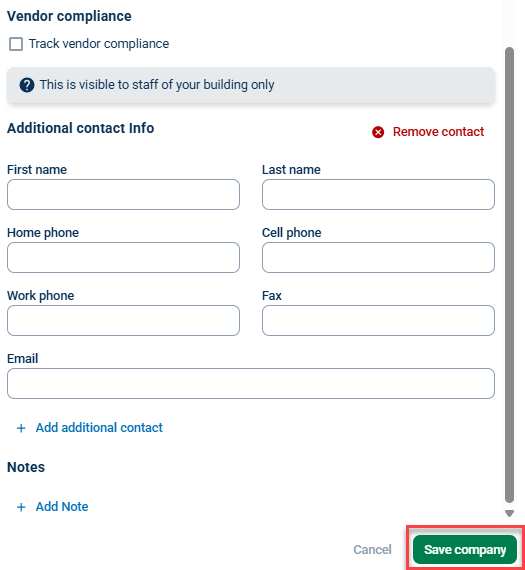
Fill out the company details. When finished, click Save company.
Once the company record is created for the vendor, click Add to my directory beside the listed vendor.
Note: You can also utilize the search filters on the Vendors/Contractors master list to search for existing vendor records and prevent duplication.
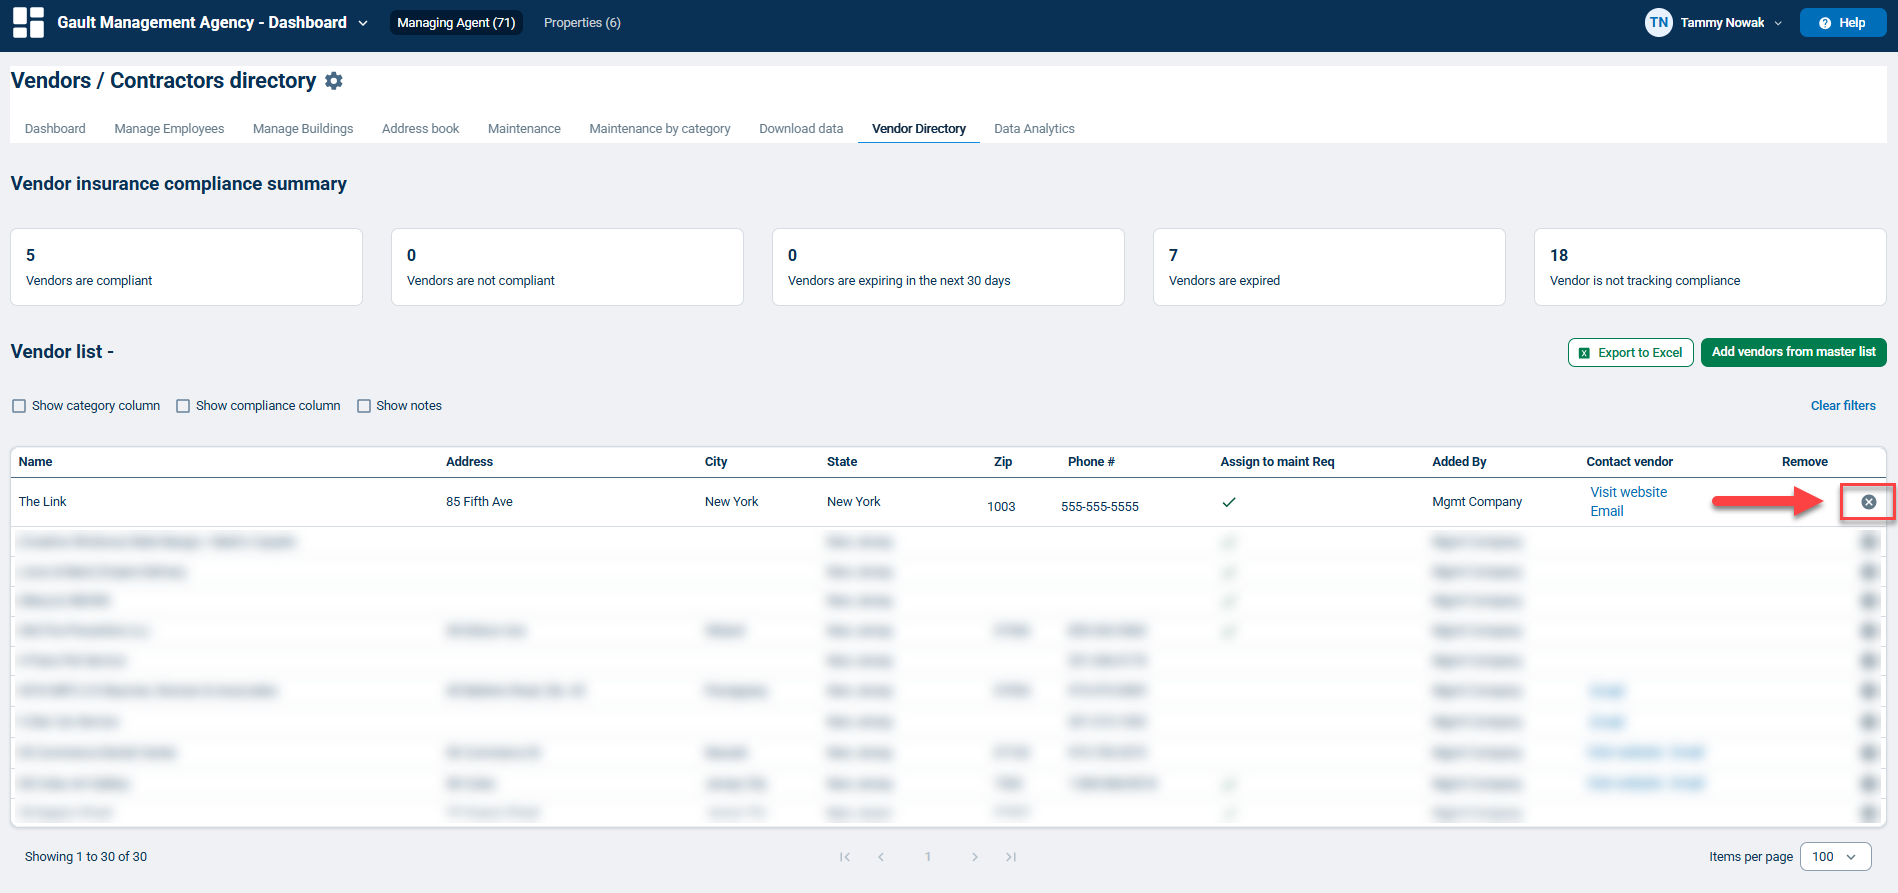
To remove vendors, click the remove icon on the vendor record.
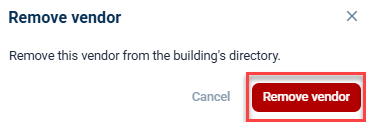
A Remove vendor window will appear. Click Remove vendor to confirm.
Data Analytics
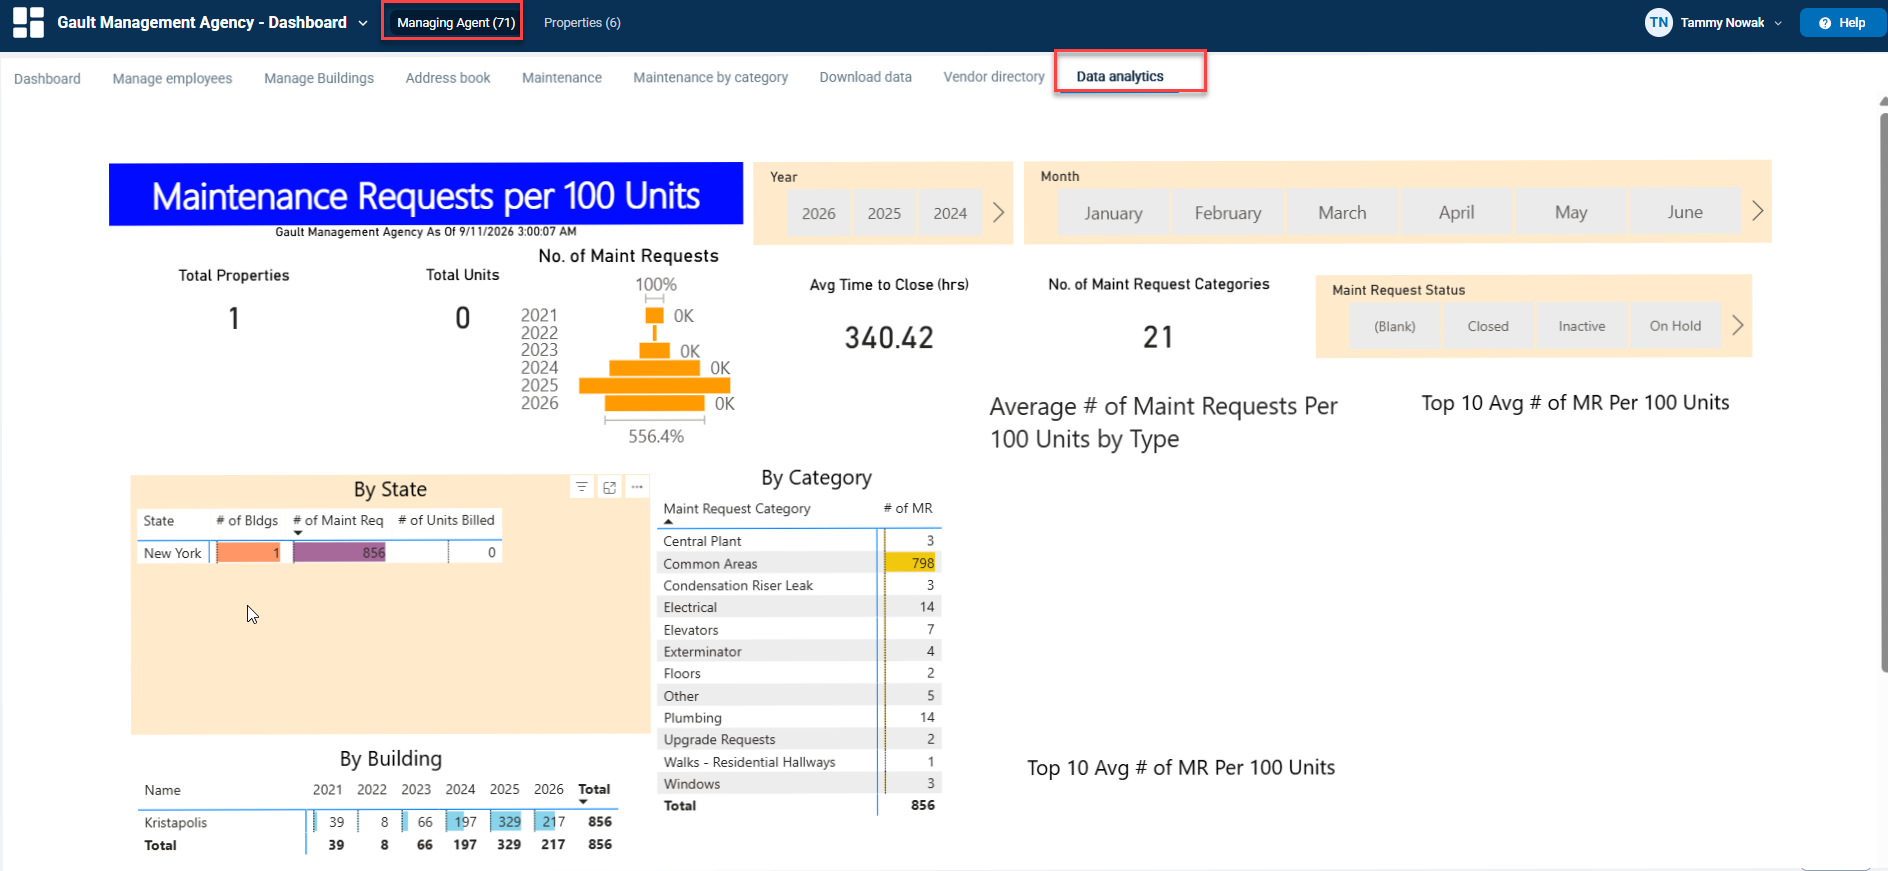
While on the Managing Agent tab, select Data Analytics from the navigation bar. Data Analytics allows you to view BuildingLink usage across your properties.
You’ll find a Site Activity Overview that breaks down exactly how many users have logged into BuildingLink and entered various items in the last 90 days, along with other activity graphs.