Note: This article is for the newly re-designed module. This updated module is in the process of being rolled out and may only be available to some users.
Overview
Resident Passports are customizable, plastic cards that can be printed for residents or employees of your building and used for a variety of situations. If you have the Resident ID mobile module enabled, they can also be displayed via the resident app instead of or in addition to being printed.
This article will guide you through how to install and use CardLink to print Resident Passports. For general information about resident passports please see our Resident Passports FAQ article.
Note: Click on the images to enlarge them.
Table of Contents
- Installing CardLink
- CardLink Set Up
- Printing Cards
- Activating Cards
- Removing a Card From The Queue and Printing History
- Resident ID Verify
Installing CardLink
To install CardLink, paste the URL below in a browser address bar, the CardLink program will run and install on the computer. CardLink can only be installed on a PC with a Window’s operating system.
https://buildinglink.com/apps/cardlink/setup.exe
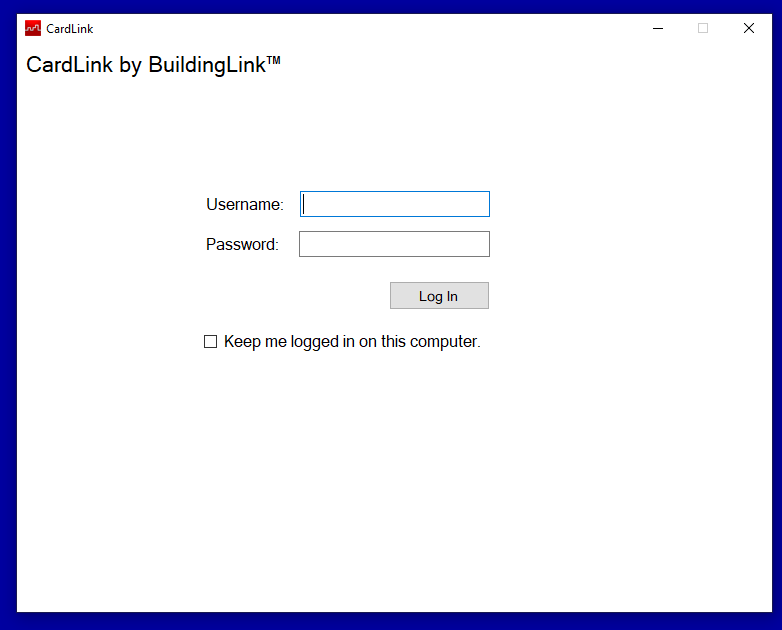
Once CardLink is installed, from the computer start menu select CardLink and then login. Any employee can login to CardLink, login is not based on authority level or permission.
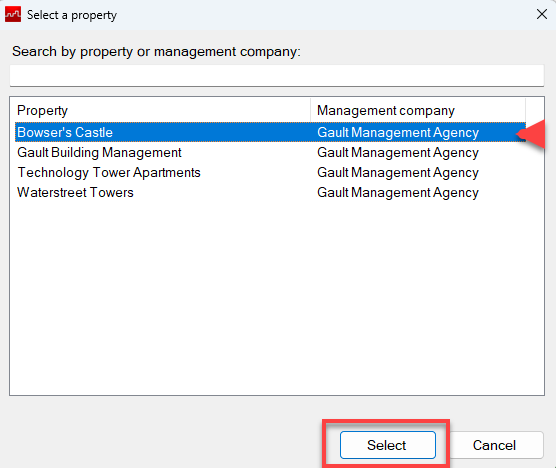
When a Superuser logs into the CardLink program, their list of properties will appear. To print Resident Passports from one property, click the property name and then click Select.
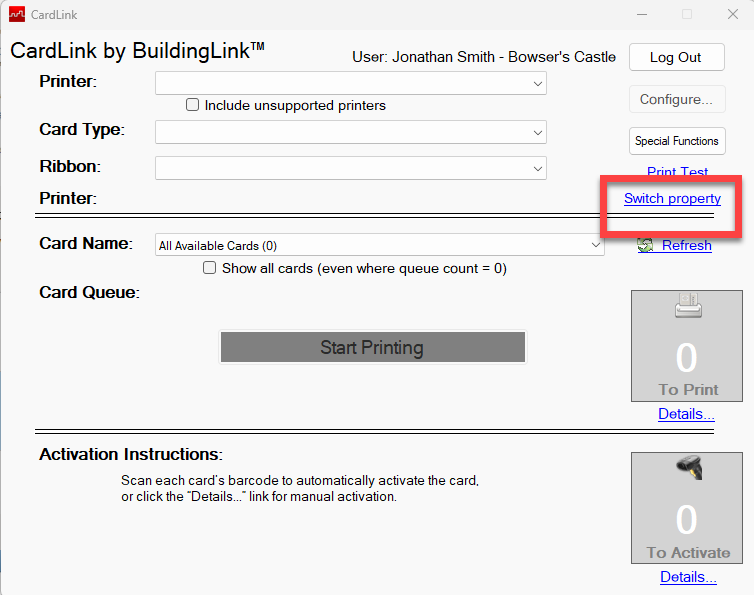
To move to a different property, click Switch properties on the right side of CardLink to access your property list.
CardLink Set Up
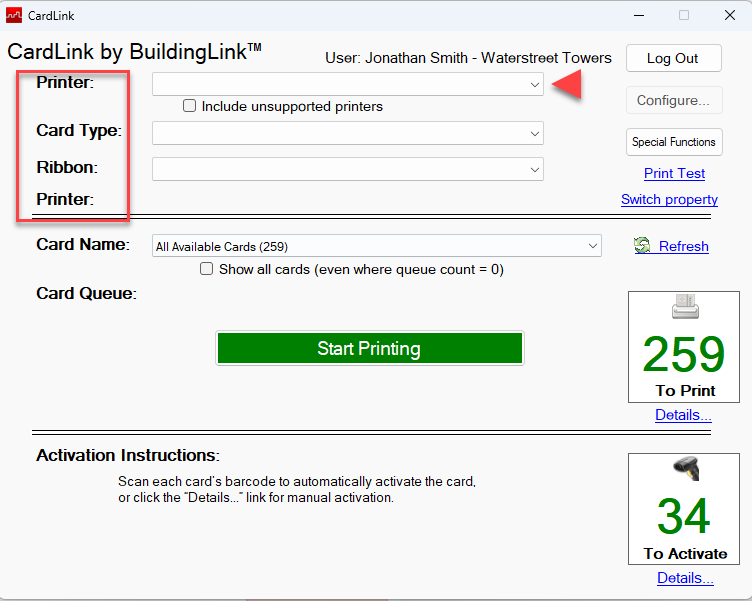
When logging into CardLink for the first time users will have to select a printer, card type and ribbon type.
Click into the printer drop down menu and select the card printer installed on the PC. Then select a card type and ribbon type from the drop down menu. Most cards are printed on the PVC card type.
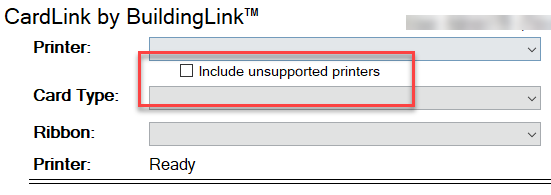
If a printer is not showing as available check the box next to Include unsupported printers to see all printers connected to the computer.
If the printer is still not showing as available in CardLink, make sure the printer is plugged into the computer and turned on. If CardLink is still not recognizing a printer, the BuildingLink Technicians can assist.
Printing Cards
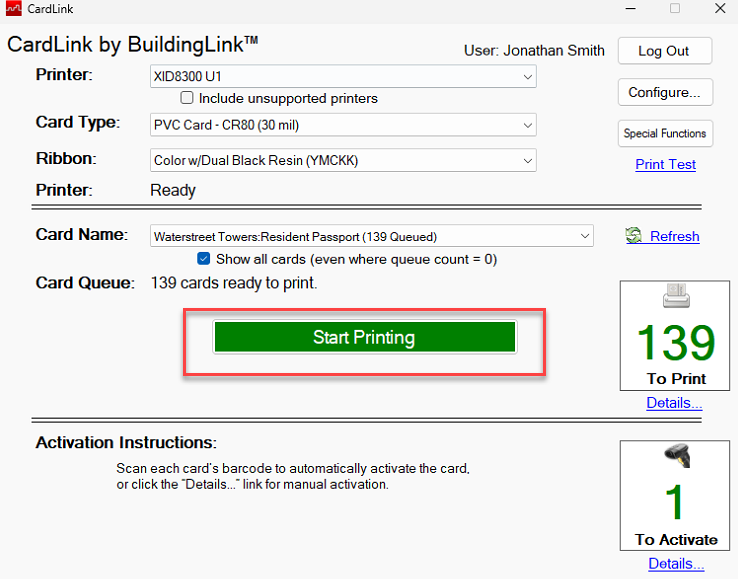
Select the name of the card you would like to print. Once the card is selected, you will see the number of cards to print in the “To Print” section on the right.
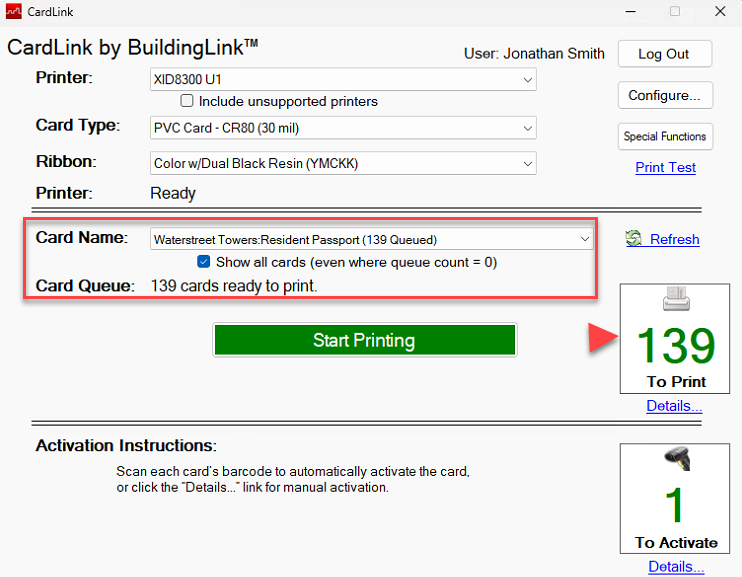
If you are not seeing cards in the “To Print” box make sure a picture has been added to the resident profile or the cards have not been paused.
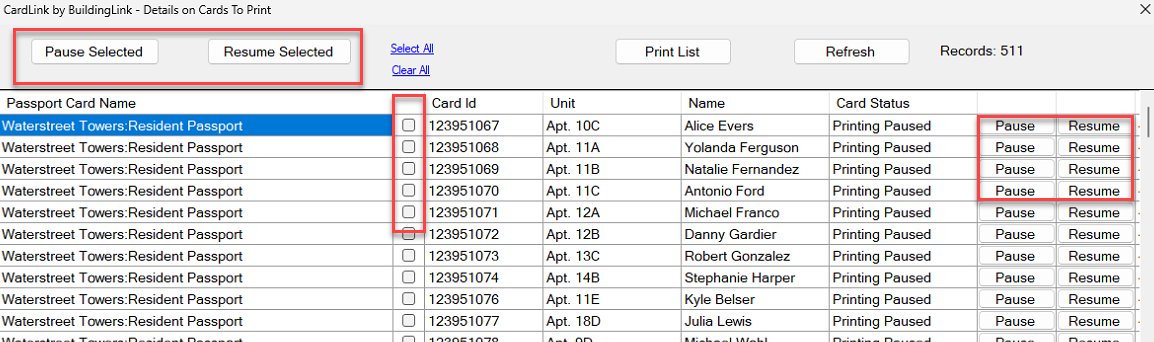
To see paused cards put a check the box next to Show all cards (even where the queue count =0) located under the card name, then click Details.
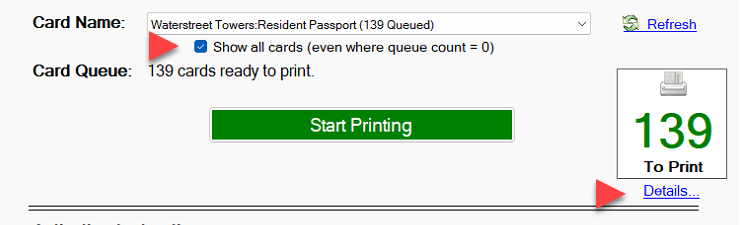
From the the Details screen you can see the status of the card, either paused or print pending. To resume printing on a single paused card, click Resume to the right of the card. To changed the printing status on all cards, click Select All then click either Pause Selected or Resume Selected.
Once the card status has been updated you can close the window and refresh CardLink.
Then click the green Start Printing button.
Once the card have been unpaused you can close the window the refresh CardLink.
Then click the green Start Printing button.
Activating Cards
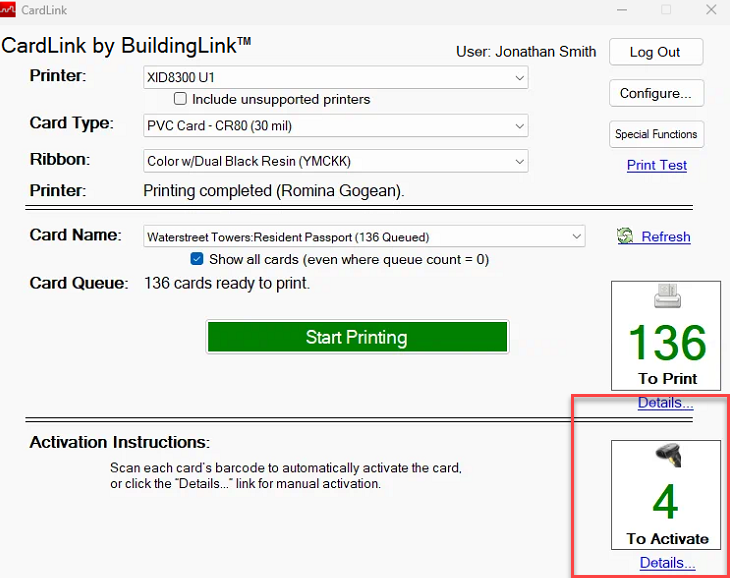
As cards print, they will populate in the “To Activate” box in the lower right corner of CardLink. From the “To Activate” box you can either activate a card for use or reprint a card if it printed incorrectly.
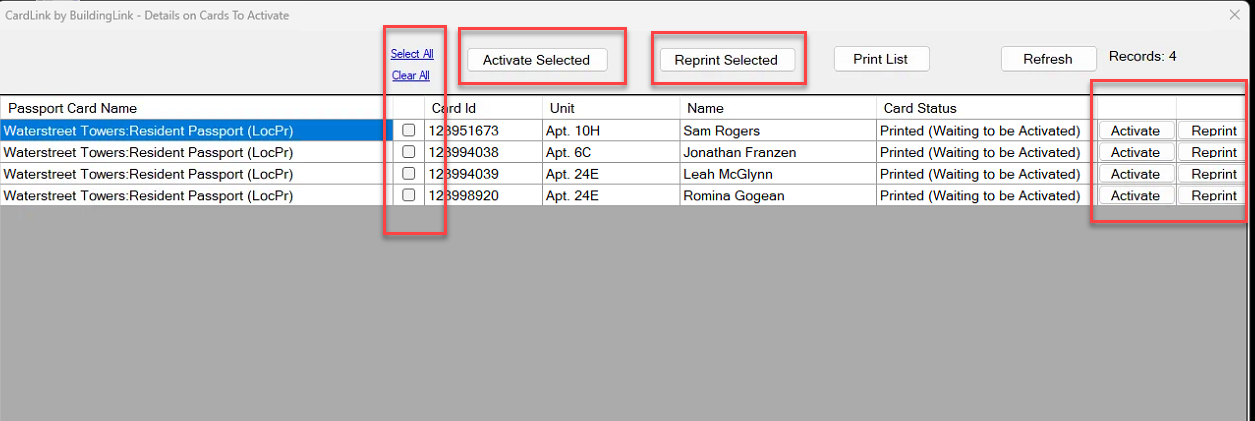
To activate a card, click Details under “To Activate”. You can click Activate next to one card or click Select All and then activate all cards that have been printed.
To reprint a card, click Reprint, then close the window and refresh CardLink.
Removing a Card From The Queue and Printing History
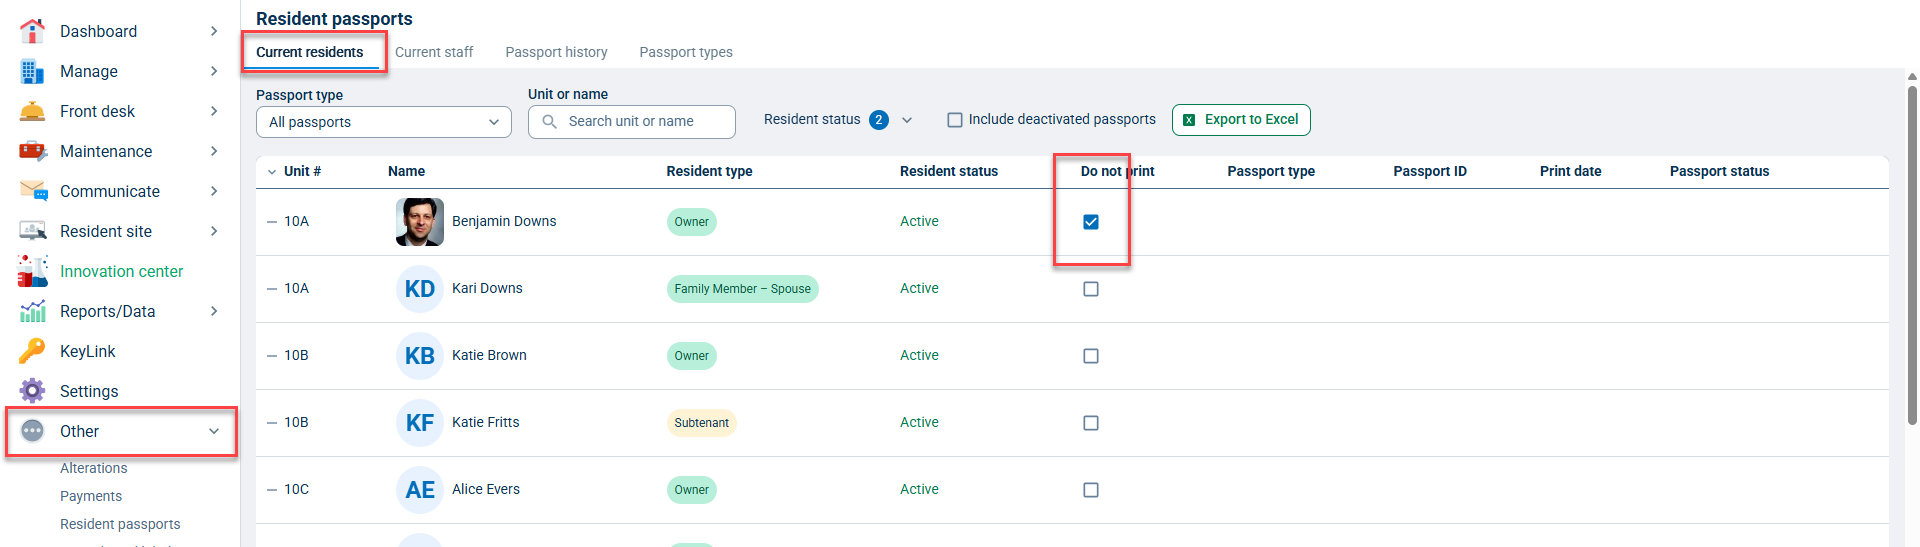
If you would like to prevent a card from showing up in the CardLink queue, you can set that card to “Do Not Print”. From your dashboard, go to the Other tab, click Resident passports, then Current residents, then search by the resident name or unit number, then check the box next to Do not print.
From this screen, you can also see if a card is active, when it was last printed, and reprint it if necessary.
Resident ID Verify
Once a card is activated, you can use the barcode on the back of the card to verify a resident's identity.
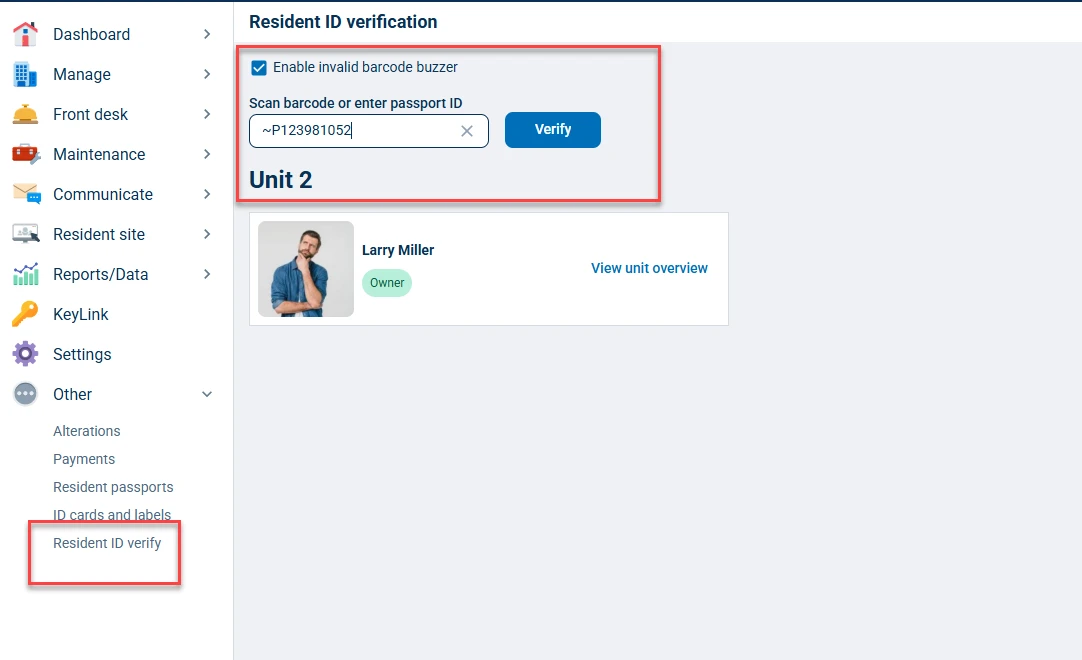
In BuildingLink, from the Other tab, click Resident ID verify, then scan the barcode on the back of the card to see the resident's name and unit number.
Note: The barcode on resident passports can only be used in Resident ID Verify. When scanned by a barcode reader in any other area of BuildingLink, you will only see the card number.